I wanted to give my my son-in-law a special birthday card this week. AnimatedGIFAssignments1086 was just the thing.
Make someone a special birthday card, but make it extra special by including a GIF!! Try to make the design unique to them (it’s THEIR birthday, after all!).

‘Shakin’ It Up’ for a special birthday card
I’m starting to get good at this now with all the practicing I’m doing with my new GIFing skills. I use Photoshop Elements 11 for the Mac as my image editing tool, and here’s my tutorial on the making of this GIF.

Original Card
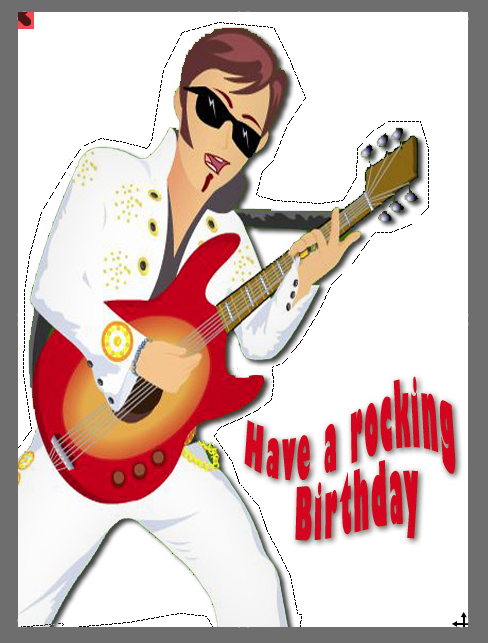
Step 1: For this project I started with an image I found on-line from a free create-your-own birthday card site. I chose this image because it had a solid white background which makes it much easier when you get to the point of merging the layers. And that was important because on this card I wanted to make the guy dance, but keep the text still. I also wanted to add a little something extra to personalize it.

Selecting Image with the Lasso Tool
Step 2: Use the lasso tool to capture only the guitar player as illustrated above. Copy and paste it into a new layer with a transparent background. Then grab the image of the “Have a rocking Birthday” text and do the same thing. Then you’ll end up with two pieces of the image on two different layers, with transparent backgrounds.

Step 3: To personalize the card create another layer with your text or a special image. I used this free clipart icon of a man sitting at a computer making music as my son-in-law, Michael, has just taken up a new hobby learning how to create music on the computer. I think he might be using Audacity even.

Step 4: Create Guitar Player Image Layers
Step 4: Duplicate the guitar player to create three identical layers. Rotate two of the images +5deg and -5deg. You now have 3 guitar players, one leaning forward, one leaning back and one in the middle.
Step 5: For the border I made a rectangle with a transparent fill in PowerPoint (I know my way around the program very well, and it was just easier to do it there.) and saved it as a picture in the .PNG format. This allows you to maintain the transparency of the images. We’ll also need a solid white layer. You should end up with 7 unique layers at this point. But we’ll need to make duplicates of layers 4-7 below to be used during the layer merging process.
1. Guitar Player tilted backward (1)
2. Guitar Player in the center (1)
3. Guitar Player leaning forward (1)
4. “Have a Rockin’ Birthday” text (x3)
5. The computer guy icon (x3)
6. The border with a transparent middle (x3)
7. A solid white layer (x3)
Step 6:If you haven’t already, duplicate layers 4-7 so that you have 3 of each as noted above.
Step 7: Now it’s time to start merging the layers together so that you end up with only the guitar player moving and everything else remaining still. These new merged layers are what will be used to create the actually GIF. Make sure you save your work often and I’d highly recommend saving the work you’ve done creating the individual image layers as its own file at this point – just in case you make an error during the merge process, you have something to go back to. You really don’t want to start all over again do you?
Note: The white layer should go at the bottom of your stack. It is supposed to be the background. Otherwise when you merge the layers you’ll end up with only a white image.

Final merged image
Merged Layer 1: Guitar player tilted back = 1 + 4 + 5 + 6 + 7
Merged Layer 2: Guitar player in center = 2 + 4 + 5 + 6 + 7
Merged Layer 3: Guitar player leaning forward = 3 + 4 + 5 + 6 + 7
Duplicate merged layer 2 (the guitar player in the center) so he’ll rock forward and backward evenly. Ta Da! You now have the four layers you’ll need to create your GIF. Center => Forward => Center => Backward. If you’ve done it right you’ll only see the guitar player rockin’.
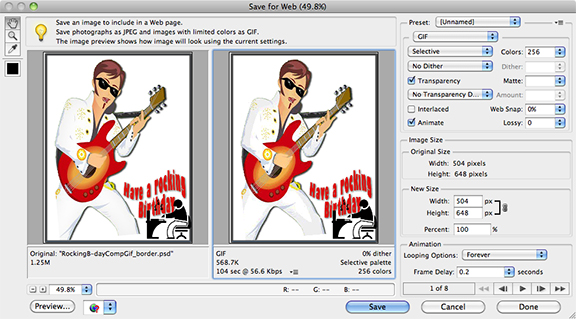
Step 8: In PhotoShop Elements 11 you select “Save For Web” to preview your GIF. On the right hand side menu, select GIF, Transparency, Animate, and set your speed in the “Frame Delay” box at the bottom. The default delay of 0.2 seconds works for most projects. Click on preview over at the bottom left and you can watch your masterpiece in action.

Step 9: If you like what you’ve done, save it as a GIF. To view the file once it’s on your computer you’ll need to open it with your browser. On my Mac I right click the file, select ‘Open With’ Google Chrome.


