

Firstly, this assignment can be found at here, and I certainly recommend it because it is a lot of fun.
For my assignment, I used Drew Barrymore, although afterwards I realized I could have chosen someone else, so I hope this doesn’t affect anything, but I had a good time making this project. I used clips from some of her major movies, including E.T., Scream, 50 First Dates, and Music and Lyrics.
Below I will include the clips that I used.
So again, I could have chosen any actor/actress who had been a child star or started their careers early, but I think Drew Barrymore is such a great example, as well as a great actress, with an interesting past. I started the assignment by going onto IMDB to get a fuller picture of the movies she has acted in, which was also very helpful for the timeline aspect of the project. So after I chose the movies that I wanted to use for my mashup, I went and found the clips on YouTube, which I assume I don’t need to explain how to do.
In order to download the videos from YouTube onto my desktop as MP4 files, I went to KeepVid, which is a pretty easy way to do this sort of thing.
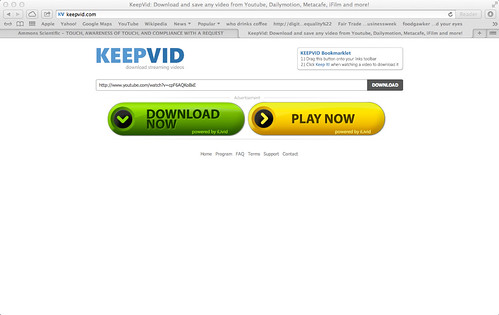
As you can see in this photo here, I copied the youtube video link and pasted it in the bar. After this you want to click on the Download button beside the text bar.
After you click the download button, you will see a pop-up box that asks you if you want to run the application, so you need to click on “Run”. The next step, you will see a screen similar to this…
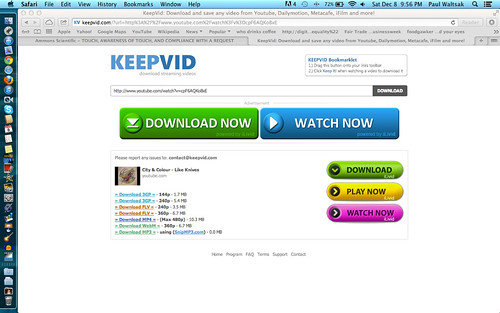
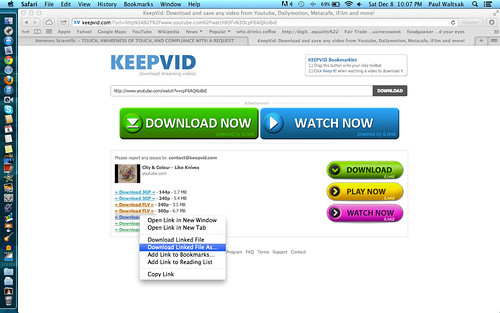
The best thing to do at this stage is to right-click on the Download as MP4 link, which is highlighted in blue, and click on Download Linked File As, and save to wherever, but it’s easiest to save to Desktop.
The next thing you want to do if you wanted to edit stuff out of the various clips, is open up the program MPEG Streamclip. Using this program you can Trim clips, copy them, cut pieces out of them, take out the audio or video from a clip, and all other sorts of fun things.
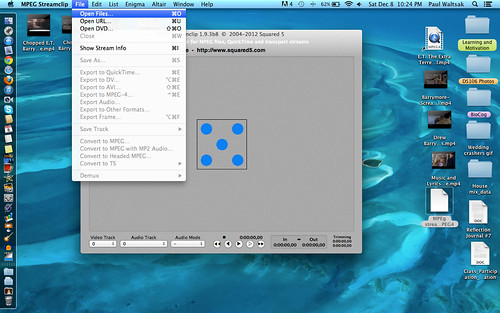
Abover you see a picture of MPEG Streamclip open on my computer, and I have highlighted the Open Files option under “Files”, which is one way to open up a clip into the program. Another easy way to do this is to just drag a file from your desktop right into the window where you see the five blue dots. From there you can edit the clip by going to edit, where you’ll find numerous options, such as “Trim, Cut, Copy, Select In, Select Out” and others. The ones that I used for my assignment were the Select In, which is how you select a point in the clip that you want to start from, and Select Out, which is how you end the selected clip. One you have a clip selected you can do a few things:
1) Cut the selection out of the clip that you are editing.
2)Trim the clip to include ONLY the selection.
3)Copy the selection.
So now that you have a pretty good idea of what goes on in MPEG streamclip, it will be useful to learn how to export the edited clip. 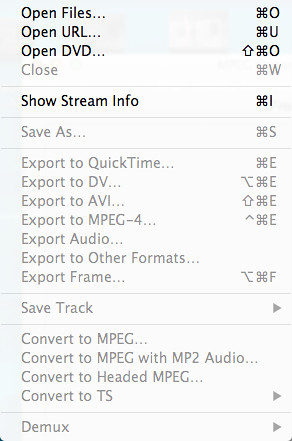
Here you see a list of options (although some are grayed out because I am not actually editing anything). The option I used was Export to MPEG-4, which allowed me to export the new, edited clip to my Desktop, which I then imported into iMovie.
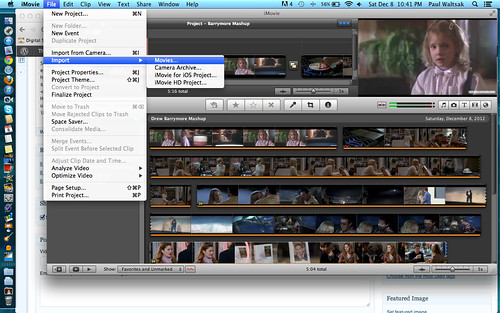
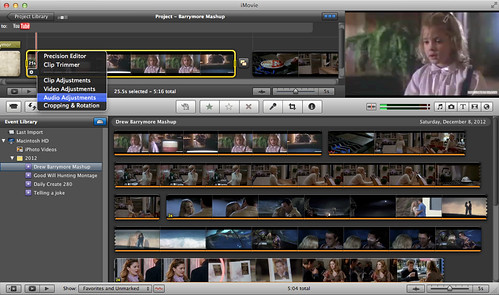
This photo above shows you how to import movies from your computer into iMovie. For my project, I did this 4 times since I used 4 clips for the Mashup. As you can see there are two levels, the one on bottom being where the clips import to, and the top representing where the clips for the project go. Once I had each clip imported I dragged them into their appropriate slots up top. One of the major editing things that I did in iMovie was add Fade-Ins and Fade-Outs for the audio to make it flow more smoothly. Below are a few pictures of how I did this..
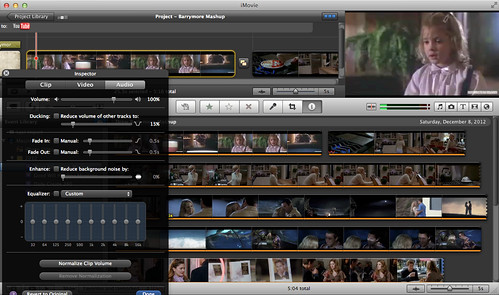
As you can see next to each option (Fade-In or Fade-Out) there is a little box that says “Manual”. I clicked on this box which allowed me to edit the length of time the audio would either fade in or out, which was useful. It is best to use your own judgement for these types of things, so it really depends what the clip is and how you feel it should sound.
Overall I really enjoyed this assignment because I think that it had a cool idea behind it. In order to really show the progression of Drew Barrymore’s career, and her physical growth, it is necessary to include all of these clips from her movies as a way to illustrate this. I also enjoyed this assignment because it allowed me to experience more video editing, which is challenging but rewarding in of itself.
So after all of this time, it is probably time to show the actual final version of my mashup, so here it is and enjoy!!

