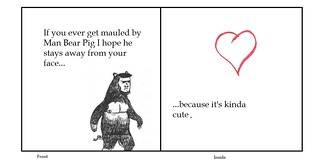
It’s Halloween, yes, but that means Valentine’s Day is just around a couple of corners. I was actually thinking today about the Valentine Cards I create for my friends every year, wondering if I should do Halloween cards in a similar style. It could work, right?
Anyway, while looking through random assignments, the Valentines Alternative assignment popped up! What an absolutely bizarre and not suspicious set of circumstances!
I often make simplistic and nerdy cards around Valentines day, because it’s cheap, I can send them to my online friends, and it’s a fun thing to do. Cutting and pasting things around is a relaxing hobby for me, obviously.
I chose to do one based on Legend of Zelda: Wind Waker, an amazing game that a lot of people love. I chose one of my 30+ favorite characters, Medli! She’s a race of half-bird people who can sprout wings in place of their arms in order to fly. They’re evolved from half-fish people. Fun little tidbit.
Process:
If you want to make a card similar to this one, it’s pretty simple, for the most part. First, open GIMP (make the size whatever you like, but I keep it the default 640 x 400).
Then, find the character you want to insert.

If your character has light colors, it’s a bit better to find a picture with a transparent background. If your character has a lot of black in it, try not to find a pic with a transparent background.

Scale the image to the size you want. As you can see, that once transparent background is now completely black. That’s why you have to be careful.

If you’ve got an image like mine, you can use the color-select tool or the wand to select all the unnecessary spots. If you’re using an image with a lot of stuff going on in the background, I would suggest using the free-hand select tool.

Erase all the excess, and you’ve got this! Now, decorate your card however you want. Remember to use layers for all the different things you want to add–it makes it easier to delete something if you don’t like it. I’ll continue to show you what I did with my card.

I found a cloud border and erased the excess around it

Then I placed it, copied and pasted it, and used the flip tool so that it could line up properly. Repeated that for the top border as well.

I used the path tool to create a heart, and then the paintbrush tool to fill it in. You can totally make it fancier if you want, but I decided to just keep it simple.

Finally, made the text (I downloaded an appropriate text for this particular card, but normally I just search through them all until I find one I think is appropriate)

To create the outline, I selected all the text, created a new layer beneath it, increased the selection by 1 (go to the toolbar select > grow > enter what you want), and then colored in the selection. Very simple, but a really nice effect that I love.

Lastly, flatten the image so that all your layers are together (you don’t have to do this, especially if you want to come back and work on it more), and export it!


