Pods embed error: Pod not found

Splash the Color Tutorial

We had to do one assignment this week where we create a tutorial for future DS106 students. I selected to do a tutorial forĀ Splash the ColorĀ assignment. I did this assignment earlier on in the semester and it was one of my favorite assignments to do (you can find my postĀ here). Here goes my tutorial.

Step 1: Go to Google and save and image that you want to color splash. Here is the image I selected.

little-girl-with-balloons

Step 2: Go toĀ FotorĀ which is a photo editing program. Click “get started”

Screen Shot 2016-04-04 at 7.34.32 PM

Step 3: Go to open and select computer.

Screen Shot 2016-04-04 at 7.34.56 PM

Step 4: Select the file you with to upload.

Screen Shot 2016-04-04 at 7.35.05 PM

Step 5: Once your picture is uploaded, look at the sidebar on the left and select “color splash”

Screen Shot 2016-04-04 at 7.35.37 PM

Step 6: Ā Select the first program (the rose picture) which then turns the image black and white.

Screen Shot 2016-04-04 at 7.35.50 PM

Step 7: You can adjust the brush side on the sidebar by dragging the circle left to make bigger and right to make it small. The brush is what turns part of the image back to color. Hold down on left click while dragging to make something in color. If you mess up, use the eraser which turns it back to black and white.

Screen Shot 2016-04-04 at 7.36.08 PM

Step 8: Once you are satisfied, select “apply”

Screen Shot 2016-04-04 at 7.36.56 PM

Step 9: Ā In order to save the image click the little square which is the second to last icon on the bar that you originally used to open the image. Select save to computer and you are done!

Screen Shot 2016-04-04 at 7.37.19 PM

Here is my final image!

little-girl-with-balloons edit

Visual Assignment ā€“ Splash the Color

My second assignment this week is called Splash the Color. This assignment is to remove all the color from a photo, and then restore the original color to single object in the picture. I picked it because it’s an effect I’ve seen done many times, but never actually done it myself. I looked through some of the previous submissions for inspiration, then took to google. Eventually, I was led to this amazing picture by 5oulscape on flickr.

7174898827_bc514e7890_o

From the start, the picture already has amazing contrast between colors. I thought if I removed the color from everything but the house, it would be as if both the sky and the land were swallowing it up. The process itself was simple using Photoshop: select the object you want to stay colored with the pen tool, then invert the selection, and finally use the black and white adjustment option.

Splash the Color

I think the end result is pretty cool, although it does almost look like I just photoshopped a house into this landscape. I’m going to have to try messing around with the coloring settings to see if I can get rid of that effect.

Color Splash Tutorial

How to Color Splash in Photoshop Elements 11

I remembered doing something like this in a Photoshop class in high school so I just played with some tools and techniques until I found the fastest and easiest way. Here is a blog of my original post for this assignment, which equated to 3.5 stars. Although there are many tutorials for this assignment, I did not see one that included Photoshop Elements 11 or the same process that I used. The following is a tutorial of how to create the color splash technique in Photoshop Elements 11.

Start off by choosing a picture with a colorful subject and opening into Photoshop Elements 11.

Screenshot (104)

First use the Quick Selection found highlighted in the tool bar and select the subject you would like to keep its color. Then right click on the selected subject and select Layer via Copy. This will create a new layer within the project that only contains the selected subject.Ā Screenshot (105)

Now select the original photo and go to Enhance –> Adjust Color –> Remove Color.Screenshot (106)

This step may not be necessary for you, but I wanted the colorful selected subject to pop more. So I went to Enhance –> Adjust Lighting –> Brightness/Contrast.Ā Screenshot (107)

Then I increased the contrast all the way to create a more monochromatic background. Screenshot (108)

That finishes this tutorial! It’s a pretty straightforward and easy procedure.

Original Photo

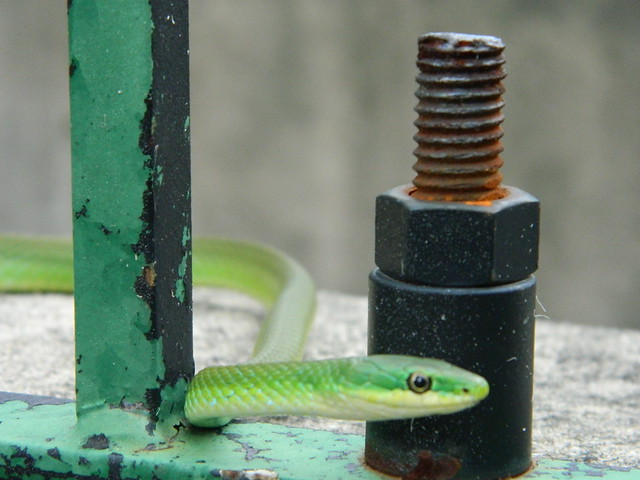
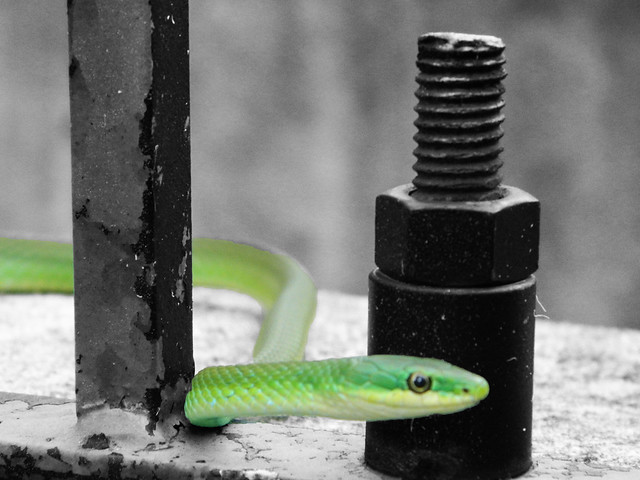
Ssss..

Finished Product

Green Snake


Highlighting the Highlighter (Splash the Color Assignment)

The second visual assignment I chose to complete this week was “Splash The Color.” This is a 3 star assignment. The assignment instructions were

Color splash is a technique to emphasize details- you remove all color from a photo, and then restore original color to a single object, e.g. a green apple on a table. Think of the Girl in the red dress from Schindler’s List.

HereĀ is a link to the assignment page.


First, the final image:

Final


Since this assignment focused on the color on an individual object, I wanted to find something with a vibrant color located in a busy setting . This orange highlighter was exactly what I was looking for. It’s stashed in among many other writing utensils and its bright orange color really stuck out.

I’m happy with the way this image turned out. In the previous visual assignment, I attempted to selectively color something much more complex and it didn’t turn out as well as it could have. Selecting an object with a simpler shape definitely made it easier to get the borders right. As I get better at using these tools, I’ll be able to work on more difficult pictures, but I think selecting the correct image for your skill level is important.

The instructions I used for the rest of this process can be found here. Ā I took the original picture with my iPhone and emailed it to myself.

Colored

I downloaded the photo onto my computer and opened it up in GIMP. I duplicated the picture and went to Edit->Mode->Grayscale to convert the picture to black and white. I copied the image into a new layer sitting above the original color image.1

I right-clicked on the B&W layer and selected “Add Layer Mask.”Ā 2

I accepted the options seen above and then selected the Paintbrush Tool. I zoomed in a bit and began painting in the middle of the highlighter.3

When I had everything except the edges colored in, I zoomed in further and decreased the size of my brush to get clean edges. I had to zoom in to 800% to get some portions of the border colored correctly. The edge of the highlighter blended fairly smoothly in grayscale in some spots, so I had to zoom in and out several times to see what else needed to be colored.45

After finishing up some spots with a brush as small as 1 pixel, I had completed the coloring. I saved the file in GIMP and then exported it as a pngĀ image file so that it could be embedded into this post.

7


A Splash of Magic

Splash of Magic

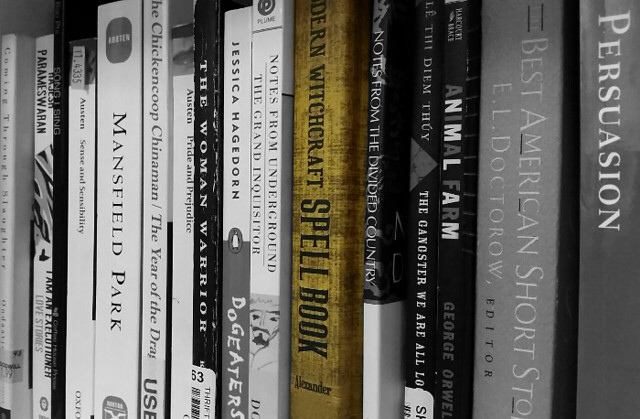
My bookshelf for this semester is just filled with so many books, some aren’t even pictured here! But there’s one book that’s just for me. Something that’s just for fun, that I know I can relax and enjoy and not have to worry about analyzing and papers. Just a little bit of magic to brighten my day.

This was for the Splash the Color assignmentĀ (3.5 stars)! In this assignment, we had to take a picture and isolate a single object to retain its color, and the rest of the photo had to be in black and white. I love this type of photography, because depending on what’s highlighted, it could have so many different meanings.

For this picture in particular, I wanted to highlight my spellbook amongst all the books I have to read for this semester. I figured since it’s the only book I’ve gotten to read in my spare time, and its subject is so vastly different than what I’m studying this semester, it would be perfect!

Process:

For this, I used GIMP, because it’s the best and I don’t have anything else downloaded. And I know how to work it mostly. So, for this, you have to open the image in GIMP

stp1

Then, you take this tool and thisĀ mode:

stp2

This is the “fuzzy selection” tool, with the “add to current selection” mode. Basically, you click the area you want to select (drag it to select more or less), and then with this mode on, you can just keep clicking away to complete your selection.

Of course, if your object is like mine and doesn’t select easy, you’ll eventually move on to:

stp3

The lasso tool with the add mode! This allows you to freehand an area to select. Draw around the little bits that you just couldn’t get before with the wand. This step is a little tricky if you have an unsteady hand, and that’s okay, because that’s what the next step is for.

stp4

Still on the lasso, select the “subtract from selection” mode. This is the opposite of the add-to mode (of course), and allows you to draw around areas you don’t want to include. You’ll probably jump between this mode and the other mode a lot, until you have exactly what you want.

You can also use the other selection tools (just make sure to set the right mode), or the first tool on the second row of tools, which selects every instance of a color throughout the image. So if I clicked on the red “A” inĀ Animal Farm, it would also pick all the rest of the red in the picture.

Next comes the actual fun part.

stp5

Go to the toolbar and hit select, and then invert. This takes the area you selected, and then selects everything around it instead. Then

stp6

Go to Colors and Desaturate, play around and see which option suits your needs, and you’re done! A bit time-consuming, but with a great result!

Fizzlebottoms, a splash of color;


Ā Color splash is a technique to emphasize details- you remove all color from a photo, and then restore original color to a single object, e.g. a green apple on a table. Think of the Girl in the red dress from Schindler’s List.

You can do this in a number of ways with photo editing software or using mobile apps. The answer lies in the Google

IMG_6257 [263240]


Fizzlebottoms’s, Downtown F’Burg. (3.5 Stars)

Visual Assignment: Splash the Color

For this visual assignment, our task is toĀ remove color from a photo, and then restore color to something in the photo.

Photo

I took this photo over the summer, where there were only dead grass and weeds around. Then, I came across these small daisies. It was so random to see them sprouted, so I had to capture them.Ā I chose this photo because I think flowers are simple yet beautiful. No matter what was around them, weeds and all, the flowers bloomed and became so bright. I wanted to emphasize their brightness in this photo.

I used theĀ AviaryĀ application, which is available online and can be downloaded on your phone. Once I was on the app, I chose the “Splash” icon. It turned the photo black and white. From here, I was able to use the “Smart Color” tool and click on areas where I wanted color. I then clicked the daisies to revive them of their color.

I enjoyed doing this assignment, because I always see this splash tool being used. It usually emphasizes something particularly important in a photo!

—SALTY SKINN

ā€œSplash The Colorā€ Tutorial

1. Ā Install the free “Photo Splash” app onto your iPhone, if you don’t already haveĀ  it, and then open it. 2. Press “Start”. 3. Press “Start New Project”. 4. Choose the “Photo Albums” option. A message will prompt you to enable access to your photos.Ā    5. Choose the photo you wish to edit from … Continue reading “Splash The Color” Tutorial

Two Gunshots & A Splash

ONE MORE ASSIGNMENT worth 4 stars! This assignment is called Your Theme Song. The task is as follows:Ā If you had the opportunity to create your own theme music, what would it sound like? Get creative and create your own sounds or select an instrumental from Youtube or any other source that represents you well.

I decided that Blair needed a theme song more than I did, and by doing that I was able to hit my 10 stars and even did 6 in honor of the lovely Blair Morgan.

I did all of my editing on audacity, which has proven to be EXTREMELY helpful this semester. I started out with two songs for background music.

I used THIS scary music, and THIS sneaky music. I then went to freesound.com and downloaded the following sounds.

Sweeping

Man Yelling

Water Splash

Gun Shot

I did a lot of cutting with the music, to find pieces I thought fit the best into the theme song. I felt that making it simple would be able to tell a better story, and I was able to have the drama I wanted as well. Sometimes less is more, and I think that when you have a theme song, you don’t want to add TOO much so you don’t give away the entire story.

A little background: Blair is a crime scene cleaner. This is where the gunshot and sweeping comes into play. Blair also killed her husband by pushing him into the pool, hence the scream and the splash.Ā The entire middle of the song eludes to the darkness of her killing her husband while the time before the first gunshot, and after the second gunshot allude to her everyday life as a crime scene cleaner.

I feel as though I did a good job with this assignment. It was super challenging, and it definitely took longer than I expected, especially with the layering and timing issues I was having.

Here is the final product!


Splash The Color ā€“ Fruit Roll-ups

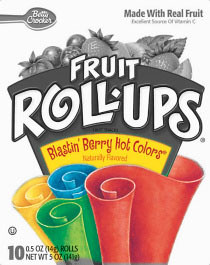
Earlier in the week I completed Splash The ColorĀ for Fruit Roll-up Friday, a promotion for Wagstaff Snack company. It was relatively easy seeing that I did it before. First I uploaded the picture to adobe photoshop and then magnetic lassoed the area I wanted to keep color. Once that was done I then selectedĀ the inverse of the area I lassoed. Next, I removed the color by selecting the “Enhance Tab” then “Adjust Color” and then “Remove color.” Or Shift+Ctrl+U. Then then removed the color I did not want and left my Splash of color.


Fruit Roll-Up Friday!


3 stars