Pods embed error: Pod not found

Second Visual Assignment

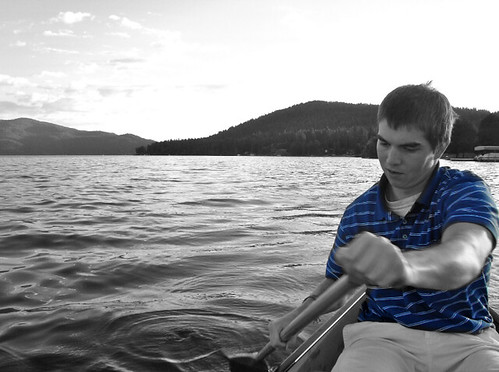
Chuggin’ along on my visual assignments, here is my second one: the Color Splash. I was a little uncertain as to how I was going to do this until a classmate pointed out that it could be done in Piknik during class – thanks to j-rabbit.info for the tutorial! It was really really easy to do in Piknik, thank goodness. Just convert it to black and white, then use the paint brush mode to repaint the selected area.

I wanted to make sure I had a photo that wasn’t too busy, but had a nice big swatch of color. I settled on this nice candid shot I got of my boyfriend Mike when we took the canoe out on Lake Pend Oreille last summer in Sandpoint, Idaho. My family has a lake house there and we go there every year, it is one of my favorite places in the world.

Color splash

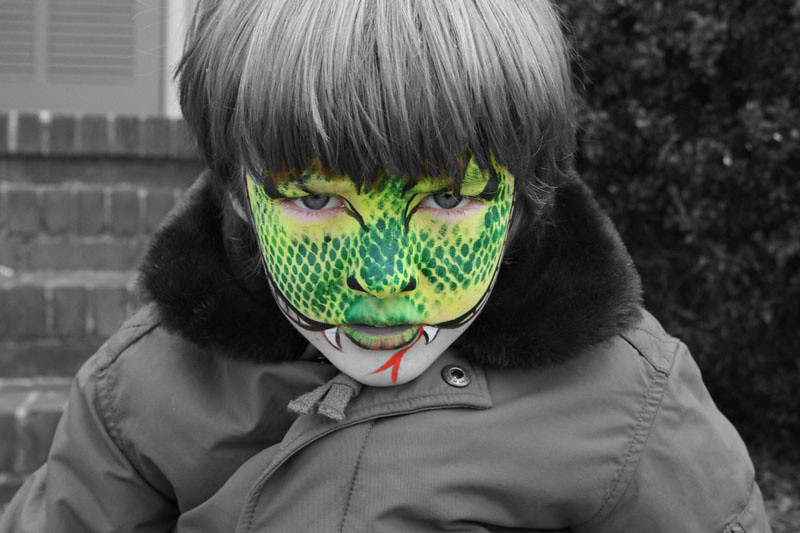
Colorized Snakeboy

I revisited an earlier image I had taken of Miles to experiment with Alan Levine’s “Splash the Color” visual assignment. I always wanted to learn how to experiment with color masking in Photoshop (I used PS for this one, not GIMP—sorry!), and thanks to Annie Belle’s brilliant tutorial here I can and did. I won’t give myself full credit for this attempt because I messed up the hair and don’t think I chose the perfect image because the hairline made it really tough, but I wanted to try it before class tonight to get my assignments started (I was feeling creatively stifled for the first 3 weeks) and I am happy with my new found understanding of masking in photoshop as well as the use of an adjustment layer, both a first for me. So, while worth 2 stars according to the assignment repository, I will only give myself one star until I redo this assignment again with a bit more precision and creativity, kinda like Annie ;)

Spying on People

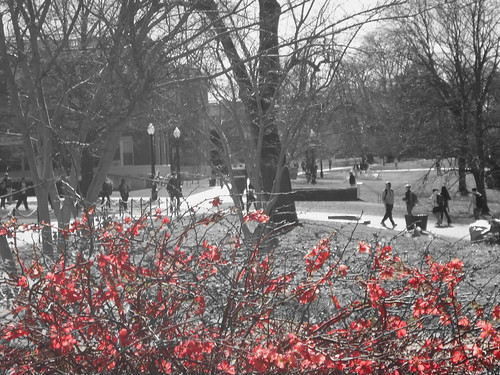
I was on campus today and had a 3 hour break between two classes. For once, I had no work to finish up. Well, at least work that I had with me at the time. I decided to take the opportunity to walk around campus and take pictures of random things that I thought were interesting. My adventure took me past the Judicial building, where the landscape was surprisingly dull. One my way out, I saw a series of red bushes which stood out a great deal so I decided to take a picture of them. After snapping the picture, I realized that seeing a guy walking around in a trench coat with a camera (a pink one, nonetheless) lurking in bushes catches students attention.

Then I remembered the visual assignments for this class and figured I might be able to knock some out with my new pictures.  For my first official Visual Assignment, I decided to take care of the Color Splash option and came up with this.

Spying on students from behind the bushes

What I used:

You can use multiple tools to make this effect. I wanted to use photoshop, but I realized did not have access to it on the campus computers and started to cry. I was excited to get this done. HOWEVER! Hope was not lost. I decided to try out Picnik for the first time and  I was pleasantly surprised.  It is very simple to use, however, below is a tutorial on how to apply this effect if anyone has any questions.

Tutorial for Color Splashing (Step by Step Video is on the way)

1. Once on the Picnik website and upload the picture that you want to edit from your computer.

2. Once the photo is finished uploading, you will see a multitude of options. You only need to go to the “Effects” option on the top bar.

3. Then click on the option “Black and White”. This will do what it implies, convert your color picture to black and white.

*Note* This may seem silly to state, but make sure that the photo you are uploading is indeed a color one or else you will not be able to                  continue  with restoring the color in the next step.

4. The last step. After you click on the Black and White option, a side menu will appear. Congratulatons, your now in Paint Mode! Two tabs should be available, Effect and Original. Make sure it is in original because the whole purpose of the painting is to restore the original colors to specific items. Then  adjust brush settings if need be, and get to painting. You can also play around with the other features to see what interesting things you can do to it. For example, I played around with the shadows and contrast.

*Another Note* Brush size can be important. If your dealing with small details, make sure your brush size is also small or else you will be painting items that dont want to be emphasized.

Freaks & Meat.

The Assignment

This is my first of my ds106 assignments for the next section of this course, “State of the Net.” I know it doesn’t start until Feb. 1, but I was excited to post this. I couldn’t just keep it sitting in my draft box waiting for Wednesday to arrive. I decided to do the Art Comes to Life assignment, which asks you to:

Take a famous painting or print and do your best to recreate it in real life. Capture it in a photo and present the two in a blog post.

It didn’t take me long to remember that I already had an image with a great story that fit this requirement.

The Process

The image that I’m thinking of is a collaboration that I did with a group of friends for a contest in 2009. We did a few images and all of them were based on the artwork of Frank Frazetta, a classic American fantasy and sci-fi artist who passed away in 2010. I’m only sharing one image we did today though, as it is by far my favorite. Before I show you what we came up with, I want to show you the image we were basing it on. The following image is Fire and Ice by Frank Frazetta. Some may recognize it as a movie poster, since it was a 1983 film. (If you’re into badass old fashioned fantasy animation, I recommend it. Some people don’t like the pacing or lack of dialogue, but I think it’s a charming watch.)

The image below was our recreation. I am the one in the luchador mask holding an “axe.”

So, to really describe the process. We knew the characters we needed: A chick in a purple bikini (Princess Teegra), a blonde warrior (Larn), an axe weilding Batman (Darkwolf), and a bunch of ogre things (Nekron’s sub-humans).

Bikini Girl (Princess Teegra): We decided it would be a lot funnier if my friend John played the bikini chick instead of me. I loaned him one of my cosplay wigs and he donned a flesh colored t-shirt. The purple bikini bra he’s wearing is actually an elastic band for resistance workouts that we stretched and duct-taped onto his back.

Axe-wielding Batman (Darkwolf): I was already in a bikini top and shorts so all we needed was a weapon and a mask. There always seems to be an excess of luchador masks, so I used that. For the axe we used a bokken and taped some torn up brown paper bags onto the end to mimic a blade.

Blonde Warrior (Larn): Self explanatory. I had a leather strapped potion bottle that he put on his belt for added fantasy effect.

Ogre Things (Sub-Humans): This is pretty straight forward. They each stuck turn up paper bags in the back of their pants to imitate loin cloths. For my friend on the right he would be the only sub-human with his face showing, so we had him wear a hulk mask and wield a plastic sword.

The Hulk: You’ll notice that the Incredible Hulk is not in the original picture. My friends just own one and decided to include it for extra fun.

We didn’t have a rocky precipice and mountainous backdrop to work with, so we just used my friend’s backyard. We had some other friends present to take the picture and to guide us roughly on positioning.

The Story

So who are these people in the picture? Why Frank Frazetta? Why are we doing this?

The company and website no longer exists but in 2009 a company called “MeatCards” made a little splash on the internet because they had an interesting idea. They were offering business cards made of beef jerky, that had your information seared onto it via laser. Here is a link to an old TechCrunch article about it. They also have an old Flickr page with the process of prototyping Meat Business Cards here.

Check out their Flicker

Photo by Tikaro (MeatCards).

They were having a contest where the top 15 entrants would be part of their alpha testing phase and receive a sheet of 4 meat cards. The contest was to recreate at least one of three Frank Frazetta art pieces (from their pre-selected list). I think somebody told me about this at work when it blew up and then I decided to do it immediately.

My friend John and I would host anime nights at his place on a weekly basis, so that’s where we got half of the participants. The other half of the people involved in the photograph were coworkers of mine (working in the game industry, it’s easy to enlist participation in crazy stuff like this).

We got the photoshoot done on one evening before our usual screening times. I was checking the MeatCard website and when we had finished only 7 entrants/winners had been announced. However a convention over the weekend stalled our submission and on Monday morning when I went to send our submission I saw that all 15 slots had filled! I sent them in anyways and we were given the 16th slot because we “brought it” and because as an anime club we fit their target demographic.

The cards arrived vacuum sealed and we gave it as a gift to John who was moving to PA soon after. Unfortunately his dick roommate ate them.

Audio Assignment #1: The Encounter

The encounter by jimgroom

This is the 90 second sound effects story I made for the sound effects audio assignment for ds106. I followed Shayna Moreland’s and Ben Rimes’s lead and riffed on a Summer time theme, mine being a short story at the beach. The beach tells its own story in terms of sounds, and I love the idea of an envirocast wherein you can experience the sense of place and being through sounds—Shayna’s example did that beautifully with the pool. I grew up on the beaches of Long Island and the sounds bring back for me such a powerful feeling of carelessness and freedom that I can’t help but be transported when I hear them, which for me is the real power of audio—it’s like the heroine of creative mediums, it plays on your sensibilities instantaneously! In fact, the absence of the beach where I live now is one of my greatest problems with Fredericskburg (especially during the Winter). Anyway, all the sounds I used are from freesound.org, and the list of credits are below (thank you awesome people for uploading your sounds, ds106 should encourage more of this):

Oceanwavecrushing by Luftrum
Sea Gulls close-up by justkiddink
Beachfootsteps by acclivity
Footsteps by Hazure
Splash by Patchen
Whale by Stomachache
Underwater by plagasul
Inhale by otherthings

How did I do it? Well, Audacity is getting easier and easier for me to work with. Not that I am getting better, but it is seeming more intuitive. The things you need to know when working on Audacity for a project like this are the following.

  • Importing new tracks: Once you have your first track open, go to Project–>Import Audio to add the additional tracks
  • Aligning audio tracks: To align the audio tracks you need to place your cursor where you want a particular track and then go to Project–>Align Tracks… and then choose with cursor. This will allow you to start organizing the tracks along a timeline.
  • Adjusting Gain: To adjust the volume/level on aparticular track look to the far-left of that track and use the Gain “-” and “+” sign slider to adjust the level of the track. Also, you can mute the track in this area as well, which may be useful for isolating tracks.
  • Cutting and pasting tracks: You can highlight a part of a track with your mouse and cut it out. Or, if you want, paste it to a new track which you create by going to Project–>New Audio Track.
  • Save as mp3: After that I made sure I had the LAME encoder installed thensave all the tracks together as an mp3 file and uploaded it to Soundcloud.

So there is my list of pretty simple steps I used to make this 90 second story—anything I am missing that could be useful?