Barcode Transformation

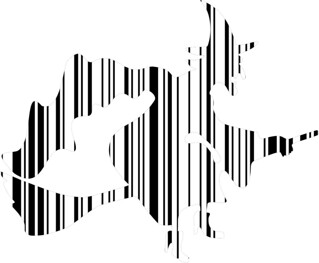
I completed the barcode transformation assignment from the assignment bank. When I discovered this task, and saw the zebra example that was posted with the assignment description in the assignment bank, I knew that I wanted to transform my barcode into a penguin.

barcode2.png

(created by Sarah French)

I chose a penguin for a couple of reasons –

1. They are my FAVORITE animal.

2. Their natural color scheme is consistent with the black and white of the barcode.

Screen Shot 2016-05-28 at 10.37.08 PM

How it was made:

This week, I decided to try an online editing program, Canva. I really liked that some of the features it offered, but I was not able to figure out a way to “fill” my image with the barcode. So, back to my trusty friend, PowerPoint, I go. (Hopefully I will figure out Canva enough later to use it for another assignment!)

To begin this assignment, I opened PowerPoint and copy and pasted in an image of the outline of a penguin.

Screen Shot 2016-05-29 at 9.58.50 AM

Next, I used the Remove Background tool by going to Format Picture>Remove Background.

Screen Shot 2016-05-19 at 9.45.07 PM

In order to use this tool, simply click on the areas of the photo that you do not want to include. The tool will cast the unwanted areas in a shade of purple, leaving only the desired areas in their original color. Simply continue to click around the image until you have removed all of the areas that you want to get rid of.

For this image, I chose to remove the white space inside of the penguin and to leave the areas around the penguin.

Screen Shot 2016-05-29 at 9.59.15 AM

Then, I inserted an image of a barcode via copy and paste.

Screen Shot 2016-05-29 at 10.00.34 AM

This barcode image is currently sitting on top of my penguin. In order to move the barcode behind the penguin, right click on the barcode and select rearrange overlapping objects.

Screen Shot 2016-05-29 at 10.00.42 AM

Another menu will pop up with each image on your screen having its own pane. Simply click and drag the panes into the order you would like and select OK.

Screen Shot 2016-05-29 at 10.01.00 AM

When you move the barcode behind the other image, the barcode will fill the space that we made empty when we used the Remove Background tool.

Screen Shot 2016-05-29 at 10.01.15 AM


Red Reaper Barcode

I really like the Red Reaper and thought of using it for my Gravitar, but went with the cat theme instead. When I saw this week’s assignment of collaborating with another host character, I decided to use Red Reaper.

For 3.5 stars, the story goes like this… LaNoir was out very late wandering the streets of Spookville. There was no moon or lights to illuminate the quite street, so she remained unseen. LaNoir needed to replace her black cape because it blew away while on assignment at the roof top doing the weather report for Grade A Gruesome’s Smooth & Spooky Variety Hour. She crept along the sidewalk gazing in store windows. As a lone car passed by she faded into an alley. Finding the perfect store, she mysteriously made her way inside without ushering a sound. While browsing through the store she found the perfect black cape. As she gazed down at the sleeve there was a flickering barcode. Her infrared eyes scanned the barcode when to her surprise appeared Red Reaper!

To create this image I copied the Red Reaper and imported it to Paint. Lines of varying sizes were added to create the barcode. This process took much longer than expected. When done, the image was saved and uploaded to Flicker where it was slightly adjusted and cropped.

Halloween Shopping

Halloween shopping can be expensive. To illustrate this I decided to make a witch made of a barcode. I decided to go about this in what I believe to be an interesting way. Instead of cutting the barcode into pieces I decided to find a silhouette of a witch and edit out the black piece essentially giving me a picture with an empty area of a witch. I placed the barcode behind this lacking the witch layer and the barcode witch was born.

witch

This is a 2.5 star design assignment for Ds106.

Was that a barcode?

To what point can an object be distorted while still being the same object? To what point can a barcode be transformed while keeping its stored information intact? Ah these age old questions. What does a barcode represent anyway? No one really cares about how it looks visually anyway. They only care about the information stored in the barcode. Now of course these two things are…wait for it… isomorphic, however no one thinks of the barcode in terms of how it looks, only in terms of information. Here we will take a look at both things:

design2I really liked the title of this design assignment. Specifically I really liked the word transformation. It got me thinking, If i take a barcode, and start erasing parts of it to make a picture, what would happen to the data. At what point will the data in the barcode be completely corrupted? So my idea then became, take the barcode and try to transform it without destroying the data.

I started with a barcode that stored the value 1. My idea then became to make the barcode display a 1 while still representing the value 1. It proved more difficult than I thought. I downloaded a free app onto my phone to read the barcode to see how my modifications changed the value of the barcode, and it seemed weird how the value would jump around. I finally got the above barcode to actually still read 1 sometimes!  I think it works because the data is encoded based on the width/spacing of the bars horizontally, so the missing portions of the image don’t destroy the data as long a the reader can see the top or bottom slice that’s actually still intact.

What Do Creative Humans Do In School?

What Creative Humans Do In School

When I saw the Barcode Transformation ds106 design assignment I immediately gravitated to it. After reading Ken Robinson’s, Creative Schools: The Grassroots Revolution That’s Transforming Education,I have come to understand the typical public school system as a concept emerging from the modern/industrial era. Ken Robinson also refers to “No Child Left Behind,” and high stakes testing that is part of the current educational landscape for K-12. He even refers to the barcode system and children viewed as products with an expiration date. Ken goes on to describe people as creative human beings that would be best served under an ‘organic system’ rather than a robotic, industrial system. So in response to finishing “Creative Schools” I created this illustration with a propaganda feel utilizing the barcode assignment on ds106.

For the past three weeks, I have been totally immersed in the narrative of Ken Robinson. I’ve watched his videos on TED and I’ve listened to podcasts and various other interviews in conjunction with listening to his audio book “Creative Schools.” Needless to say, I’ve been imagining the industrial educational system in my head as gears, assembly lines, and barcodes. So when I set about to create this illustration, I looked for art inspiration and assets that felt industrial. I was able to find some vectors of the figures and the school house on shutterstock for download. The gears I created myself in Adobe Illustrator along with the text, barcodes, and overall composition. I set my composition to A4 setting to create a mock-up as a magazine spread. In a way, this combines elements of other design assignments to make a more comprehensive project. Here is a brief tutorial on how to make a magazine layout as A4 size. Basically, the assignment was rated 2.5 stars so I needed to bump it up some.
The composition came about by playing with the various vector shapes, scale, color, and contrast to get the desired layout. The biggest chore was using the pathfinder tool to crop out the ‘barcode’ lines on each figure. The pathfinder tool is sometimes picky about how shapes are separated and combined to trim, divide, merge, etc. I found the trim function in the pathfinder palette to be most effective, although there were some stray shapes generated. I just deleted any unnecessary artifacts and re-ordered the layers over the other element to get the ‘crowd’ look. My favorite part of the barcode elements is how the figures sort of dripped down into the area where the serial codes are implemented, along with, the ‘standardized tests’ text that is combined with numbers. Overall this was another really rewarding assignment that delivers meaning to my focal topic ‘the importance of creative arts in education.’

Citations
Aronica, Lou; Robinson, Ken Ph.D. Creative Schools the Grassroots Revolution That’s Transforming Education. 2015. Narr. Robinson, Ken Ph.D.
Tantor Media. May 8, 2015. Accessed June 20, 2015. Digital File.

Bar Code Ice Cream

For this assignment (worth 2.5 stars), we were asked to create a bar code in the shape of an object.

I chose a double scooped ice cream cone because it’s really hot outside and ice cream sounds amazing in this scorching summer heat (it’s really not THAT hot but who doesn’t like ice cream).

ice cream kid

To create the bar code ice cream, I googled ice cream silhouette and came up with this picture:

ice cream

I saved it to my computer and pasted it into Paint.  I created lines through the picture and made sure they were straight.  I right clicked on the originally black lines and inverted them to make them white.  It create the illusion that it was a bar code.

I went back to google to find bar code numbers and used this one:

barcode

I then cut and pasted the numbers under the ice cream cone to turn it into this:

barcode ice cream

Bar Code Stripper

ami's barcode art

For this assignment (worth 2.5 stars), I had to make some barcode art. I decided to make this related to my character, Folami Turay. This is a piece that Folami would have hanging in her living room. It expresses her internal conflict with being a stripper, someone who plays an integral part in an industry that commodifies and erases the humanity of women. However, she does what she needs to do to survive and understands that she shouldn’t feel guilty about the way she makes a living.

To create this image, I found a picture of a stripper on a pole on Google Images. Then, I used Photoshop to erase the area around the stripper. Next, I cut that shape out of a barcode that I also found on Google. Finally, I gave the image a strong red background, a color I chose due to its connotation of fire and passion.

Mack’s Barcode

This assignment was a little more involved than I initially thought but that did not take away from the fun or new things I learned from Gimp and making it work with paint. I wanted to apply it to Mack so I borrowed an image of a gun (not very familiar with them or their relation to time periods so forgive my ignorance) and blacked it out in Gimp.

CharGunThen…

CharGunOnce I had it blacked out and still looking like a gun I added some white lines to make it look like a barcode and the numbers underneath.  I think it turned out pretty good.

CharGunDSI decided to go with the gun because I thought it would represent him really well and look pretty cool after the barcode transformation.

Barcode Transformation: Manatee!

For my Barcode Transformation I decided to add barcodes to a manatee silhouette!  Manatees are one of my favorite animals, and I really wanted to see what one would look like as a barcode.  I created the first half of the image using Paint as GIMP was giving me difficulties, but switched over to GIMP for the second half of the picture.


I started off by finding a simple silhouette of a manatee, and pasting it into Paint.  Nothing too special here, just a manatee on a white background.

mantee1

Using the paintbrush tool, I added white lines to the manatee, doing my best to give it a barcode look.

mantee2

The only thing that was missing now was the serial number below the barcode, which I was able to add with some finagling in GIMP.

mantee3

Here is a close up of the finished product:

Mr Manatee Barcode


In total, this assignment was worth: 2.5 Stars