I was both very interested and nervous in starting this assignment. The effect looked amazing, but I had no idea where to begin with this. I checked out “steampunk” technique the author of this assignment recommended, but I could not figure out how it applied. I decided to mess around with Photoshop for the first time this semester and see how much I still remembered, as I knew you could make a similiar affect in there. This is what I came up with.
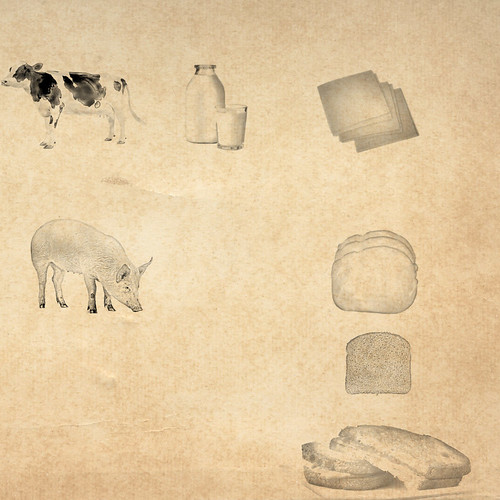
Although I didnt quite grasp the effect I was hoping, I think it turned out ok.
What I used:
I used three different programs for this assignment, as there were some features I was not sure how use in one but did in another. Istarted with Photoshop CS3, went to GIMP and ended the process with Picnik. How I used each one is covered more in detail in the Tutorial.
Tutorial:
Please note that is may be a more complicated way to do it as I am jumping from program to program. Unfortunatly, it was the only way I could find to do it.
1) Open Photoshop and then open your first image. Go to the bottom right hand corner of your screen, under the “Layers” tab. Right click on the image labeled “Background” and select Duplicate Later, hit ok.
2) Click on a layer and go to, Image –> Adjustments –> Desaturate. This will make it black and white. Do this for both layers.
3) Select the background copy and invert it (control + i) and change the blending mode from “normal” to “Color Dodge”. This will make the image almost dissapear, if not fully. Dont worry, it is still there.
4) Go to Filter –> Blur –> Gaussian Blur. From here you can change the amount of pixels in your picture, changing the details of it. You can either choose one that looks nice to you, or go to the optional 5th step to make it a little more personal.
(optional) 5) If you want to do a more manual job, you can select a low pixel radius from step 4 and select the burn tool to add in shading. To find the burn tool, to go the dodge tool and right click.
6) After all your images are how you want them, its time to put them in a document together. I used GIMP for this, as I found it hard to do in Photoshop for some reason. In GIMP it was simply a matter of making a new project with a large background, copying, posting and resizing the images into the positions I wanted them. The Resizing and Movement Tools are located in the top right. After I did this, I saved the document and moved to the next program.
7) I uploaded the image to Flickr and used picnic to edit it by going to Effects –> Texture and selecting one from there. VIOLA! You have my entire process.


