

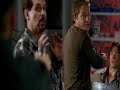
It took about an hour browsing YouTube before I found the perfect scene to re-make into a silent movie a la the Return to the Silent Era assignment, and I was kind of surprised that it turned out to be from the TV show Supernatural. Here’s the original clip:
And my silent movie re-make:

This thing… definitely worth the five star rating. Hell, I’d give it an extra star just for how detail-oriented the whole assignment is, and how frustrating it was to get all the programs I needed to cooperate.
To begin at the beginning, though: Supernatural. A show about brothers fighting mythical creatures and ghosts, and then demons, and then angels, and then trying to stop the apocalypse, and then… yeah. It gets intense pretty quickly. That said, despite how modern the context, Supernatural is at its core an action series, which made it the perfect choice for a silent film adaptation. I’ll admit that I’m not exactly an expert when it comes to silent films, but one thing I have noticed about them is that due to the lack of voices, there’s always a lot of action going on in every scene. Whether it’s the classic girl-tied-to-the-railroad gambit or super dramatic expressions, the audience needed something to look at to keep them engaged. Supernatural has all of that in spades, and the pauses for dialogue between actions in this scene made it easy to place each title card to give a sense of back-and-forth banter between hero and villain.
I used YTD Video Downloader to download the clip to my hard drive, then uploaded it into Windows Movie Maker and quickly realized that the “Old Film” effects I’d been relying on to complete this project had been gutted in the so-called “updates” to the program. After poking around online a little and asking a few ds106 students for advice, I downloaded VideoPad and gave that a whirl. No dice—not only was the program abysmally slow on my computer (a complaint many others have about this otherwise well-stocked piece of freeware), the interface was too complex to master in a week and the “old film” effect it produced was migraine-inducing, as evidenced by this ds106-ers otherwise excellent video.
After a bit of poking around, I discovered that I wasn’t the only person lamenting the loss of the video effects from previous versions of Movie Maker, and it was still possible to download Version 2.6 from Microsoft’s website. This was a Godsend, but I found that it was easier for me to edit my clip and insert title cards with the version of Movie Maker I already had because I was more familiar with the program. I decided to edit my clip with the later version and add effects later with the previous one.
Creating the title cards was one of the more time-consuming parts of this assignment. I did a quick image search for silent movie title cards and found this wonderfully simple example from a teacher’s blog in Hollywood (how cool is THAT, by the way?). After importing the image into Photoshop (YES, PHOTOSHOP. THAT IS A THING I HAVE NOW!!) I found an appropriately silent-film-y font and went through the clip writing out the dialogue and sound effects. I added some intro title cards to give context to the clip as a whole, and some hand-drawn flourishes on the “Supernatural” and “The End” title cards completed the effect. Once that was done, I imported them all into Movie Maker and stuck them in the right places.
After fighting with the formatting a bit and going through a couple of conversions (thank you once again, Online-Convert.com) so that I could upload the edited clip into my older version of Movie Maker, I managed to get all of my video suitably old-ed up. I was pretty disappointed that the only way to get that authentic, jumpy silent film feel meant a serious decline in overall image quality, but decided it was an acceptable sacrifice since I was trying to evoke a specific style of film, and conveying the scene itself was secondary.
Last but not least, music. I found the perfect track on Incompetech.com, a ditty called “Amazing Plan – Distressed,” and uploaded it into Audacity to edit it. The biggest change I made to the song was extending (rather clumsily, I’ll admit) the major-key middle section. Once that was done I added it to the final movie, exported it as a video file and sent it off to YouTube. SO EASY, RIGHT?!?!
As to the work of other students who’ve attempted this assignment, I mentioned Norihide’s Jurassic Park silent film. I think he did a fantastic job capturing the feel of a silent film—in fact, I’d say his movie is far superior to mine simply because of how much clearer it is, annoying jumpiness notwithstanding. I also love how he was able to capture the cinematic feel of Jurassic Park without cluttering it up with too many title cards. I think I would have been tempted to do a lot more with sound effects than he did.
A current student, Witt LeFew, did this assignment with the trailer for Skyfall, the most recent Bond film. While I really liked the way his video kept the clarity of the original trailer while also looking like an authentic silent-era movie and his use of big-band music to create atmosphere, I thought incorporating title cards would have made it even better. Trailers for silent films always had really fun title cards with big, splashy adjectives on them, and that would’ve made his trailer that much more exciting.
