Played From Another Room – Tutorial!

I’ve done this assignment and it turned out great! Check it out here to hear what it is supposed to sound like.

I used a tutorial myself to make this, so I would love to make a text version of my own. Keep in mind I am using an Apple computer, so I cannot speak for any differences for a Windows computer.

  1. To start, you need to download the free audio mixing application, Audacity.

If you’ve never worked with audio editing software before, it might look a little overwhelming, but the process of making this assignment is very simple.

2. Start by selecting File—>Import—>Audio. Select your desired song. You cannot alter purchased official music, but you can edit other audio files you have downloaded.

3. Next, you double click the audio. The background will turn from gray to white to indicate it has been selected.

4. As the audio is selected, click the “Effect” tab and scroll down the long list to “Low-Pass Filter”

5. Once you click Low-Pass Filter, this window will pop up:

The default setting is different than this one, but this is the handy pre-set for creating a muffled effect: 1500.0 and 36dB.

6. Once you click “OK” the filter will be applied and your audio will successfully sound muffled as if it is playing from another room.

7. You’re finished! Optional things could be to add some reverb for echo or adjust the volume. You could also equalize it.

I hope this was helpful!

Audio Tutorial- Final Story

As going along with the creepy theme of my final story, I wanted to create some chilling audio.

At this point in the story, the character is hiding behind her bedroom door, listening through to see if she can hear anything on the other side- maybe a ghost, perhaps?

First, I started with importing some heavy breathing into Audacity. After, I added other sounds, such as disturbing audio files, banging on a door, and a final bang on a door to create a final jump scare.

After adding all of my free audio sounds from freesound.org, I cut, expanded, and moved all of the sounds into place to create the overall creepy effect.

Finally, I metaimposed all of the files into one singular monotrack to then upload to SoundCloud with a creepy picture to go along. \

Here is my final audio product!

Hope you guys like it and it goes along with the story!

Week 12

I enjoyed this week! Even though I had 3 papers and 1 exam I was able to complete the assignments. I think video is just extremely hard to complete because it takes so many factors, and all the mashup stars I chose this week were visual design/photo tasks. I receive more entertainment from creating designs and pictures because theres more structure, video is more free and I find it more work. I even got commenting in this week!!

Incorporating my character into an image, I used her form as a leopard, I wanted to show her being able to walk around without being noticed in the dark. The background was an image of the dinning hall on UMW’s campus that I took at night.

For her closeup I used a free photo of a worried woman in a hat in the sun, and used my own photo from Kenya to make the background. It was supposed to be Aitana right after she left the statue and was running away and trying to understand why she felt different than before.

For the two other assignments I did design projects, one was mashing up two different logos to make them look as one. I did Pepsi and Coke combined into one soda logo!

The last assignment involved contrasting an emoji and human. I chose my step-mom who welded and used that picture of here from her fb profile and the dark-haired, girl, welder emoji. I was so into this assignment that I also made my tutorial on it!

For the remixes I also chose one photo editing and poster design. I got to photoshop (but really just used Preview app) myself into a different “universe” and for that I made myself sit on the plane of a wing (both photos were mine). An then altered the color to look drastically unpleasant and unrealistic.

The other remix I did was of a lost and found poster. I remixed it to “the opposer” and instead made a flyer for selling the hat/trying to get rid of it instead of find it.

The two daily creates I did were more opinion based than “creative” this week. First the account had simply stated “Sadie Hawkins Day” and I looked up the link they gave, it provided background to the dance I was aware of but never went to growing up. I stated:

The second T.D.C. was captioning a cartoon image, I found this was funny and came up with two captions just because I enjoyed it so much:

My group got the “special assignment” of creating a “This week in ds106” post. Ours was on all the video assignments people made. We weren’t able to get it done until Thursday because communication was such a struggle. But we did finally get to honor the hard work of our fellow classmates!

Overall it was a busy but good week ?

How to combine video

Tutorial Time! This is a tutorial for the mashup assignment Two Movies, One Line. I am going to go step by step with images to explain one way to tackle this assignment. (Fully acknowledging that there are other programs and options at your disposal.) I am also using a Mac for this tutorial so my video editing software is iMovie a Mac specific program. (If you attend UMW on the Fredericksburg campus iMovie is available for free on the computers in the Hurley Convergence Center.)

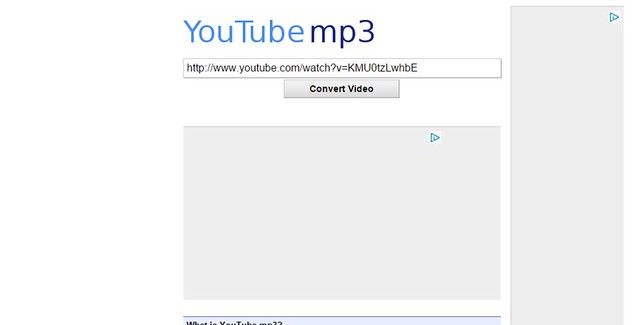
This first step in this assignment is to find and download the video clips you plan on combining. I will not be going into detail on downloading from youtube or other sites in this tutorial but there are different options available to you such as ClipConverter.ccFile2HD4K Video Downloader, or KeepVid.

Once you have downloaded your video it is time to cut out the lines you want to mash together. To do this I recommend the software MPEG Streamclip, it is free to download and works on Mac and PC. After downloading open up the program.

Editing in MPEG Streamclip

Step 1- In the top menu bar go to File, then choose “Open Files”. A window will then pop up where you can select your video file once selected click “Open” to open the file.

open files


Step 2- To select where you want your clip to start move the cursor in MPEG Streamclip to where your line starts. (If you need to get fine detail you can use your arrow keys to move frame by frame.)

Step 3- To select the start of your line go to Edit and choose “Select In” (shortcut is simply clicking I on your keyboard.)

select_in

Step 4- Now move the cursor to where the line ends. From here go to Edit and choose “Select Out” to cut your frame. (Shortcut is “O” the letter on the keyboard.)

select_out

Step 5- Now that you have your clip selected go to Edit then choose “Trim.” This will cut your video down to just the line you need.

trim

Step 6- Now that you have your completed clip go to File and choose “Save As.”

save_as

Step 7- I would suggest saving the file with the line from your clip to help remember it. When you are done click “Save”

save_and_title

Step 8- Repeat this whole process for the other clips you want to combine.


Putting clips together in iMovie

Now that you have your video clips it is time to put them together. You’ll need to open iMovie. Once iMovie is open you need to create a new movie.

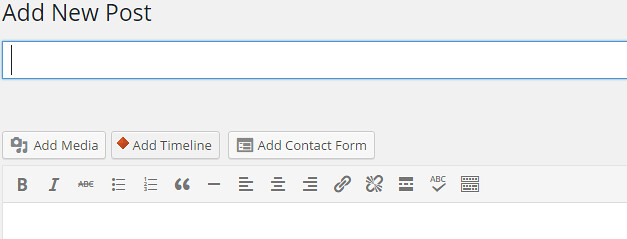
Step 1- Click the plus and select Movie to create a new Movie.

select_movie

Step 2- Click one of the two down arrows to upload the clips we made.

import

Step 3- In the import screen select those clips you made and click “Import Selected.”

import selected

Step 4- Now you clips should appear in the upload area of iMovie, if not go back and re-upload the clip.

clips_in_thing

Step 5- Now it is time to bring the clips into the bottom section where the clips go.

drag_clips_down

Step 6- Drag and drop all the clips you plan on using for your mashup.

both_clips

Step 7- To export your video go to the top corner and click the export button.

export

There are several options on how you choose to export your clip I will be exporting it straight to Youtube because it tends to load faster.

select_export


Step 8- When you upload to Youtube change the file name, and summary from the default. Then click “Next” to export it.

export_to_youtube

In the top right corner of iMovie a little circle will appear when the circle completely turns white it means that the movie is fully exported.

circ

Step 9- Check to make sure your video has properly uploaded to iMovie to Youtube.

exported_video

Step 10- Grab your Youtube video url and paste it into your blog! Do your assignment write up and you are done!


Now you should have all the steps you need to go through the Mashup assignment Two Movies, One Line. The same basic skills in iMovie and MPEG Streamclip are also usefully in many other DS106 assignments.


Creating a Chalkboard in Blender: Part 1

Have you ever started something and thought “this should only take me a couple of hours,” so you dive in and six hours later …

Lines, Dots, & Curve Tutorial

During my semester in ds106, I found this assignment to be the best assignment all year. This was the best assignment in my opinion because it was easy and fun. It was easy because you didn’t have to do a lot; all you had to do was follow the directions of drawing 4 lines, 5 dots, and a curve to make any sort of design. If you were able to do those three things, then you could easily complete this assignment. For this tutorial, I will show everyone what I did to make this assignment as easy as possible to complete.

I was able to make this video by figuring out how to take footage of my screen by researching how on Google. It turns out the Quicktime Player on Mac can record what you are doing on your screen and you can talk in the background. After I found this out, it was quite easy to make a tutorial for everyone.

Cowboy Hat Drawing Tutorial

For the assignment “30 Second Documentary”, you had to create a 30 second video involving any topic that you desired. I needed to make the assignment related to my created character of Buck because I needed 4 stars involving my character. It was actually harder than I thought of thinking about topics to do because 30 seconds isn’t a long time to make a video.

Then I thought to myself that I should do a tutorial on how to draw something like cowboy boots or a hat. Since my created character of Buck always wears cowboy boots and a cowboy hat. I asked other people in my house if they thought I could draw a hat or boots in 30 seconds, and since they know that I take my time in drawing it was a fair concern. I tried drawing a cowboy boot in 30 seconds and had a time of 1 minute, so next I tried drawing a cowboy hat by looking at a cartoon hat I had found on Google Images. That drawing ended up being 39 seconds, and I decided it would be better to make a tutorial for the cowboy hat. Here is my video tutorial of me drawing a cowboy hat.

30 Second Cowboy Hat Drawing Tutorial

I filmed this 30 second Cowboy Hat Drawing Tutorial by using my iPhone to record myself as I started drawing with the pen on the paper. Then I sent the video to my computer. I had trouble posting it into this post, but hopefully it shows up.


Tutorial for 800%

This is a walkthrough of this assignment which requires you to slow a song down 800% too create an ethereal version.  It’s important to distinguish between expanding the song (which makes the tones lower) and slowing it down.  The process is simple, but requires an outside tool to do it.

  1.  Download the software from this website

Slow1

2.  Find a youtube video of the song you wish to slow down and upload it to youtube-mp3.org.  Download and save the file

Slow2

3.  Upload the downloaded mp3 file to the slowing software by clicking open audio file under File

4.  Adjust the slider to about 8.00 times the normal speed

Slow3

5.  Click the render and save audio option under file

This will download the file to your computer, with which you can upload to soundcloud, and now you’re done.

How To Make A Reverse Video With Sony Vegas Pro 13

Do you have Sony Vegas on your computer and want to know how to reverse a video? Well you’re in luck as I show you how to in the short video tutorial above.

How to Make a Story Map

The KnightLab Story Map is a fun way to tell the story of a trip in an organized manner.  I used this in my final project about a wanderer to help me tell their story from their various destinations.

Steps:

  1. Click the “Make a story map now” button in the center of the KnightLab home page.

Map1

2. Name your story map whatever you want

Map2

3.  Click add slide on the left side to create the first point of your trip

Map3

4.  Search for the location of the destination in the search bar in the center of the screen.

Map4

5.  Add media to your slide by posting the URL to the image or upload an image.  Make sure to give credit in the credit field as well.

Map5

6.  Add the story and title to the slide in the right side of the bottom half

Map6

7.  Repeat the first 6 steps for as many destinations as you have in your trip

8.  Save the map by clicking the icon in the top right.  Then click the share button to bring up the embedding options.

Map7

Map8

9.  To embed your post in WordPress, you must install the KnightLab Time Table plugin.  Add a new plugin and search for “KnightLab” in the plugins store.

Map9

10.  After installing the KnightLab plugin, an “Add Timeline Option” will be added in the blog editor.

Map10

Click on it and copy paste the embed code from the embedding options in the story map editor into the Data source field.

Map11

This will add an interactive story map to your blogpost.  You’re done!

Map12