McLovin’

Consumer Mashup

“Think of anyplace you spend money, and what you most often buy at that place. “

I mashed McDonalds logo and it’s delicious coffee:
I LOVE the mornings I can get myself out of bed 5 minutes early to stop at McDonald’s for coffee before class. I’ve never been much of a caffeine junky, but this semester I think I’ve entered adulthood and needed it more mornings then not.

I made this mash up by finding the McDonalds logo and coffee through google (links above) putting both pictures in Microsoft Word, changing the M’s settings to be behind text and the coffee settings to be in front of text. Then I played on the slogan “i’m lovin’ it” with “coffee lovin’” by typing the phrase and then taking a screen shot of the new logo.

Recycling

The assignment Recycle that Media involves taking at least 7 different previously unused works from other ds106ers and create it into a whole new story out of it! I first went through all of the 153 items to see what was available to use. My first thought was “what the????”. I had no idea how to even start to pick random items and mesh them together. I then came across a cat file. Of course, since it involved animals I just saved it to my desktop. I then saw a few other nature like pictures and thought maybe I could do a story of how a cat travels everyday. Having 3 cats of my own I know they do not stay close to home if they are allowed outdoors. I also found a bird audio that worked perfectly with my outdoor story. I then found a picture of a dog and decided to include that too.

I made a bit of an adjustment on the audio. I didn’t really like just the birds playing throughout the whole story so in the end I added a dog barking (had to adjust the pitch for the smaller dog) and a cat hissing. I had these files left over from when I did the 5 sound story.

Other than a minor adjustment in the audio, the rest was a breeze. I wanted an interesting title clip so I used a weird transition for the title words. I didn’t want any other captions besides the title slide and a bit of an introduction to Sadie the cat. I feel cats prefer silence on their daily adventures anyways (hint the hissing when a dog interrupts the bird noises).


Create an Assignment: WalkingDead-ify

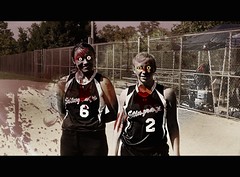
When I was coming up with a design assignment I thought it was a good idea to do something that people could possibly relate to and would be fun.  The first thing that came to mind was how obsessed some people are with the show The Walking Dead.  The show is pretty cool to watch and has some really gory scenes.  In the show a lot of time friends and family of the main characters become “walkers” which are zombie like creators that try and turn the humans into walkers. I thought it would be cool for people to turn their friends or even themselves into walkers by using their creativity and photo editing applications.
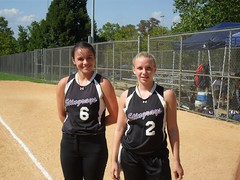
To complete the assignment I created I began by uploading a picture of my friends onto picmonkey.com
SAM_1232
I then went to basic edits and color where I increased the color slightly and pressed apply.  I then went to effects and went to the cinerama selection and pressed apply.  I then went to the themes section where I had the options of “the day of the dead”  and “zombies.”  I darkened the image and added scars, gashes, and bloody marks to make my friends appear more “walkerish.”  I then pressed save at the top of the page and uploaded the picture onto flickr and tagged it with the tags walkingdead, DesignAssignments762 and DesignAssignments.
Walkingdead-ify

Assignment Details:
WalkingDead-ify your friends! (No stars yet)
http://assignments.ds106.us/assignments/walkingdead-ify-your-friends/

With the new series The Walking Dead becoming more popular by the show, it would be cool to see people turn their friends into “walkers.” To do this use such photo editors as photoshop or online photo editor picmonkey.com. Use your imagination and add such things as scars, blood, gashes, or missing limbs.

Do this Assignment

If you complete this assignment, share it! If you are signed up with a blog that feeds the main DS106 site just use the following tags when writing the post on your own blog to have your example added below. (You must use BOTH tags!):DesignAssignments, DesignAssignments762

If your blog is not connected to ds106, you can add your example directly.


Create an assignment: Winterize it!

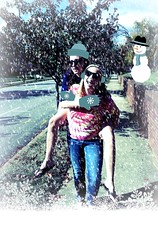
The idea for this assignment came from the environment around me! It has clearly started to get colder and the christmas music has started to make its appearance.  I thought the perfect assignment would be to take an old photo, preferably one from the summer or spring and convert it into a winter themed photo, snowman and all!!!

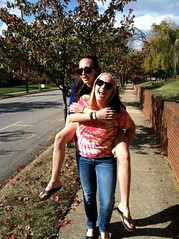
To create the example for this assignment I found a picture that was taken over the summer of my friend and I.
Pre Assignment Winterization
I
 then uploaded the picture onto picmonkey.com and used such editing tools as winterizer, where it added snow, gloves, hats, and a snowman to the picture. I then adjusted the color of the photo to make it look colder. I did this by lowering the “temperature” of the photo, which can be done under the color edit link in picmonkey.com.  The end product was a winterized summer photo that now prepares me slightly for winter!
Make an assignment Winterize

The assignment details include:
Winterize it! (Not given stars yet)
http://assignments.ds106.us/assignments/winterize-it/
Take a picture from summer and winterize it! Using photoshop or an online photo editor such as picmonkey.com lighten the color to make the temperature appear cooler, add scarves, snow flakes, or even a snowman! Use your imagination and take a photo from another season and turn it into a winter theme to prepare for the winter season ahead.

Do this Assignment

If you complete this assignment, share it! If you are signed up with a blog that feeds the main DS106 site just use the following tags when writing the post on your own blog to have your example added below. (You must use BOTH tags!):VisualAssignments, VisualAssignments761

If your blog is not connected to ds106, you can add your example directly.


Tutorial of Warhol Something.

First begin by opening up a photo-editor website such as picnik.com or picmonkey.com.
Tutorial 1
Press “Edit a photo” and upload the photo you would like to transfer into a Warhol image.
Tutorial 2
Once your picture is uploaded click on the chemistry bottle (the second symbol from the top on the left) and scroll down to the paintbox section where you will find the Warhol selection.
Screen shot 2012-11-26 at 7.14.30 PM
Click on the Warhol link and watch your picture turn into a new creation!
You can adjust the brightness, contrast and fade to your liking, along with picking the first and second colors to play in contrast with each other.
2nd Tutorial 2
Once you like the picture press apply and that will save the edits you just performed. Then you can go to the top of the page and press save, where it will give you a save button on the bottom left and you have to name the photo.

Screen shot 2012-11-26 at 7.30.06 PM
Once you have saved the picture to your computer you can then go to flickr.com and upload it by pressing the upload button.
Tutorial 8

Tutorial 9
Once you upload your picture you can tag it with the necessary tags: VisualAssignments and VisualAssignments560.
2nd Tutorial 4
Once uploaded your creation is now capable of being shared on the web!!!
warhol

Tutorial on Overedit yourself.

Often times when using such websites as picnik.com or picmonkey.com people are trying to improve how they appear in a picture.  For this assignment you are attempting to do the opposite.  To get started begin my opening up picmonkey.com and click on the Edit the photo link.
Screen shot 2012-11-26 at 4.23.39 PM

It will pull of files where you can pick a picture to edit.
Screen shot 2012-11-26 at 4.30.06 PM

Once you have chosen a picture of yourself to edit a list of effects are in a table on the left.
Screen shot 2012-11-26 at 4.20.31 PM

The first thing I suggest playing around with is Color, increasing the saturation gave the picture a more orange tint.
Screen shot 2012-11-26 at 4.41.43 PM
To save this edit press apply.
To add more effects go to the lipgloss edit button on the left and click eye tint, to change the color of your eyes.
Screen shot 2012-11-26 at 5.11.12 PM
To save the changes press apply, for me it allowed me to use a free trial so I could keep using special effect applications.
Next go to the lip tint and chose a random vibrant color to stick out. (In this case I used green.)
Screen shot 2012-11-26 at 5.21.29 PM
Then press apply and save all the changes. Once you are done with your creation go to the upper part of the page and press save.  Where it will give you a save button on the bottom left and you have to name the photo.
Screen shot 2012-11-26 at 5.26.33 PM
Once you have saved the picture to your computer you can then go to flickr.com and upload it by pressing the upload button.
Screen shot 2012-11-26 at 5.31.04 PM

Screen shot 2012-11-26 at 5.35.13 PM
Once you upload your picture you can tag it with the necessary tags: VisualAssignments and VisualAssignments626.
Screen shot 2012-11-26 at 5.35.48 PM
Once uploaded your creation is now capable of being shared on the web!!!
Screen shot 2012-11-26 at 5.44.49 PM

What Makes Me Laugh

Airplane! and its sequel are two of the funniest movies of all time in my opinion. I don’t need super dirty scenes and vulgar language to make me laugh. The simplest way to make me laugh is to just play with words. Throughout Airplane! and it’s sequel is the best sort of word play I have ever heard. Furthermore, I am constantly referring to the movies and quoting them around people. My family got me started on Airplane! at an early age, and to this day I am spoiled and turn my nose up at most comedies. Not too many movies, especially recently, have even come close. Here is a clip from Airplane! The Sequel that I captioned for the “What Makes You Laugh” assignment. I hope you enjoy it as much as I do!

11 + 12 Sum

Video Assignments

The first assignment I did these two weeks was Play by Play. I really enjoyed inserting my own commentary into a video that I watched. It was a cool experience to have my own input and to hear it play outloud.

The second assignment I did this week was Return to the Silent Era. It was really fun to turn a trailer for a movie and make it “silent movie-esque.” It took a lot of time to add all of the captions to the video, but it turned out really well and flowed easily from one phrase to the next.

The third assignment I did this week was Character/Genre Mashup. This was definitely my favorite assignment of these past two weeks but absolutely took the longest. It took forever to search through videos to find ONE scene (sometimes two) that I wanted. Each clip lasted about 10 seconds or so, which meant having to find quite a few to cover a song that lasts about three and a half minutes.

Reflection

It was really cool being able to tell stories through video this week. I found that it was exciting to see what kind of changes I could make that would impact everything about that particular video.


I Don’t Know Why You Say Good Bye, I Say God Be With Ye

Get the Beatles reference? If you don’t, promptly YouTube search the song “Hello, Goodbye” by the Beatles before continuing to read. There really is no excuse. Anyways, I first heard about the origins of the word goodbye from a Spanish professor explaining why people say “adios” in Spanish. He explained that it wasn’t uncommon in many other languages to reference a deity when wishing a person good fortune in their travels from you. In English, it is said that the word goodbye is a sort of mashup of the words “God be with ye.” So when I read the assignment description for Vernacular Video, it took me a while, but I remembered what my professor had said about goodbye, and decided to use it. I immediately wanted to flip flash cards for the assignment, as if to portray a feeling of studying off of them. It was hard to read the cards and shoot the video at the same time, so I had my friend Victor flip the cards and shoot the video while I read. The main problem was my horrible stuttering again. I try so hard, but I’m just a natural stutterer. I’m not as bad as I used to be, but it still frustrates me, and when I get frustrated, I stutter. It’s a vicious cycle. Regardless, the point of the assignment was to tell the history of a word in an interesting way, and I feel accomplished. Ta Dah!

DS106 Food Time With Cap’n Markish

The “McGangbang” is a food product made out of two McDonald’s sandwiches off of the dollar menu that causes much controversy amongst people who like to cause controversy over stupid things. People will argue with you about many different things, including where it originates, what goes in it, and what the name of it is. This has made me come up with the subgroup of the sandwich called the “Virginia McGangbang.”
I feel like it’s important to point out that I do not condone the name of the sandwich, but this brings me to my first point. The sandwich is actually recognized by the name “McGangbang” in many McDonald’s (especially in my area), so much so that you can actually order it by name. People can literally walk up to the counter and say “I’ll have a McGangbang,” and the person will make it for you, without the extra bread. Thus, the name sticks.
Most people agree that the sandwich originates from Daytona Beach, Florida, where you take a Spicy McChicken sandwich, and put it between the patties of a McDouble. The main problem with this, is that not all McDonald’s carry Spicy McChickens. Thus, the variations come in to spice up the sandwich. The most important concept, is the fundamental blueprint of using sandwiches off of the dollar menu, and combining them.
The way I was taught to make it the first time, is the way I stick to making it. I actually thoroughly enjoy this artery clogging sensation enough to make it from time to time. I was told to buy a McDouble, and add the Big Mac sauce (Mac Sauce for short). You also buy a McChicken and add cheese, because heck, who doesn’t want more cheese? You then split the patties down the middle and insert your McChicken sandwich into the middle, and mash it together. The result is a beefy, chicken-y goodness that can only come from the mind of a broke college student who was tired of eating the same things every day. Another development is that the McGangbang has led to the creation of a more expensive and larger sandwich entitled the “Man Sandwich” that you can also order by name at many McDonalds. The concept of ordering off of the dollar menu is neglected, but the same principle of splitting patties and adding chicken sandwiches is there. The Man Sandwich is consisted of a Double Quarter-Pounder with Cheese; add Mac Sauce, and a Country Style Chicken Sandwich; add cheese.
When I read the requirements for the assignment Cooking Show, I felt almost entitled to share this delectable treat with the DS106 world. My friend Victor and I set off to the nearest McDonald’s, and acted out the making of this food of Gods. I asked my friend to use a recording technique where he comes up from behind me, and then sits down at the table, as almost personable, yet had an almost Nightly News feel to it. I asked him to shoot the scene lower than usual to emphasize the sandwich, and then raise up and emphasize me at the conclusion. Before he began recording, I thought it would be funny to use the receipt as a scene card. I feel like the effects worked well to give me the look I was looking for. One more point, I can’t stop laughing in these videos. Enjoy!