my somewhat gif (hopefully)

I did two because I found the process a lot more fun than I thought I would. Jim Groom’s guide was beyond helpful to me. I downloaded mpeg streamclip and gimp and after the first time of following the directions, I was able to guide myself through the second one. I am not sure how to get the quality better in the top one (it looks kind of more like a painting with all the shading going on) but I will try to troubleshoot it this weekend.

I chose Harry Potter and the Prisoner of Azkaban because I love that movie and, because this movie really is the turning point in the whole series. Sirius is able to finally meet Harry again. This particular scene is where Buckbeak has been sentenced to death and Malfoy is behind it. Obviously, Hermione is not very pleased by this and takes matters into her own hands, first threatening Malfoy with a wand, backing off and then punching him.

For my second GIF, I did one from one of my all time favorite movies, Clue. Back in middle school, I could watch Clue over and over again for days on end. (what’s weird is how much I hate the game!). Anyway, there’s this scene where Mrs. White talks about how much she hated this woman, and describes it as “flames, flames, on the side of my face”. As an immature middle schooler, my friends and I would say that very line any chance we got. So, it was a no-brainer that this be one I used.

I love the smell of GIFs in the morning

I decided to start off the week in a productive fashion by knocking out one of the harder assignments for the week.  Before I start, I should mention that I love GIFs.  I find them hilarious, but I’ve never tried to make my own.  That was an ordeal to say the least.  I learned that the MPEG Streaming software doesn’t allow for a large amount of frames, so I had to compress my clip down a whole lot more than I would have liked.  From there it was fairly easy to import into GIMP and create it into a gif.

With that being said, I think the clip came out very well.  A big thanks to the DS106 wiki which has a fantastic tutorial on how to create gifs here.   It may take some trial and error to get a gif that works well, but it’s well worth it.

Stay out of Malibu, deadbeat!

My first GIF!

This was a clip from my favorite movie ever, “The Big Lebowski,” a movie which is, by far, one of the most hilarious pieces of cinema ever.  If you haven’t seen it, drop whatever your doing, make yourself a white russian, and go see the movie.  The entire rant which leads to the confrontation above can be found here.  Plan on seeing many more gifs from me in the coming months.

In other site news, I’m still fidgeting around with themes and widgets and the like and any creative input would be appreciated considering I am design impaired.

Handy Set of Guns

Nicolas Winding Refn’s avant garde movie Bronson is a semi-biographical account of Britain’s self proclaimed “most violent inmate.” This movie was a real step forward in the now renown movie star Tom Hardy (Bane). The flick has TONS of fighting, mumbling British accents, and great ’80s music. The gif below is a loop of Bronson showing of his “skills” that made him famous, something that he very much desired.

To make this gif I had to download two different–but free–types of software. MPEG Streamclip to download youtube videos (its important to get the beta version) and GIMP to compress all the image sequences. There is also a VERY help full video, that walks you through step by step. Here it is:

Hope this helps


My First GIF!

The Avengers!  If you haven’t seen this movie, it’s amazing.  I loved it and laughed so hard when I saw this scene.

So, we were given this assignment.  I’ve never created a .gif before and had to do a little bit of digging before I finally figured out how to make one.  I don’t have photoshop, so I had to resort to a website called MakeAGIF which is actually REALLY handy.  I hope that we are aloud to use this site to create our work?  I had the video file that I wanted, and I took screenshots with VLC and then uploaded them and then it created this gif!

I really enjoy this particular clip because it is funny but at the same time makes me think of how I felt when I was first told to create an animated gif.  My brain felt like Loki’s body at first.  These sorts of things are a bit daunting to me when I have to do some research and figure out how to do something that I’ve never done before and then create it.  I’m really glad that I got it done though because I thought it was a fun process!  I’m sure I’ll find an easier and more efficient way to produce a gif as the semester progresses.

So far, every assignment that I have done for this course has been one that I enjoyed in the end.  I can definitely see though how people say that it takes time and to not procrastinate.  I’m trying to get everything done as early as I can so I can go back and edit it later on in the week if I need to before I actually submit the assignment.

Like Peanut Butter

Photobucket

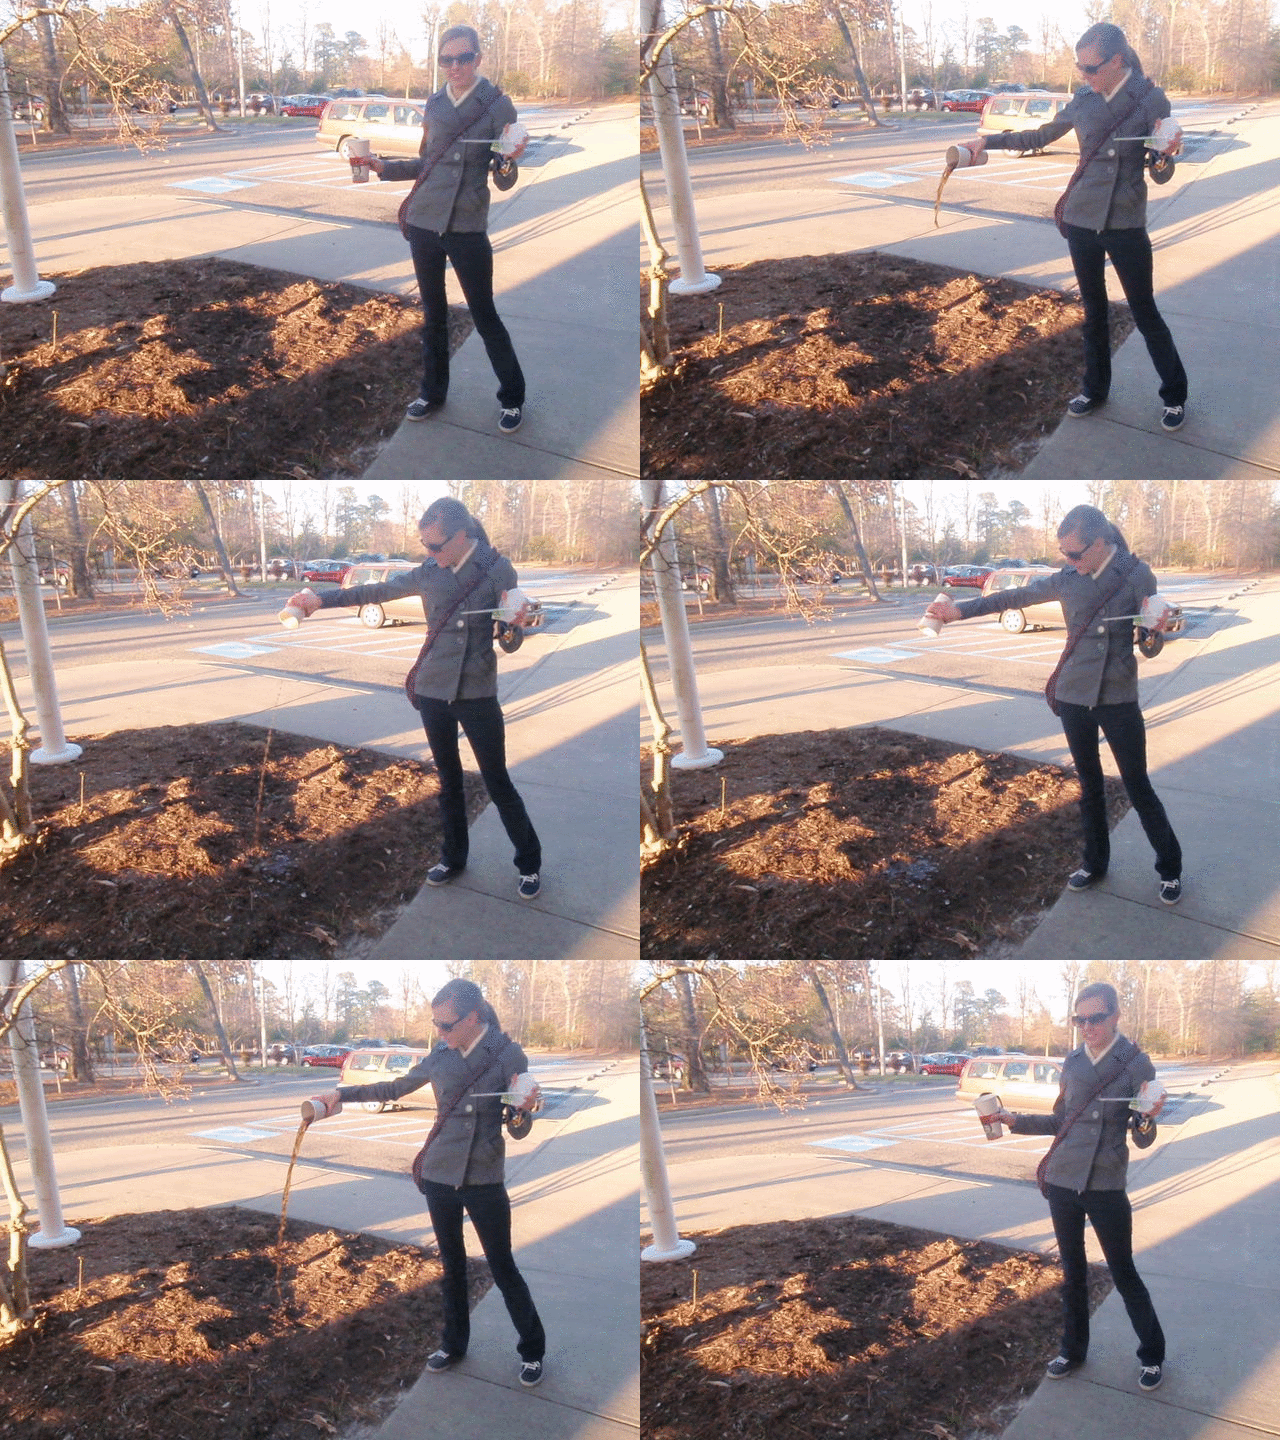
Visual Assignment: Photo It Like Peanut Butter

For this assignment, my friend used a multi-burst setting on her camera as I spilled my drink out onto the ground. With this, the camera creates multiple photos in a row. Then with the series of photos, I was able to great this gif that looks like a movie clip. As I created the gif, I also decided it to loop backwards to look like I was continuously pouring the drink out of my cup.

Color Splash

Roses are red

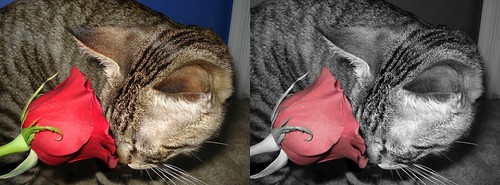
Picnik collage

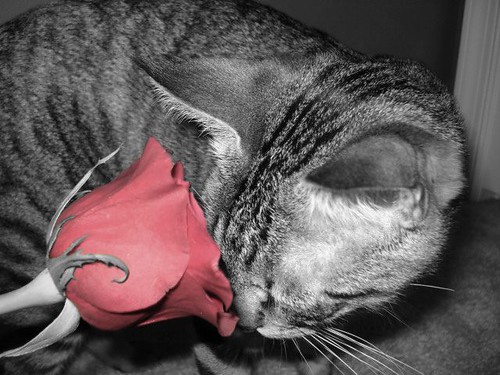
Visual Assignment: Splash The Color

With the color splash visual assignment, I found an old picture of my cat on my computer with a bright red rose and thought this would be perfect to use for the splash of color. For this assignment I used Picnik to create the black and white with color. I used Picnik’s black and white filter for photo and then it has an option to erase the black and white with a paintbrush. I adjusted the size of the paintbrush and painted the area that where I wanted the color to show through. After saving this, I but another black and white filter over the image and then faded it so the rose color wasn’t as harsh and had a more vintage look.

Common Object

Coils

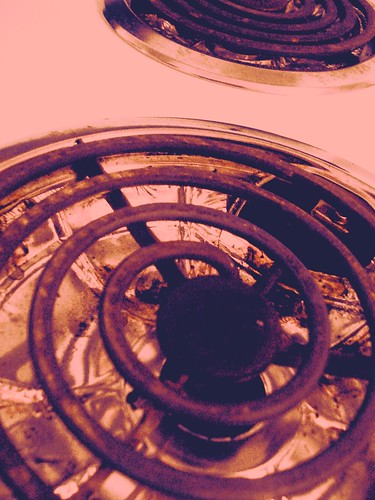
Visual Assignment: Common Everyday Object

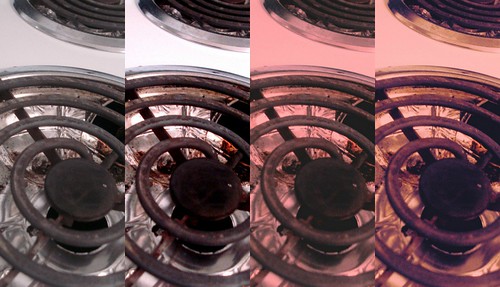
For this assignment, the objective was to take a picture of a common object and then manipulate it’s colors for a new effect. For my photo, I edited the colors in picnik because I still have yet to get photoshop working on my computer. First off I took a photo of my stove top because I thought the coils would look cool and I put my camera at a different perspective for a new look. In picknik, I first boosted the colors of the original photograph, which emphasized all the gross stains around the stove coils. Next I did a dual tone effect on top and used a peachy pink color and a gray and then faded the colors so they weren’t so bright. For the final effect, I used a heat map on top of the dual tone which brought out the more of detail on and around the coils.

Picnik collage

This is a collage I also made in picnik which shows the progression of the effects that I used on the original photo.