Old to New, Before and After;

Inspired by the Return to the Scene of the Crime assignment, comes a related idea which asks you to digitally mix the past and the present. This was done exceptionally well by Shawn Clover in his series 1906 + 2010: The Earthquake Blend, “featuring photographs captured during the devastating 1906 San Francisco earthquake blended into views of what the city currently looks like.” Use a photograph from the past and digitally blend it with an image of the present. And for five thousand bazillion extra stars, blend the past and present photos with a digital concoction of the future.

monroe

A blend of Monroe! Now with fountain. (4 stars)

Before and After- 4 stars

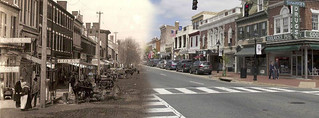
In this visual assignment, I had to take two pictures and blend them together. Both pictures are downtown Fredericksburg. I thought this was fun.

then and now

10610797_10200124046061313_4835783315958675586_n caroline st 3

Moving On

The Visual Assignment “Before and After” is about combining the past and present into a single image.  I chose to do that with an image in a rear view mirror (that I placed there with the help of Photoshop).  Here we have someone looking forward to what is down the road in the future of […]

Class Blog Post #3

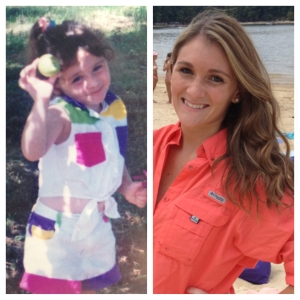
For our Assignment A, I chose to do the “Before and After” Assignment. I took a screenshot on my computer of both pictures and repositioned them together so that they were even. On the left is a picture of me when I was younger (excuse my lack of fashion sense) and on the right is a picture of me two weeks ago in Tybee Island for a cousins wedding.

Screen shot 2013-04-15 at 11.33.28 PM

Link to assignment: http://assignments.ds106.us/assignments/before-and-after-2/

Before and After

Me when I was younger and now

Before and After

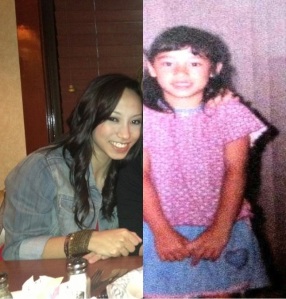
For my ds106 assignment A, I chose to do a before and after shot of myself when I was 6 to now. I did not blend the two photos together, but I cropped and merged them into one picture.
before-and-after

link to assignment: http://assignments.ds106.us/assignments/before-and-after-2/

How Things Change & Stay the Same

I was disappointed that I couldn’t do Return to the Scene of the Crime with a photo that wasn’t directly linked to me.

But then I found this assignment called Before and After!!

The task: use a photograph from the past and digitally blend it with an image of the present.

A History major getting to use history?!?!!


Now this took me awhile, so I’m glad it’s worth four stars.

I needed digital images of UMW. Luckily, I have done quite a few projects in the Archives of UMW, so I went back to the site and grabbed a number of photos that I thought I could recreate.

Then I wandered around UMW for awhile. I took hundreds of photos and changed batteries five times. I wouldn’t know if I got the right angle until I got back into Photoshop to test it. I would love to know if anyone knows how to not wait until Photoshop, though!

I took my many images and put the ones that I matched up with my eyes into Photoshop.

I really wanted to do Monroe Hall, and I took some EPIC photos for my scrapbook, but they weren’t matching the archival photos.

Alas, I had to turn to my Trinkle photos.

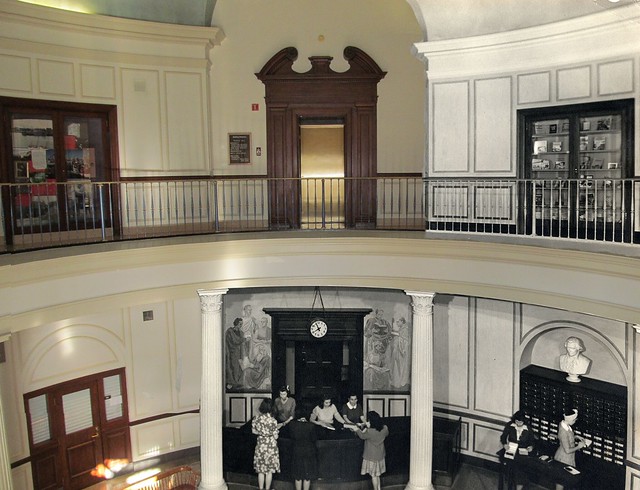
This is the photo I found to match up the most:

bp5 076

Then I took this photo from the Archives @ UMW:

Large Format JPG (2)


The photos don’t match up completely, though, so I had to do some finessing.

Here is the final edit:
Using a Paintbrush of History

How I did it

1. I opened both images in Photoshop in separate windows.

2. I copied the archival photo on top of the new photo. At first, I didn’t know where to start. I just used the Eraser and erased parts of the archival photo to see if it would match up.

3. I remembered the layer options, though, and changed the opacity so I could see both images. With this method, I was able to match up most of the edges.

4. I stretched parts of the image, but you can’t really tell.

5. Then I started erasing! I used the Eraser with 75% thickness and 100 size for most of the erasing. I didn’t really know where I wanted the lines to be between the old and the new. I realized, since some of the edges didn’t match up completely, I needed to direct their eyes elsewhere.

6. I picked areas that could easily be concealed, like the rim of Trinkle in the middle and the door to the second floor elevator.

And viola! That’s all it took.

Final Project: Before and After

xOk5tA on Make A Gif, Animated Gifs

make animated gifs like this at MakeAGif

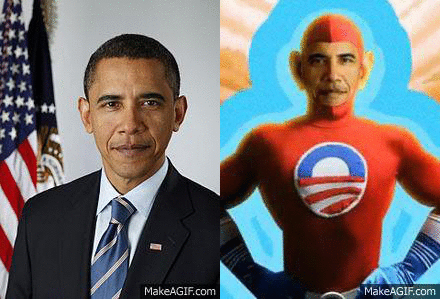
For this before and after assignment, I took one white house picture and one superhero picture of Obama. I used a website called makeagif.com to make the gif with two pictures.

This gif is supposed to show how by day, Obama is merely president of the United States, but by night, he is a superhero. He runs around the White House and the DC metropolitan area stopping crime and destroying sexism. He takes superhero walks with Bo, the First Dog.

*insert super hero sound here*

[11/~15]

Before and After

I decided to do this as a before and after because, 9/11 was such a horrible tragedy to all of new york as well as the united states. We were terribly hit and with this picture I feel even with something like this we are still a strong nation and will continue to be!!!!!!! I LOVE AMERICA