A Little Slice of the Starry Night

Using Vincent Van Gogh’s famous painting The Starry Night, I did the visual assignment Adapt an Artist’s Work for my final project story. The assignment asks us to:

Adapt a famous artist’s work to change or reinforce its possible message.

Here’s what I did:

Untitled document (45).jpg

I incorporated it partly because I couldn’t photograph the moon in the right phase on such short notice, and partly because the painting style goes nicely with the surreal aesthetic of my story.

This is the original painting.

300px-Van_Gogh_-_Starry_Night_-_Google_Art_Project

I found it on the Wikipedia page for the painting.

If you click on the image, it tells you the copyright info. In this case, its available for any use.

Tutorial

Untitled document (46).jpgUntitled document (47).jpgUntitled document (48).jpgUntitled document (49).jpgUntitled document (50).jpgUntitled document (51).jpgUntitled document (52).jpgUntitled document (53).jpgUntitled document (55).jpgUntitled document (56).jpgUntitled document (57).jpgUntitled document (58).jpgUntitled document (58)Untitled document (60)

Untitled document (68).jpgUntitled document (61)Untitled document (62)Untitled document (63)Untitled document (65)Untitled document (67)

With that, you should be able to take any image of a piece of art and adapt it with a Drawing in Google Drive.

The theme is GREEN!

This is visual assignment 615. The directions were “Make an alphabetically themed collage. Compile images to represent each letter of the alphabet within a chosen subject area or theme. Create a collage. ” My theme is green! To make this collage I used GIMP.

First, I found all of the photos I was going to use and saved them in one folder. (I renamed them so they would be in alphabetical order, this made is A LOT easier.)

Now, open GIMP. Click on the “File” tab and go to “New”

This dialogue box should pop up, you can change the Image size to whatever you want. Then click “ok”

Now you should have a beautiful white space to work with:

Next, click on the “File” tab and go to “open as layers”

Highlight all of the photos you wish to use, then click “open”

Now you should have 26 layers of photos! (AKA pure chaos!)

Now all you have to the is move, scale, and rotate the photos however you want. (The tools move, scale and rotate are circled below)

Just keep playing around with it until you get the product you want!

This is what my collage ended up as:

I hope this helps you make GIMP collages!


Draw it.

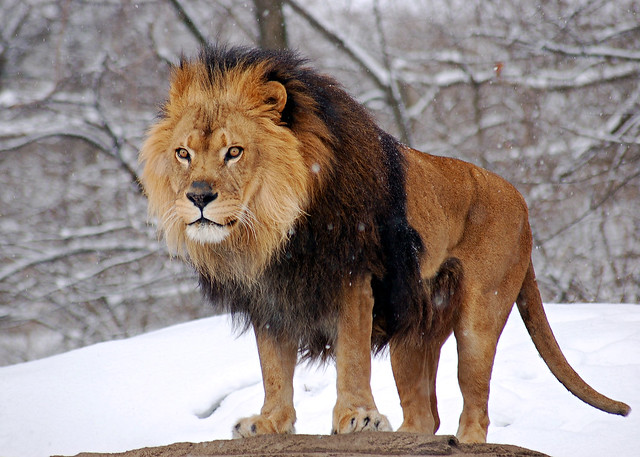
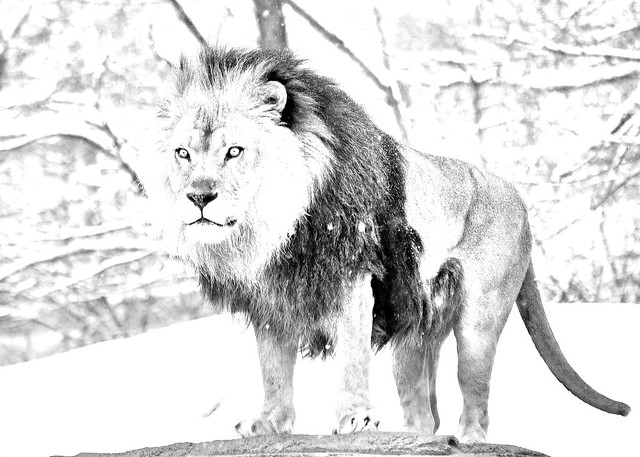
I was able to come up with one more assignment idea, Draw it! This one asks the students to take a picture, whether it be there or one from the internet, and get some experience with Photoshop by converting it into an image that look drawn.

I actually got the idea for this one from a previosu assignment that I did –  Da vinchi Invents the Kitchen Sink. When I worked on that assignment, it required me to figure out how to convert my chosen images into a format that looked hand drawn, which took me a little bit to understand how to do. That being the case, I decided to provide a simple tutorial on how to do this.

Tutorial for Photoshop:

1. Import the file you want to work with. (File > Open)

2. Now we want to make the image black and white. (Image > Image > Adjustments > Desaturate)

3. Create a duplicate layer ( Layer > Duplicate Layer)

4. Invert colors. (Image > Adjustments > Invert)

5.  Change the blending mode to Color Dodge. The layers pallet should be in the bottom right and will have a drop down menu (mine is originally on “Normal”)

6. At this point, the majority of the image will be white with a few black spots (maybe). Dont worry. Go to Filter > Gaussian Blur. From here you can just slide the Pixels bar to make it lighter or darker based on your personal preference.

My example:

Before:

Lion

After:

Photoshop converted drawing of a Lion