Getting to know the joker I found clips from “The Dark Night” on youtube and downloaded them. Once I did that I put them in order so the story makes some sense. I got the Jokers stories that he tells people in order.
Musicless Music Video It took me a while to find a video that I was able to download. iMovie has a lot of sound effects in the library already so I used those. I thought it would be funny to use a sound effect after that scene happens, it makes no sense but it was fun to do.
Why So Serious? When I was younger I was a big fan of Indiana Jones and Ace Ventura. One of the movies is somewhat serious and the other is comedy. This was pretty challenging trying to match up the mouths and the words. I cut the clip down a lot to make it seem like it was somewhat accurate.
I am me. I am Agent Reveal. I decided to use pictures to describe who Agent Reveal is. This is similar to the “Who is Agent Reveal” assignment, but this time, I am talking about who she really is, more personal things with some awesome guitar riffs in the background!
Instead of doing a character description on a character from a movie, I decided to do my character, Agent Reveal. I used clips from movies to describe what I do through video. I thought this was a cool assignment and really allowed me to show who my character was through other movies.
The movie that I decided to spoil was Passengers. I recently just watched it and after watching it I was disappointed. But, now that I reflect it was actually a really good movie. It was fun to guess why they woke up in the beginning and then become very shocked on why they actually woke up. If you want a quick run down on the movie, then here it is!
This assignment has you create a short 1-2 minute documentary about a certain person close to you. Most people did their western characters for this, but I wanted to try something a little fun. I chose my favorite character from my favorite video game, Dota 2, or Defense of the Ancients 2. Zeus, much similar to that of the Greek mythology, finds himself stranded on Earth as a mortal. The video should explain the rest.
Now I think the process was the most interesting part. Every character in Dota 2 is voice acted, with quite a few lines, so I tried to tell Zeus’ story only through his ingame lines. Most of the lines have to do with actual gameplay, so they weren’t too useful, but I think it turned out pretty great. Besides picking out voice responses, I plopped this Hymn to Zeus in the background, and added in some clarifying title cards.
In this assignment, you take a clip from a movie, and try to make it look like a film out of the silent era. This is usually accomplished by removing the sound, turning it black and white, and adding some sort of filter, while adding in background music and title cards. I chose the shootout from The Good, The Bad, and The Ugly, and presented it as an informational video produced by my character. He has had many odd jobs in his life, but now he can add video producer to the list.
This was a fairly difficult process. I first cut the clip out of the movie in Premiere Pro, and then spent time separating it for later editing. Most of the work was in After Effects, where I spliced sounds, audio, text, video, and pictures together to create the final project. I followed this tutorial, but it was still a lot of work.
For this assignment, you create a video montage of your favorite assignments that you have done so far. I decided to compile all of my assignments dealing with my character, Luke, and put them in one video.
First off, the music I chose is Ecstasy of Gold by Ennio Morricone, featured in The Good, The Bad, and The Ugly. I downloaded all the assignments I could feasibly put in a compilation video with background music; I excluded only a written assignment and my barbed wire commercial, but I gave it a nod with a picture of barbed wire and the logo for our western news show. I set each image after each other in Premiere Pro, got rid of any audio that might have been in the videos, and dropped Ecstasy of Gold in the background. I like how it came out, but I wish I had more character work to show.
This assignment is to create a video tutorial for origami. The original theme was halloween, but I decided to connect it with my character, crafting him a paper gun for when his trusty Smith & Wesson isn’t around.
I found how to make the gun from a tutorial online. Since I don’t have any proper stand for my phone, I had to wedge it under some books and have it look down at my desk to record it, which is why it’s vertical. I also had some stuff that the camera was capturing, like my keyboard, so I had to cut that out of the video. It recorded upsidedown as well, another thing which I fixed in editing. The origami itself is fairly simple, just requires one piece of standard paper cut in half.
For 4.5 stars this week, I completed the Mini Documentary assignment, and used it as a way to get a better glimpse into the life of my host character, Sally Slaughterhouse. It kind of acts like a trailer for a longer film, if I were to actually create an entire film about Sally.
To create this short film, I recorded Sally speaking, and also took some photos around campus that would look like no one was around. It was difficult to get shots where there were no people, but I eventually did it! I then used Movie Maker to put the photos and videos together. I added some transitions, beginning and end titles, and some panning action on the still frames. I also used a website called incompetech.com to find some royalty free music to add to the background. The music I used is called “Wounded” by Kevin MacLeod.
Overall, I think this is a decent piece of work for me, considering that I started completely from scratch! The audio quality could have been a little bit clearer, but unless you are using lapel mics or any other mic, you will end up with some white noise in thrown in there as well. After a while, hearing the same music over and over again as I was editing got kind of annoying, but I thought it added a great emotion to my documentary! Enjoy!
Don’t know how to complete the Chipmunk Style assignment? Look no further! Here is your step by step guide to creating and completing this assignment! You can also view my original post about this assignment and see the finished product!
You will first need to find a video that you want to edit. If you need help with this part, refer to the video resources page provided by ds106tales. Make sure your video clip is saved as an .mp4 file. Once you have your video, follow the steps below.
Using Audacity
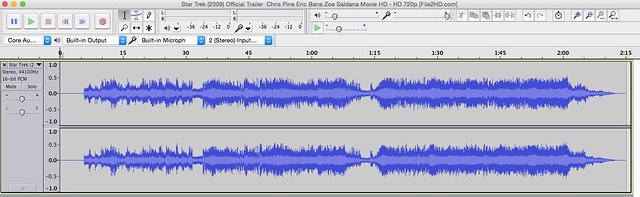
1. Open Audacity, and import your video clip. Audacity has the capability of reading audio from .mp4 clips, so make sure that .mp4 is the file type!
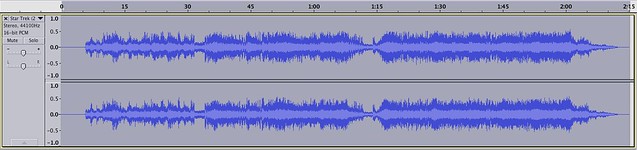
2. Click on the left side of the audio clip to select the whole clip. If the entire clip is selected, it should be a few shades darker.
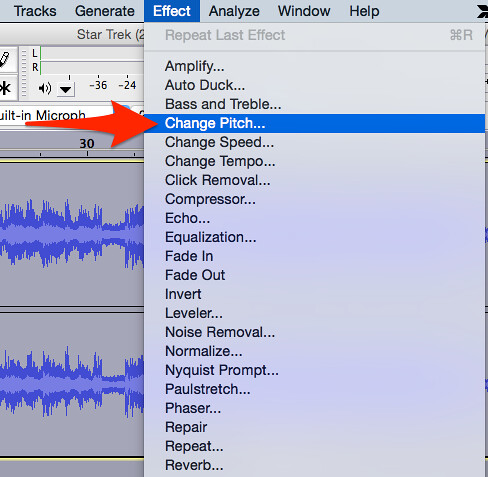
3. Click “Effect” then select “Change Pitch…”
4. A new dialogue box should open up, where you can choose how high or low you want the pitch to be. You do have the opportunity to preview the changes before you actually make them. It is up to you how much of a chipmunk you want the voices to sound. Usually 50% or higher sounds like a chipmunk. When you are finished, click “OK”.
5. When you are finished editing the audio, click “File” then “Export”. You will then be prompted to save the file. Save the file as .mp3 and somewhere where it will be easy to find, like you desktop. A Metadata box will then open. This information is not necessary, but feel free to add any information you want!
Using iMovie
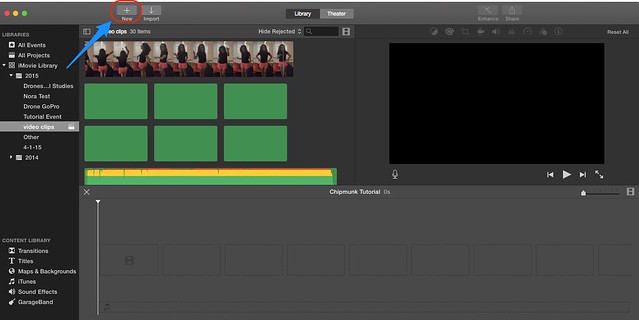
1. Open iMovie, and create a New Movie
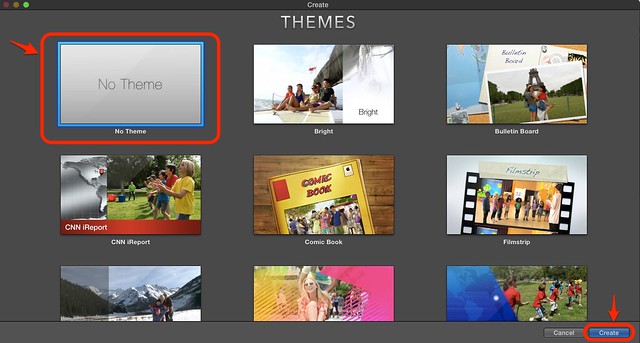
2. Choose “No Theme” then click “Create”. Name your movie something that you will remember/ something that is related to your project. Then click “OK”.
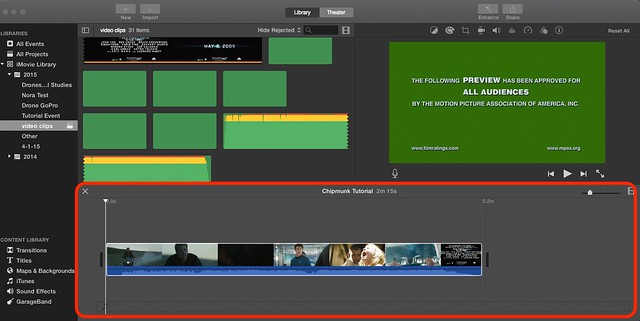
3. Click and drag you clip into the timeline on the bottom half of the window.
4. Click “Edit” then “Select All”. Your entire clip should be surrounded by a yellow frame.
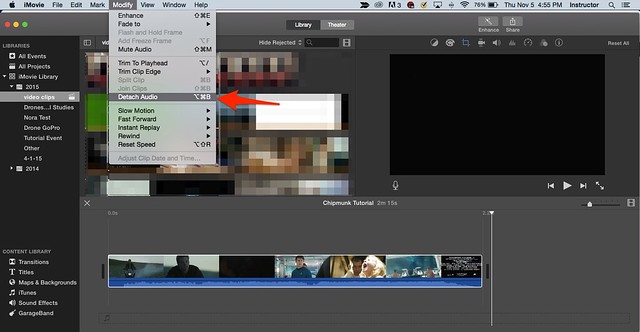
5. Next, click “Modify”, then click “Detach Audio”.
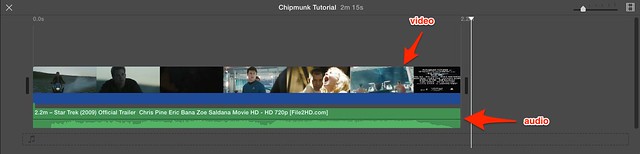
6. Your audio should now be separate from your video clip, and should appear as a green strip below the video in the timeline.
7. Delete the original green audio from your Timeline.
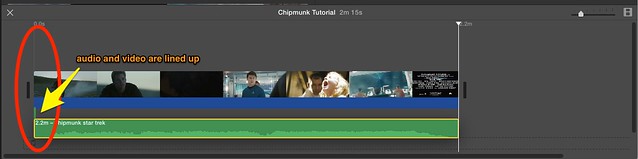
8. Locate the audio clip that you edited using Audacity. Click and drag that audio clip into your video timeline. Make sure that the audio starts at the beginning and is lined up with the video. Otherwise, the audio will not line up with the video!
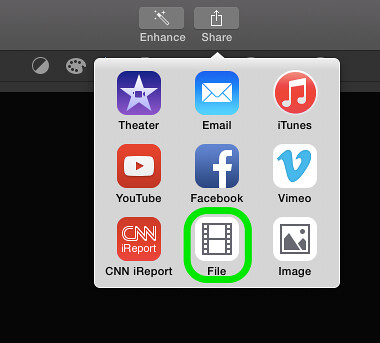
9. You can now preview your video before exporting it, to make sure that the audio and video line up. When you are ready to export, click “Share” then “File”. Save the file to your computer, and then you can upload the file to YouTube, or any other video sharing site. You do have the opportunity to upload it directly to YouTube, but I like to save it as a file on my computer, just in case something happens when uploading to YouTube.
10. Upload your video to YouTube, and viola! You have completed this assignment! Now for the blog post write up… Here is the final product!