How to Make Typographical Picture in Photoshop Elements 11
Photoshop Elements 11 has been a lifesaver for me in this particular class. It has many of the basic features of Photoshop so if you have that, you will probably be able to follow this tutorial as well.
First off I would like to credit eHow Tech for their video that really helped me get started on this project and learn the basics of typographical pictures.
Here is the blog post of my original typographical picture. The assignment is worth 4 stars.
To begin, create a paragraph of text in Microsoft Word in order to copy and paste it into Photoshop Elements 11.
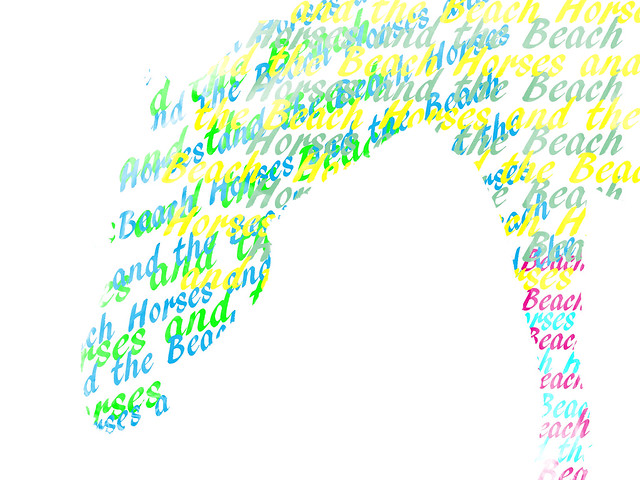
Since the photo I am using was taken at the beach, I used the words “Horses and the Beach.” Then open the photo you would like to use into Photoshop Elements 11.
If your photo is already black and white, that’s great! You will be able to skip this step. If your photo is not black and white, then you will need to go to Enhance –> Adjust Color –>Remove Color. This will take all of the color out of the photo quite easily.  Now that the photo is in black and white, use the Quick Selection highlighted in the toolbar below to select the unnecessary background.
  You can see below that I have everything other than the subject of my photo selected.
Now select the Paint Bucket tool seen highlighted in the tool bar below and make the selected area white. Also make sure to create another layer (it doesn’t need to include the photo).

Next go back to the paragraph you created in Microsoft Word and highlight and copy the entire text.

Then go back into Photoshop Elements, select the Text tool in the toolbar and paste the text onto the photo. Continue this process until the words have completely covered the subject.
This next step is optional but it does help if you want other to see the different words used instead of all of them just blending together. To color the text, double click on a text layer, go to the bottom toolbox and select the color you’d like to use. Continue this process until each text layer is a different color.

Next select each of the text layers. Then go to Layer –> Merge Layers. This will put all of the text into one simple layer.
Now select the layer with the picture, then go to Layer Effects right above the layers and select Screen. You should notice that your picture becomes lighter.

To make sure everything will work, the top layer should be the picture with the Screen effect, the second layer should be the merged text, and the last layer should be a white blank background.

Now you have a typographical picture! I do suggest picking objects and photos with very obvious shapes in order to get the best effect out this project.
Final Product