Chipmunking;

If you’re looking for how to speed up a video just enough, look no further! I am the expert at chipmunk style. It’s simple and quick, and quite funny when it’s done right!
To show you how, I will use a video I used for my own assignment. I used this video of Matt Smith’s best moments.


First, you’ll need to find a video and download it. Youtube is a wonderful plethora of videos to choose from! To download the video, I reccomend using Convert Files to download the video from youtube. It’s an online file converter, but it will also rip videos off of Youtube for free (unlike other software…Lookin’ at you, Youtube Downloader). I definitely recommend it for downloading Youtube videos.
After downloading the video, you need to open it in a video editing software. Windows computers come with Windows Movie Maker, so that is what I will walk through. After downloading the video, you need to open it in a video editing software. Windows computers come with Windows Movie Maker, so that is what I will walk through.
To start, open WMM and go to add media and find your video file. To start, open WMM and go to add media and find your video file.
Once it uploads, you may need to trim the video to a specific clip. For mine, it was a “best moments of” video, so I had to pick on singular clip. find the start point and hit “split.” Doing so will cut the clip, and then you can get rid of the first bit that is unneeded.

Tutorial 1.1.jpgTutorial 1.2
You’ll need to repeat this after you find the end of the clip.

Tutorial 1.4

 
To speed up the clip, click the drop down menu next to “Speed.” I recommend  1.25x to speed up because it is not too fast but still has that nice “chipmunk” sound to it.

Tutorial 1.5Tutorial 1.6


After speeding it up, preview the clip to make sure it’s what you wanted. When it is all set, go to File, Save Movie, and For Computer. This will save the movie in the format you want. From there you can upload and share it with all your DS106 family!

Tutorial 1.8


How To Chipmunk

Don’t know how to complete the Chipmunk Style assignment? Look no further! Here is your step by step guide to creating and completing this assignment! You can also view my original post about this assignment and see the finished product!

You will first need to find a video that you want to edit.  If you need help with this part, refer to the video resources page provided by ds106tales.  Make sure your video clip is saved as an .mp4 file.  Once you have your video, follow the steps below.


Using Audacity

1. Open Audacity, and import your video clip.  Audacity has the capability of reading audio from .mp4 clips, so make sure that .mp4 is the file type!

Chipmunk 6

2. Click on the left side of the audio clip to select the whole clip.  If the entire clip is selected, it should be a few shades darker.

Chipmunk 7

3. Click “Effect” then select “Change Pitch…”

Chipmunk 8

4. A new dialogue box should open up, where you can choose how high or low you want the pitch to be.  You do have the opportunity to preview the changes before you actually make them.  It is up to you how much of a chipmunk you want the voices to sound.  Usually 50% or higher sounds like a chipmunk.  When you are finished, click “OK”.

5. When you are finished editing the audio, click “File” then “Export”.  You will then be prompted to save the file. Save the file as .mp3 and somewhere where it will be easy to find, like you desktop.  A Metadata box will then open.  This information is not necessary, but feel free to add any information you want!  

Using iMovie

1. Open iMovie, and create a New Movie

Chipmunk 1

2. Choose “No Theme” then click “Create”. Name your movie something that you will remember/ something that is related to your project.  Then click “OK”.

Chipmunk 2

3. Click and drag you clip into the timeline on the bottom half of the window.

Chipmunk 3

4. Click “Edit” then “Select All”. Your entire clip should be surrounded by a yellow frame.

5. Next, click “Modify”, then click “Detach Audio”.

Chipmunk 4

6. Your audio should now be separate from your video clip, and should appear as a green strip below the video in the timeline.

Chipmunk 5

7. Delete the original green audio from your Timeline.

8. Locate the audio clip that you edited using Audacity.  Click and drag that audio clip into your video timeline.  Make sure that the audio starts at the beginning and is lined up with the video.  Otherwise, the audio will not line up with the video!

Chipmunk 9

9. You can now preview your video before exporting it, to make sure that the audio and video line up.  When you are ready to export, click “Share” then “File”. Save the file to your computer, and then you can upload the file to YouTube, or any other video sharing site. You do have the opportunity to upload it directly to YouTube, but I like to save it as a file on my computer, just in case something happens when uploading to YouTube.

Chipmunk 10

10. Upload your video to YouTube, and viola! You have completed this assignment! Now for the blog post write up… Here is the final product!


Tutorial 1 – How To Chipmunk Voices

This tutorial goes over one possible way to do the Chipmunk Video Assignment, which I found incredibly entertaining when completing it myself. It’s not a very difficult assignment with the right tools.

Before you begin, you need to have Camtasia 8 or later – I haven’t seen Camtasia 7′s interface and I’m not sure how different it is. The trial version can be found here. You will also need Audacity installed with the LAME plugin, or you might encounter weird behaviors in the course of making the project.

Camtasia lets you export just the audio in a project even from a screen recording, which is why it is such a useful program in this case – you can Screen Record the video clip using Camtasia, export the audio, edit it in Audacity, put the Chipmunk’d voices back over the same exact video track, and silence the audio from the original clip.

Here’s the step-by-step:

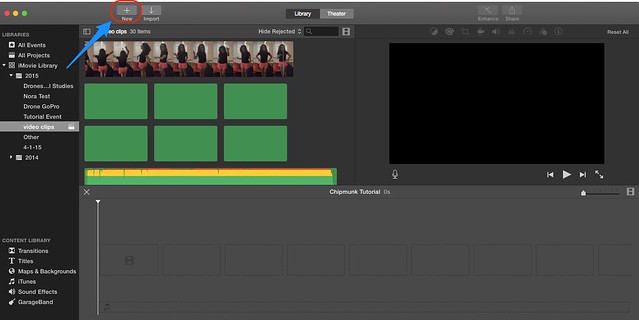
First, you open up Camtasia – it defaults to a blank format if you don’t open anything:

Screenie 1

Next, you pull up the video of the clip you want to record for Chipmunking in your favorite video playback software (I used CCCP) and put it on pause right where you want to start recording.

Then, go back to Camtasia and click on Record The Screen in the upper left-hand corner. This will instantly minimize the camtasia window and bring up an options menu for recording that looks like this:

Screenie 2

Next, you can click on the drop-down menu next to the “Audio On” button to turn off your microphone for the duration of the recording if you need to.

Hit the big red “rec” button, and Camtasia  will start a countdown to the recording start. Bring up your video that you want to record, full-screen it, and then let the clip run.

After you have recorded what you needed, stop recording by going back to the tooltip from Camtasia and hitting “Stop”. Camtasia’s full window will automatically pop back up after this. Click the “Save and Edit” button in the lower right hand corner that Camtasia now displays. Save your file with a descriptive file name.

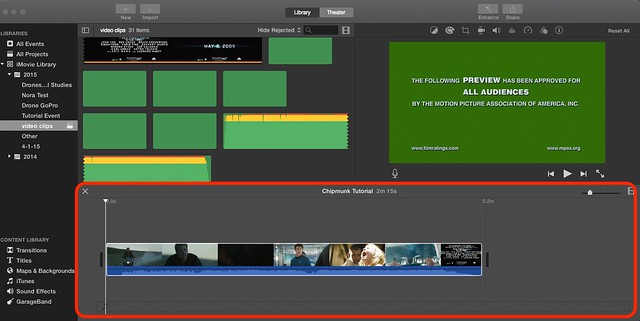
Once that’s done, Camtasia will automatically put the new clip into both the clip bin and the track window at the bottom of the screen and return to the main project. Edit your screen recording using the Cut or Split function so that you have only the video clip to be Chipmunked – likely, there is a little bit of extra video at both the beginning and end of your recording, since you needed to pause the video clip to be recorded before starting and stopping the recording. Mine looked like this after the minor edit, with the beginning at the exact point I wanted the Chipmunking to start:

Screenie 3

Next, in Camtasia, go to File -> Produce Special -> Export Audio As
and make sure you save it in the .WAV file format in the dropdown menu, as this is one of the only audio file formats Camtasia will recognize when you have to port the audio back from Audacity after editing.

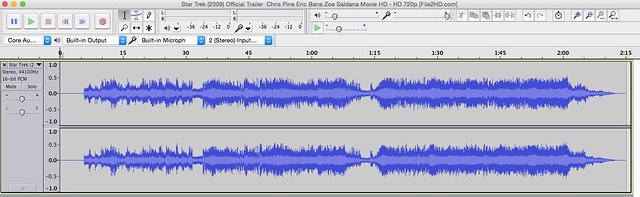
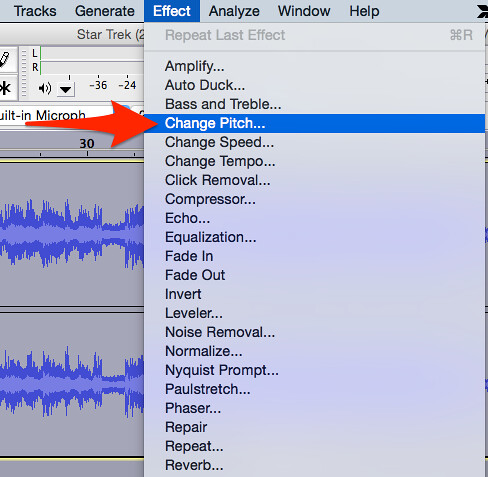
With your newly saved .WAV file in hand, drag it into Audacity’s editing window from where ever you saved it. Highlight the entire clip using Audacity’s Select tool. Then, go to Effect -> Change Pitch in the upper menu, and in the window that pops up from Audacity, there
will be a Percentage entry field. I upped mine by 40% to get the chipmunk effect:

Screenie 4

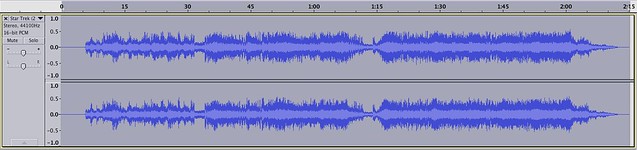
Listen to it to make sure it has the desired effect you want it to. Feel free to go for a higher or lower frequency depending on how much Chipmunk you want. Based on the sound track of the clip you’ve selected, the background noise besides character voices will sound a bit distorted.

Next, go to File -> Export, and export the file as a .WAV file once again.

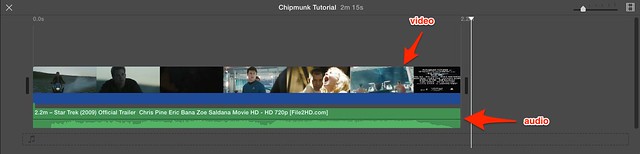
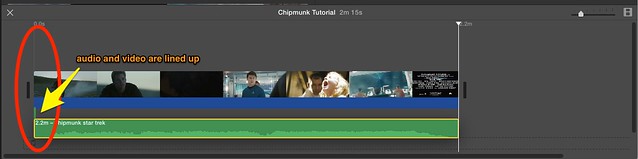
Back in Camtasia, click Import Media and browse to your new file with chipmunk voices. This adds it to the clip bin, where you can drag it onto the tracks. Once it is on a track, drag it all the way to the left of the timeline to line it up with your video. It should match the length of your video clip.

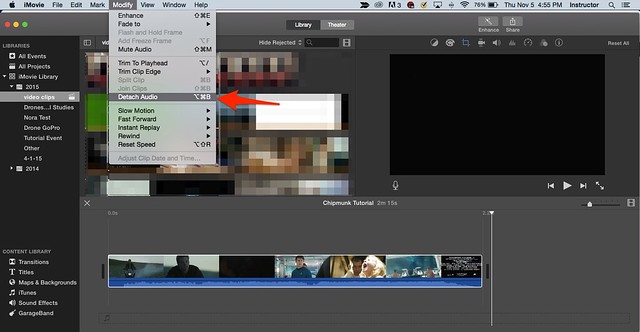
Next, remove the original audio if you haven’t done so yet by clicking on the track containing your System Audio, right-clicking it, and hitting Delete. This is usually the lowest track in Camtasia, and I have highlighted in red where it declares the track as System Audio:

Screenie 5

Play the new video back from the beginning to make sure you have your newly-Chipmunked scene.

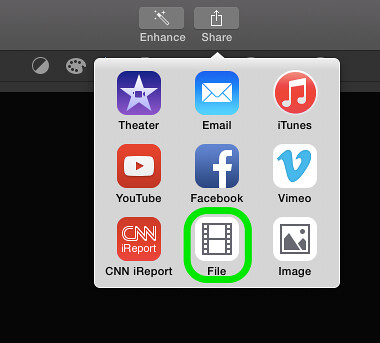
Click File -> Produce and Share, and select the format you want to export it as. For DS106, this is most likely a 720p MP4 file:

Screenie 6

When it’s done rendering, upload it to Youtube. That’s it, you’ve now got a nicely chipmunked scene. Thanks for reading!

- David

Chipmunk Style

Helium may be in short supply, but a little digital tweaking can still leave your favorite actors sounding like the Chipmunks. Take a clip from a film and either speed up the action or raise the pitch on the audio track for some high-pitched laughs.

Examples:
http://www.youtube.com/watch?v=ps0bzgVLSQk 
http://www.youtube.com/watch?v=wWRSvJJ7F00
http://www.youtube.com/watch?v=HCXuTqpM0ZQ