Ever wonder how you’d look like as a drawing? Wonder no more! Turn your basic pictures into drawings in 4 simple steps.
Start by going to picmonkey.com and clicking “Edit a photo”
Next upload a picture to revamp by selecting “open” and choosing one from your computer or which ever other source you prefer.
Once you have your picture selected, click on the effects icon.
Scroll down to the “Edge Sketch” filter and apply it. You can adjust the intensity and color of the drawing. I stuck to a plain drawing but add a little color and you have a color pencil creation!
Thats it ! Pretty simple. In 4 steps you have a whole new picture! You may even try printing some images like these and making a coloring book out of them. Unique and fun !
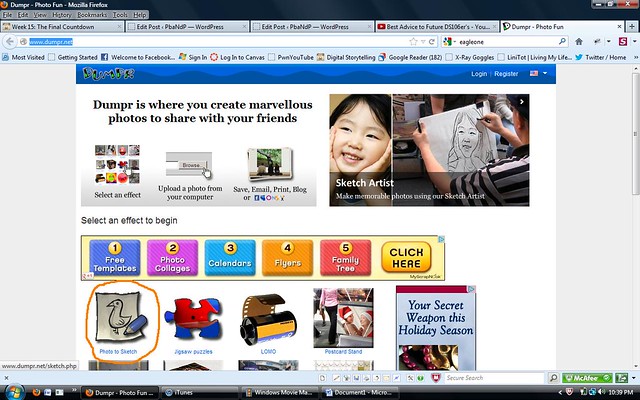
So for this tutorial all you have to do is pick a picture that you would like to change so it looks like some one drew it. First select a regular picture. Then in your search engine type in the following: http://www.dumpr.net/. Here is the link to that website dumpr. Click on photo to sketch like in example 1. Then the site will take you to their next page where you upload your picture.Upload the picture and the program will change it to make the picture like you drew it. Then right click on the picture and save as the new draw it picture on to your computer. It’s a simple and easy program.
Welcome to my DS106 Tutorial on how to create a drawing! If you’re unfortunate, like myself, and don’t have Photoshop, don’t sweat it. This quick tutorial is going to make using GIMP as easy as possible for all you new DS106ers! Now most of you may have clicked this by going through the “Draw it.” assignment and seeing the tutorials…So you must be aiming to get the 2 stars for the assignment, woohoo!
I also did this assignment, A Man and His Dog, and understand the frustrations of using GIMP and other new programs. The Internet is a big help with answers/tutorials, which also helped me with my own assignment. So relax, take a deep breath and get ready to draw!
(If you can’t wait to read and just want to follow pictures, here is a slideshow of the tutorial)
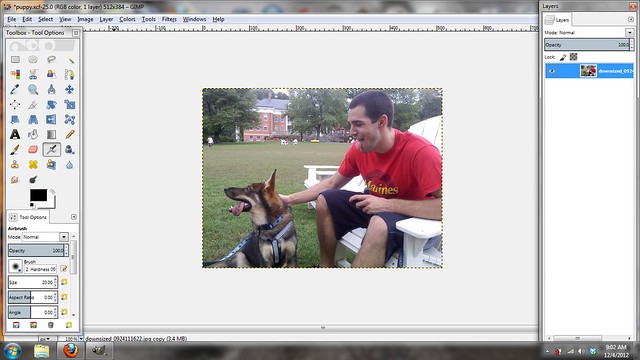
Step 1 – Start with a picture. It can be a picture of ANYTHING! That’s the best part about art, you make what YOU want! Open the picture up in GIMP.
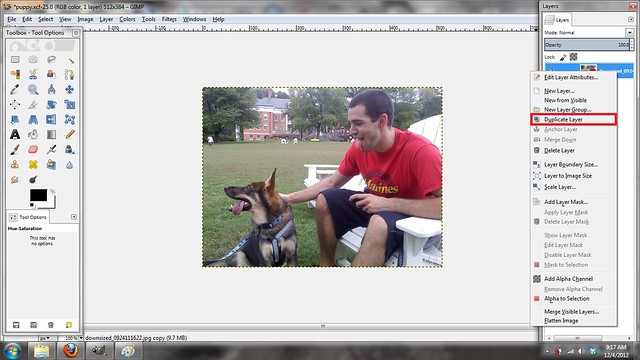
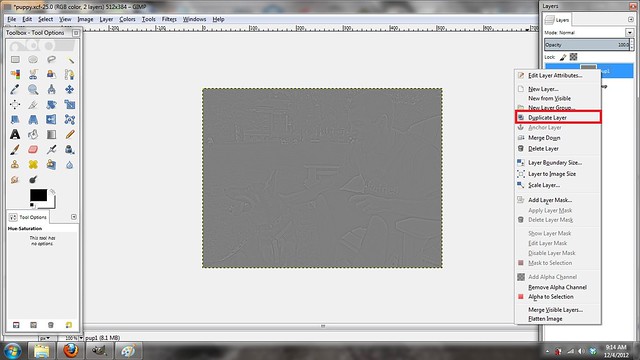
Step 2 – Duplicate your layer. You can do this by right clicking on the layer in the layers window and then clicking Duplicate Layer. This is a good practice because you will always have your original photo and won’t edit over it by accident. I learned my lesson in my old Photoshop/high-school days!
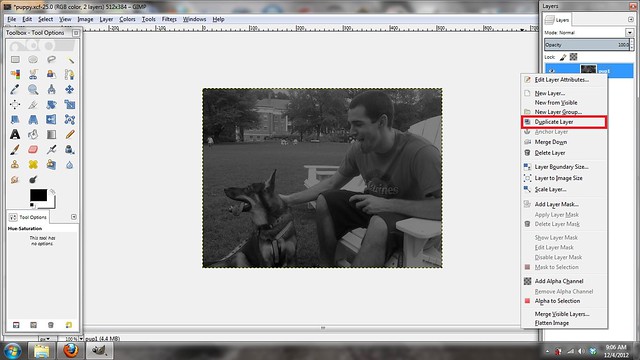
Step 3 – Make sure that you have your new copied layer selected in the Layers window, and then proceed to go to Colors on the toolbar. After the dropdown, select Hue/Saturation. A new window will open and you will want to drag the Hue/Lightness/Saturation bars all to the left. This will result in a seemingly black/gray image.
Step 4 – Just like in Step 2, we are going to Duplicate the black/gray layer from Step 3.
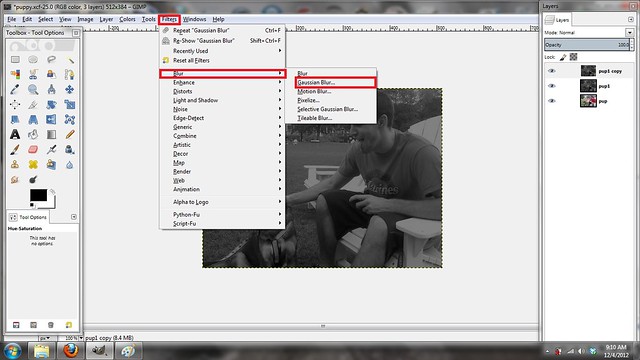
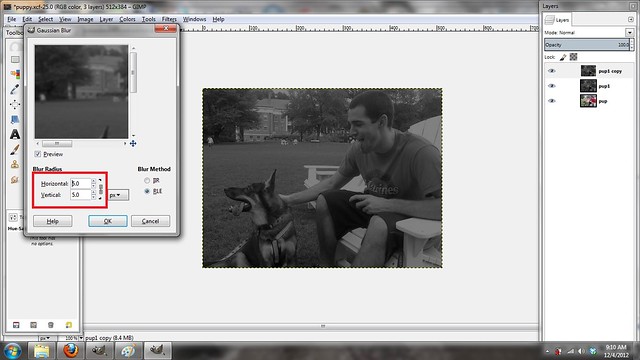
Step 5 & 6- Making sure you have your newest copy(should be the top black/gray layer) selected in the Layers window, go to Filters, down to Blur, and then select Gaussian Blur. This is just a generic blur that I used. (If you wish to play around with GIMP or your drawing assignment, select another blur and see what you get!) A box will appear and you will want to select how much of a blur you would like to apply. I chose 5, but once again, you can get creative!
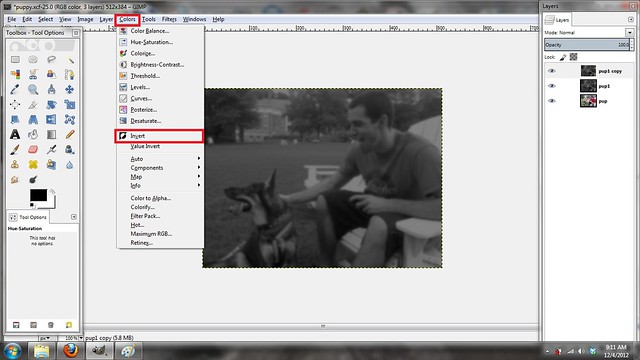
Step 7 – Continuing to use the same layer, go to Colors. Then choose Invert.
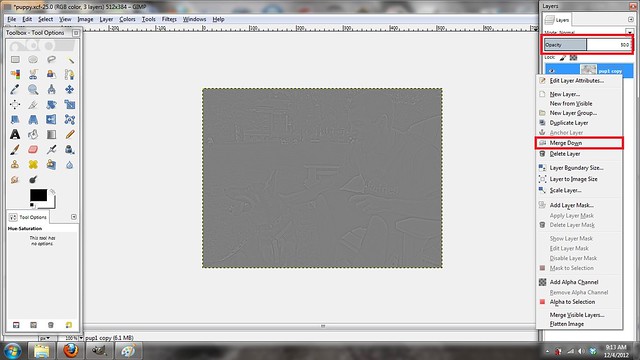
Step 8 – After you invert, you need to change the Opacity of that layer to 50%. This is located near the top of where your layers are located. Once you change the Opacity, you will then right click the layer in the Layers window and choose Merge Down.
Step 9 – Great, now you have a gray blob. What do you do with a gray blob?? Duplicate that layer as you have done with previous layers.
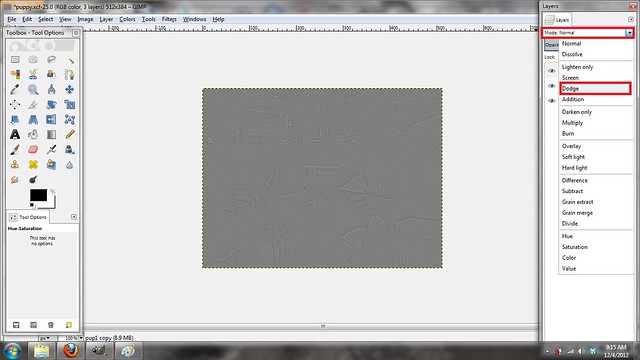
Step 10 – Lastly, go to the top of your Layers window. With the newest copied layer selected, change the Mode to Dodge.
This should result in a “drawn” looking image! Congrats on receiving your 2 stars! Now go blog about your creation and don’t forget to mention me! On my final image, I wanted it to have sharper edges and more “drawn” looking qualities, so I played around in GIMP until I was satisfied. Have fun creating!
For my first Visual Assignment for this week, I’ve decided to do Justin Baker’s Draw it. “Take a photograph of something and transform it through GIMP, Photoshop, etc, into a drawing.” I also decided to attempt to also make it a tutorial! (:
My first thought when I saw the criteria for this work was, “I really want to make my “drawing” look like something out of a comic book.”
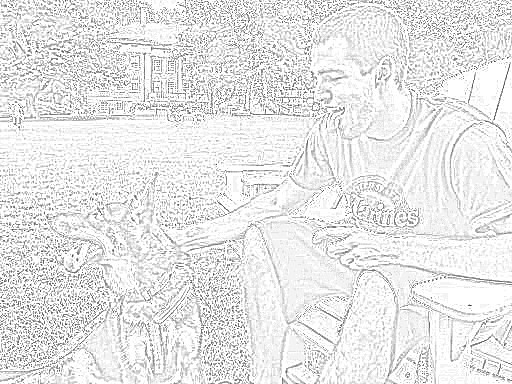
I started by looking through the photos on my computer and decided which photo would look amazing as a sketch. That’s when I came across this photo of my neighbor Nick! And I knew THIS was the photo I was going to work with! I pulled up the photo with my basic computer editing software which came on the computer when I purchased it, I hit the “draw/sketch” icon and BAM there it is. I also decided to mess with the contrast and color options to make the photo drawing more effective! (: This activity was fun and easy. I just used the basic software from my computer and transformed my photo into a drawing. This assignment was worth two stars (:
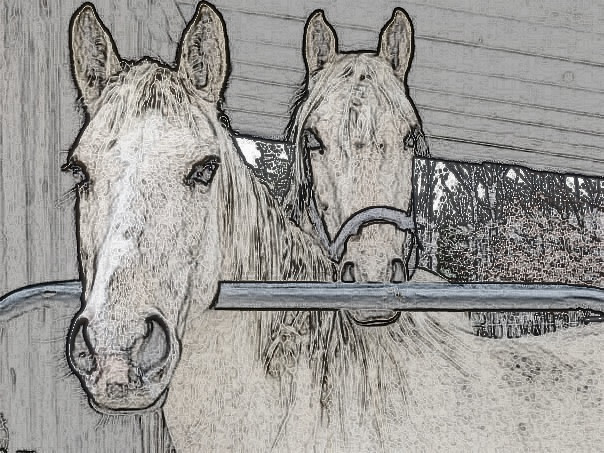
This is my assignment and tutorial (using GIMP) for the 2 star Visual Assignment, Draw it. I hope you find it helpful!
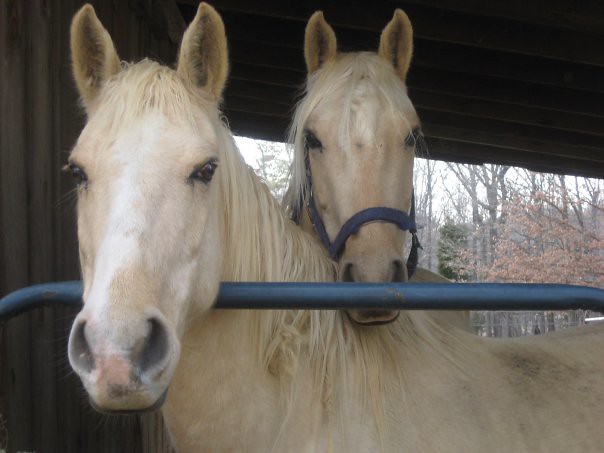
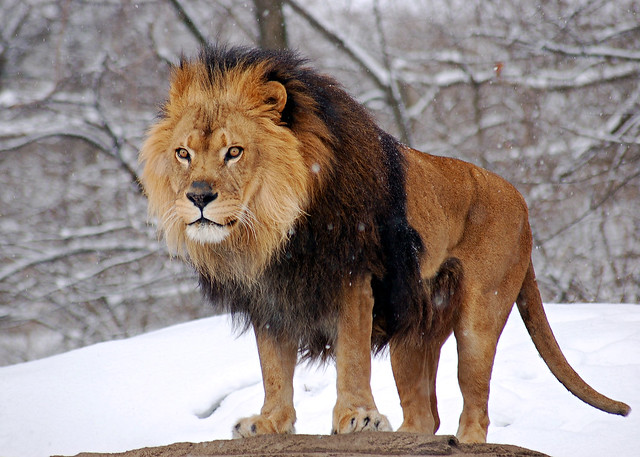
I used GIMP to transform a photo of my horses into a sketch!
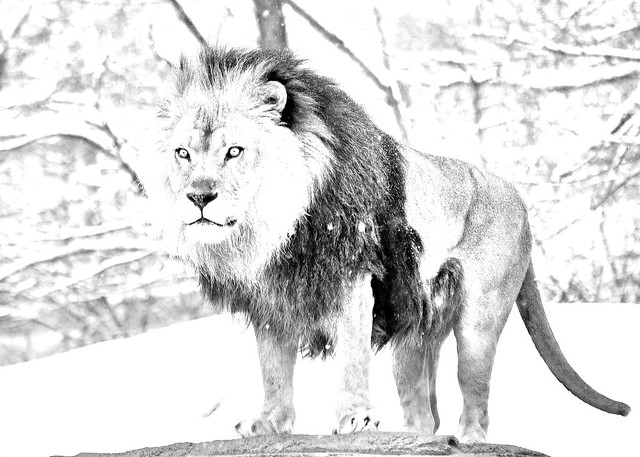
First, open gimp and drag the photo you wish to use into the GIMP screen. Now click “duplicate layer” under the “Layer” tab.
Next go to the “colors” tab and choose “desaturate.” (When the dialogue box pops up choose “lightness” and click “ok”) All color should now be gone!
Like this:
Now click on the “filters” tab ? “edge-detect” ? “edge”
Once you do this, a window will pop up:
You can play around with the Algorithms if you’d like. I chose Prewitt Compass. (They are all about the same) When you choose the algorithm you want click “ok”
Now your screen should look something like this:
Looks creepy I know! But we aren’t done quite yet!
Next, you need to click on the “colors” tab and then “invert”
And you get:
Yay! Much better!
Now if you want to take it a step further and add a little bit of color:
Go to the “Layers-brushes” window…
Now make sure the layer you manipulated is selected and lower the opacity from 100% (I lowered mine to about 70%)
I was able to come up with one more assignment idea, Draw it! This one asks the students to take a picture, whether it be there or one from the internet, and get some experience with Photoshop by converting it into an image that look drawn.
I actually got the idea for this one from a previosu assignment that I did – Da vinchi Invents the Kitchen Sink. When I worked on that assignment, it required me to figure out how to convert my chosen images into a format that looked hand drawn, which took me a little bit to understand how to do. That being the case, I decided to provide a simple tutorial on how to do this.
Tutorial for Photoshop:
1. Import the file you want to work with. (File > Open)
2. Now we want to make the image black and white. (Image > Image > Adjustments > Desaturate)
3. Create a duplicate layer ( Layer > Duplicate Layer)
4. Invert colors. (Image > Adjustments > Invert)
5. Change the blending mode to Color Dodge. The layers pallet should be in the bottom right and will have a drop down menu (mine is originally on “Normal”)
6. At this point, the majority of the image will be white with a few black spots (maybe). Dont worry. Go to Filter > Gaussian Blur. From here you can just slide the Pixels bar to make it lighter or darker based on your personal preference.
Take a photograph of something (If you take a picture from the internet, make sure to be nice and cite the original) and transform it through GIMP, Photoshop, etc, into a drawing.