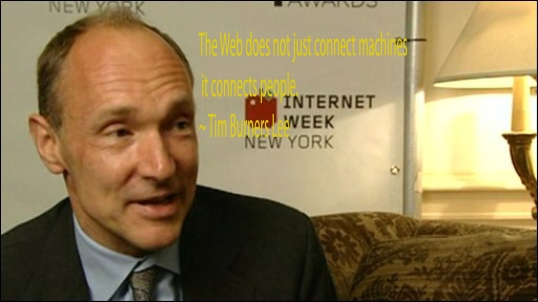
Did you ever wake up in the morning, and say:
“Man, I’m so grateful that the world wide web exists! What would I do without it?”
Well, if so, the vibrant guy in the picture above, Tim Berners-Lee, is who you should be thanking!
Hmm, wait a minute. This guy was knighted by the Queen of England, right?
Better make that Sir Tim Berners-Lee instead! (According to Wiki, the rank he was giving was Knight Commander of the Most Excellent Order of the British Empire)
Compared to the old days, it must have gotten a lot easier to become a knight considering all he had to do was invent the web!
Anyways, since I guess he is kind of like royalty now, how about we go ahead and give him the Royal treatment? The Royal Photoshop treatment of course!
With that being said, I’m going to go ahead and give you guys a really really simple tutorial on how to use filters and a few other tricks in Photoshop to get any picture looking like the one I posted above!
Okay, so first lets start off with the base picture. I got this photo. from this wiki in case you want to use the same picture to practice on.
Lets start up by opening the file in Photoshop. Your screen should look something like this:
<Reg Pic Begin>
Next, go to your layers window and right click on the layer named “Background” then click on the option “Duplicate layer”. For this tutorial, let’s duplicate it twice. When you’re done, your screen should look something like this.
<SS after Double Duplicate layer>
After that, select Background copy 2 to work on simply by clicking it in the layers window. Once you’ve done that, click the drop down Filter menu at the top of the screen and select Filter Gallery. (For those of you using older versions than Photoshop CS3, you may have to manually select the type of filter you want to use instead of using the Filter Gallery.)
Your screen should look something like this once you select Filter Gallery:
<SS of filer gallery menu>
Once the filter gallery is open, simply select the type of filter you wish to apply and (for the sake of brevity) experiment with the filter options using the sliders on the right side of the window. Each filter is unique so try out each one to see what you like the best!
As of right now, your window should look something like this depending on what filter you chose:
<Picture of bc2 changed>
For our next step, lets go back and try doing what we just did with the remaining layer. Once both layers have been modified with filters, it should look something like this:
<Both layers filters applied>
Now we’re ready to do a little magic with our handy-dandy quick masking tool! Select it by clicking on the (circle in the rectangle) icon in your tools menu box.
<cropped photo of masking icon>
Once selected, you should see your background colors automatically switch to black and white. This is important, as the color black in quick masking mode selects the areas you want to work with when you exit quick masking mode. The color white, on the other hand, is used for removing the mask, so to speak.
Applying the mask is easy. Just select the layer you want to work with, your paintbrush tool, adjust your brush size, opacity, flow, etc., to your liking and then click on the areas you wish to mask. Again, if you make a mistake, just select the color white and paint over the area you wish to undo. (Or..press ctrl+Z to undo your last action)
Oh, and for those really unfamiliar with layers, remember that the layer on top in the layers window is the first and most visible one. Just think of layers like paper, and in our example there are 2 pieces of paper. Background and Background copy. Background copy is the one on top of the pile, with the layer Background on the bottom.
The masked areas should appear red, and your screen by now should look something like this.
<Show masked area pic>
At this point you should exit quick masking by clicking on its icon again in your tools menu. Next, click on the eraser tool and then use it inside the selected area to uncover parts of the layer underneath. Your screen should look along these lines once you do:
<Layer Mask Erased>
After you familiarize yourself with all the steps up to here enough, from here on you should try and make an even more amazing multi-layered, multi-filtered picture on your own!
Here is my final image after making more layers and applying different filter effects.
<Final Image>
…and that’s all folks!
I hope my (very first) tutorial helped you out at least a little bit and many thanks for giving Sir Tim Berners-Lee the royal photoshop treatment with me! Feel free to leave a comment and if you can, tell me what photo-editing software you use (include the version please)!
Thanks and good luck!


