Pods Embed Error: Pod not found.

My Exquisite Corpse

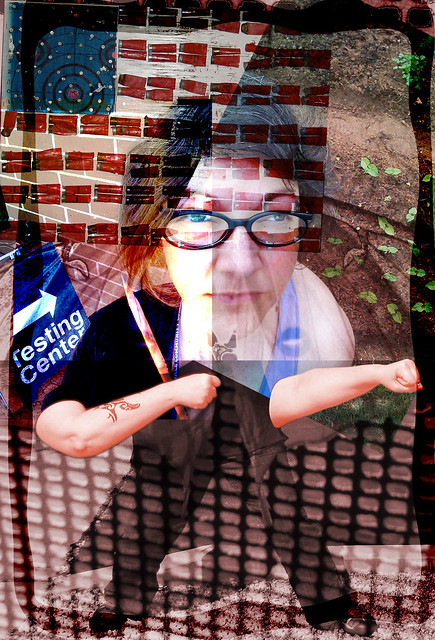
Exquisite CorpseThis is an exquisite corpse made up of different images representing important parts of my life over the last several years. It represents my development over about the last four years. Among other things, I started growing my own food, sold my first piece of art, and tested my resolve by earning an associates degree (finally) (long story). I went through different photos taken of myself over the last few years, mostly self portraits. I also included a moth sitting on a net as a sort of overlay – it represents my continuing transformation between different states of being.

I submitted this as a #ds106 design assignment. This is something I assign to my ART100 students, and I ask them to make it say something about them. Check out their examples. It can be a really fun thing to do. Take pictures of yourself, or your family, or even each other. You can also mix in objects, like metal parts, tools, natural objects, animals, even sketches. Use an image editor to mash up the body parts and objects, etc. Let it say something about your identity. Heck, use it as your avatar. You can make it as goofy or deep as you want.

Hope you like mine.

Oh, yeah, you can get help with the technical details from this great open source textbook that I use with my class, Digital Foundations: Intro to Media Design with Adobe Creative Suite. What you want is Chapter 9, which walks you through step by step with pictures. My link goes to Exercise 3, which is where the Exquisite Corpse instructions start – you’ll just have to ignore the bits about the double exposure layer they have underneath their body parts. Or you could scroll up to Exercise 1 and add the double exposure into your mix. I hope you try it. It takes some time but I think the results can really be worth your while.

An “Average” Day with DS106

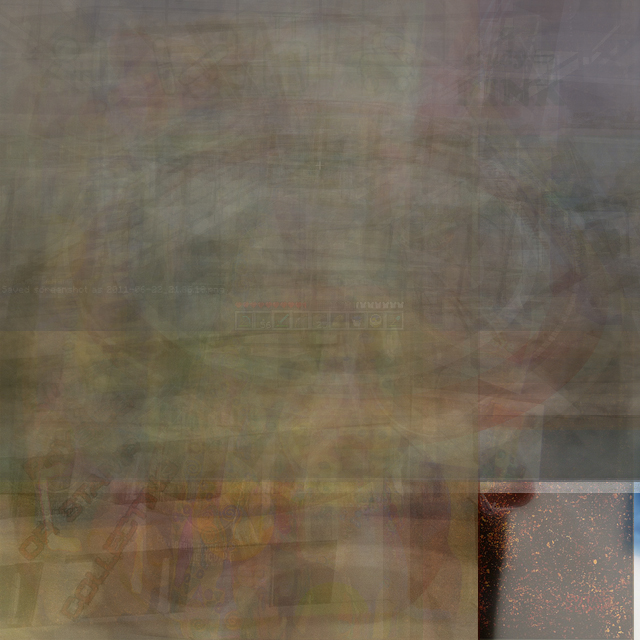
averaged composite of colors taken from 50 recent ds106 images on flickr.

For those that have been sending me tweets, e-mails, voicemails, and carrier pigeons trying to figure out what exactly ds106 is……I’m sorry. It really can’t be explained.

That’s not to say I haven’t tried! However, the sheer preponderance of ds106 means that describing a typical day of one’s participation involves explaining the use of no fewer than 5 pieces of desktop software, twitter, blogging, youtube,  streaming internet radio, and live TV broadcast via the internet. I’ve tried the very conservative approach with colleagues:

ds106 is a digital storytelling course, where we get to experience using a bunch of different tools like Photoshop, iMovie, and Storify to tell stories.

Honestly, that answer gets the most nods of understanding from people, but it makes me weep a bit inside every time I say it. So to those a bit more savvy when it comes to technology I can comfortably tell them:

ds106 is an exploration of story telling, media design, and the influence that creativity and design has over our lives and attitudes.

That’s a much more pleasing answer to convey, and it usually does a pretty decent job of expressing to those that are more experimental with technology that ds106 is more of a test-bed for media interaction and creation, not a primer. Still, it doesn’t get to the very core of ds106. At it’s heart, ds106 is an amalgam of ideas, emotions, connections, and community. Imagine if you were, to take a snapshot of all the wonderful moments in your life from the previous year, mash them together into one hazy, swirly image of contentment, and that’s actually what ds106 is all about. Whether it’s the active role playing that occurs heavily within the course, or the incredibly awesome tutorials for creating pretty things with computers, ds106 is all things to all people. It’s not just what you put into it, but the connections and familial feelings of fondness and fraternity that come with going just a bit too far down the rabbit hole with an amazing group of highly creative individuals.

ds106 is a way of life…..a lens with which we perceive the world around us, and while I would LOVE to explain it to you, I can’t; you have to experience it for yourself (although some of you most likely already have without even participating in the course). There’s nothing “average” or typical or regular about the way ds106 takes shape, it is what it is, each and every moment of the day.

Reimagined Road Sign Tutorial

I know we are past the visual assignments week in #ds106, but since I submitted the Reimagined Road Signs visual assignment, I should provide some how to. I am also using this post to submit my fourth visual assignment, which I didn’t finish yesterday because I was packing for a month in the UK.

The assignment description is:

Reimagine the scene in a road sign. What is going on outside the iconic depiction in the sign itself? Find a road sign image online or photograph it yourself. Redraw it to show the rest of the scene you imagine, and show us the before/after on your blog.

Before

After

after

Credit: To create the finished version I used Photoshop and Illustrator to create a mashup of my original photo plus Michael Jackson Silhouette by munchester2cool.

How To

Illustrator purists get annoyed with me for showing anyone how to use LiveTrace, but I don’t care, I think it’s a really useful alternative when you just need to get a quick and dirty vector image. I suggest you don’t rely on this technique as a crutch though, because you can make much cleaner paths by working with the Pen Tool, and it is well worth learning. Also, LiveTrace does not work well in all situations, but for this assignment it is nearly perfect.

Watching the YouTube version is your best bet; it should look good played at full screen (especially if you switch up to 720p). The QuickTime version is included for anyone who subscribes to my podcast via iTunes.

So, this tutorial should be useful for either the Reimagined Road Signs assignment or the Four Icon Challenge. Anytime you want to make an icon actually. And it covers:

  • Advanced image searches using Google (to find images licensed for reuse)
  • Illustrator: LiveTrace for pasted or placed pixel-based graphics, Rotate, Erase tool, working with Layers
  • Photoshop: Quick Select and Magic Wand tools, Threshhold adjustment, Transform (skew) tool
  • And much more!

I hope this has been useful. Your feedback on the tutorial would be awesome. Share and enjoy!

Have You Seen This Man?

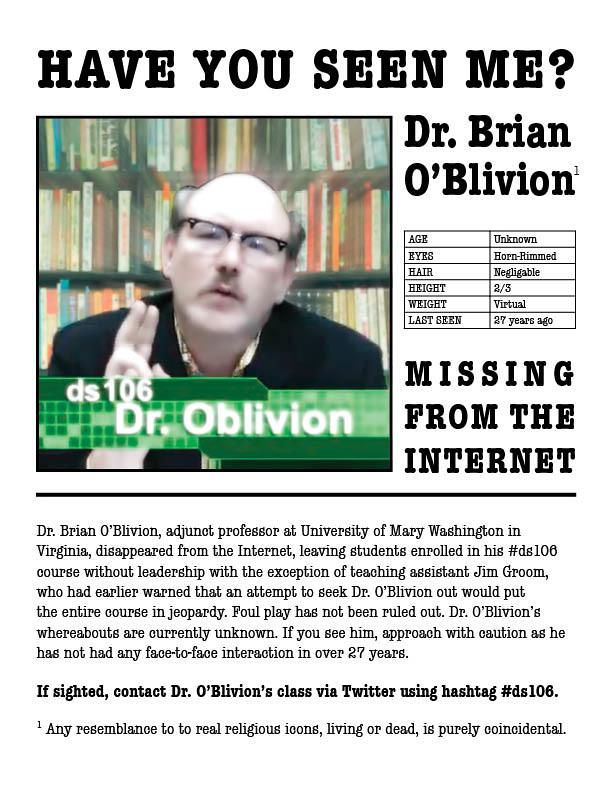
Have you seen this man?

Please download and print this flyer (PDF) and post. The #ds106 course must go on.

Update (June 23, 2011 8pm MST):

I noticed earlier that Teddy Broosevelt appropriated the image I made for this poster design in his design assignment. Now that’s fine with me, but I noted I would appreciate credit for the inclusion of my work. But of course I can’t escape how that immediately made me a hypocrite since I didn’t acknowledge the video from which I pulled the still image of Dr. O’Blivion in the first place.

And that reminded me that I need to also include my process when submitting assignments. At least that’s what I think Dr. O’Blivion would have wanted.

So here is the video still attribution:

This poster features a video still from “Dr. Oblivion Day 3 Broadcast” by timmmmyboy, available under a Creative Commons Attribution license.

Now for my process

I played back the video from YouTube and used the full screen playback option. When I found the still image I wanted, I paused and took a screen capture by pressing COMMAND + SHIFT +3 on my Mac. I took the screengrab at full screen because my monitor is pretty large and this gave me more pixels to work with, even though they were at low resolution and had been stretched to fit my screen. I selected this particular frame of video because Dr. Oblivion’s pose calls to mind the myriad portraits throughout art history depicting scenes of benediction. I thought it would be fun to play with that idea.

Next I opened the screengrab in Photoshop and cropped it to a square image. I made several copies of the original image on new layers. I took some time with the pen tool to create a mask that isolated Dr. O’Blivion and the lower third from the rest of the image. I applied different filters on  different layers.

I added a radial blur with a zoom to the background books. Then I set that layer’s blending mode to Lighten to give the impression that Dr. Oblivion is actually emanating light, like a halo. I applied a Distort > Diffuse glow filter and used the mask to isolate the glow to the Doctor, again supporting the idea that he is somehow glowing. I added a gaussian blur to yet another layer to soften the books and make them recede more into the background. I used a brightness/contrast adjustment layer to enhance the still image contrast a bit, since some of the filters I employed started to make the image look faded.

I mixed the layer order and played with blending modes and opacity until I got more or less what I wanted.

I guess I didn’t write about this before for two reasons. First I kind of wanted to see if anyone would pick up on the benediction idea since I didn’t make it extremely overt. Second because I want to play with the idea more in light of the tone of some of Dr. Oblivion’s tweets and micro blog posts.

Anyhow, I hope I have now righted my own hypocrisy. I think it was obvious that I used a video still but I should still attribute the sources I include in my mashups so as not to present the work as though I made it without the benefit of the efforts of my fellow learners.

I Present to you…

….. my final DS106 video project.

I had previously decided to do the Movie Trailer Mashup, but the idea of putting together scenes from a series of the same movie intrigued me even more. So what I’ve done is taken the 5 trailers of the Final Destinations movies, took scenes from the trailers and put together one trailer, and added the Saw theme music in the background. I was definitely trying to give it the epic look. I then submitted this type of assignment on the DS106 website. This took time and effort, and was definitely challenging. Windows Movie Maker/Windows Live Movie Maker… -___- . Just frustrating, not many editing options, but I put my mind to it and got it done! I also had a tough time because I accidently saved it as a WLMP file, which didnt work and I thought my hours of editing had gone to waste, but some helps from friends and some googling around did the trick. I really hope you guys like. Feel free to comment.

Without much further ado:

Digital Creations Compilation

For this video assignment I combined some of my favorite creations from the class so far into a video compilation. It’s a little bit of a mashup too. I added music to some of the visual assignments and I mashed up the Flickr version of my story “Running Shoes” with the sound effect story redux. I hope you like it and I hope you’ll give it a try.

Play Video

Credits

Images:
captureme45
ahappyjaffee
dustyzeigler
Intrepid Flame
nagahamaa

Audio from freesound.org:
16422__agarwal.parag__Shhhhh.wav
19825__tommorawe__Pfiff_whistle.wav
24965__mich3d__BigDogBarking_02.wav
29600__dude3966__footsteps_1.wav
31255__ERH__door_1.wav
34153__nas1__dog_running.wav
34878__Sruddi1__WHINE1.wav
52086__mudflea__dog_pulling_ring_on_a_sock.wav
52203__sentryx86__Squeeky_Toy.wav
54779__bevangoldswain__running_hard_surface.wav
65601__becks77__rocco_russa.ogg
88774__pierrecartoons1979__Oh_No_.wav
94732__ttiimm54__door_slam.wav

Songs:
“No Sleep Tonight” by The Faders
“One Shot” (Starsmith Mix) by The Saturdays
“Friday” by Rebecca Black

DS106 Radio (Not Really) Live Show

Welcome to another episode of Pimp My Class. Click the link to listen. Tonight’s show will take you back to old school storytelling. We got a letter from Anna in Cave Creek who wanted to know if there were simple audio tools to use in the classroom for storytelling. Why yes, Anna, let’s Pimp Your Class with some easy to use audio tools.

Assignment Description: Come up with an hour-long, themed show for #ds106 Radio that you both conceptualize and produce, then deliver on-the-air live over. It can be an ongoing show, or a one-time affair.

So I’m taking a stab at radio show hosting. Someone be sure to tell me to keep my day job. I created a radio bumper, 3 mini commercials all rolled into a 5 minute episode of a show I created called Pimp My Class. I recorded in Audacity and added a few sound effects and StackTraxx music which I have a license for.

Links for tonight’s show:

Transcript:

You are listening to ds106 radio with soul4real broadcasting live from Phoenix, Arizona.

Welcome to another episode of Pimp My Class. Tonight’s show will take you back to old school storytelling. We got a letter from Anna in Cave Creek who wanted to know if there were simple audio tools to use in the classroom for storytelling. Why yes, Anna, let’s Pimp Your Class with some easy to use audio tools, but first…

Old school storytelling is all about the story and the storyteller. A good story was conveyed through words, and often by improvisation or embellishment.(Much like I’m doing now) Stories have been shared in every culture as a means of entertainment, education, cultural preservation and in order to instill moral values. The same is true today, but storytelling has certainly changed. Today’s storytellers have so many other tools other than the spoken word or movement of the body to convey the story. Today we have endless types of media, including a ton of Web 2.0 tools that can create everything from a still photo to mashups of video to help us tell a story. It can all be quite over stimulating. However, there are many purists still out there that believe storytelling should be only about the narrative. Just sit down. Unplug. Listen. Just like in the old days when we would all gather around the radio to listen to an episode of the Lone Ranger. SCRRRRRR! Okay, okay. Yeah, I wasn’t alive in the 1930’s, and I’m not buying this purists crap either. Gimme a good old fashioned Web 2.0 created story any day. In fact, let’s get right down to my top 3 super techie story telling audio tools.

First is AudioBoo. There’s nothing better than telling a story around a picture, but who has time to take a picture, go home, transfer it to your computer, pretty it up, and then upload it to the web? Then you’re only half way done. You still have to record the story. Back up there a sec. Snap a picture with your fancy smart phone, open up your AudioBoo app, record your story about the picture you just took, attach the photo and send the whole thing to AudioBoo with the push of a button. AudioBoo then posts your story for the whole world to see and hear just like magic. Truly awesome sauce, don’t you think?

Okay, number two on my list is iPadio. Again, who has time for old technology. That would be desktop computers and uploading photos and stories to the web, in case you forgot. iPadio is another tool that lets you use your mobile phone to create audio. iPadio gives you a toll free number to call, so just dial the number and start telling your story. When you’re finished, hang up and your show is live on the web. In fact, if you wanted to actually be live, you can do a live storytelling broadcast. Totally rad, right?

Finally there is AudioPal for those time when you are stuck in a boring textbased discussion forum reading endless boring diatribes about whatever the teacher has assigned. Let’s assume you are not the teacher. That would be bad. But anyway, why not bust out in story right in the middle of that boring discussion with AudioPal. AudioPal lets you record audio directly to the web browser using a microphone or your telephone. And if you’re truly lazy, you can use text to speech. Any way you choose you get your story recorded, and AudioPal will email you the embed code to your story. You can then embed your story right into the discussion, so when all the other bored students get to your post, they get a surprise story to brighten their day, and all is right in the world once again. Okay, well, maybe not, but anyway, Anna you can pimp your class by introducing any of these storytelling methods into your class. I hope that helps and good luck to you.

Okay, that’s it’s for tonight’s episode of Pimp My Class. If you would like to get some tips on how to pimp your class, send your email to dr.coop at yahoo.com. Until then, this is soul4real signing off. Have a great evening.
You only got 4 icons to tell a whole story…

Here is my attempt at The Four Icon Challenge created by Kyle Tezak and submitted by Tim Owens.

Guess which movie in 4 icons...

I drew all of them in Microsoft Paint.

In case you cannot decipher them…/What should be running through your head if you’re like “WTF mate?”…
1. A pilgrim hat with the initials “SP” written in a heart.
2. Hot pink hair of a girl.
3. A “VS” or “versus” symbol.
4. The name and phone number of some person (a girl?) named “Ramona” with seven x’s underneath it. Kisses?

***Spoilers Below. ***

Analysis…
1. Scott Pilgrim-”Every Pilgrim reaches the end of its journey…some sooner than others.”-Roxy. I decided to go with a Pilgrim hat to reference that his last name is “Pilgrim” and that they often reference him as being a Mayflower pilgrim. The initials “SP” on the buckle with the heart are supposed to reference the Smashing Pumpkins t-shirt he wears when he goes to battle Gideon. I figured this was the most important depiction of him-the main character.
2. Ramona’s hairstyle and color of when we and Scott first meet her. Also references the drawing Scott holds up in the movie to ask Comeau, “Hey, Comeau, you know everybody…Have you seen a girl with hair like this?” I wanted to have Ramona as my second icon because the movie is basically about how he gets to be with her.
3. “VS” symbol seen at the beginnings of each battle between Scott and Ramona’s evil exes, usually in blue (although with Roxy’s fight it is pink). I thought this would reference the video game/fighting game aspect of the movie.
4. My attempt at a replication of the note Ramona gives Scott when he asks her for her phone number. With “seven DEADLY X’s,” not kisses like Scott originally thought. I originally just drew 7 deadly x’s, but then I thought it would be cooler to replicate the note he gives to Ramona because for awhile Scott doesn’t even realize why he has to fight.

I hope this amuses you, dear reader.

Final note: If you have not seen Scott Pilgrim Vs. the World, please do so now. That is all.