Getting Cheesy up in here + a tutorial

It’s another new week of DS106! This week is about visuals and photography.

This week we start choosing our own assignments from the assignment bank. However, before delving into that, the whole class is starting off doing captions for Postcards a former ds106 student (Sara K) found in Urban Outfitters. They are a pack of pictures called “UnbridledĀ Passionā€ by Franco Accornero.

I thought these pictures were too funny and ridiculous! But I ultimately decided upon the Superman and Wonder Woman Photo. I do not have photoshop of my computer, so I’ll share how I edited my photos– I guess you could call this a tutorial.

For my tutorial all you need is:

Paint program – MAC users– I downloaded this program and it works great

Picmonkey.com (It’s free)

Step 1: Get the photo off flickr. For me, I found it easiest to email myself the picture and then save the photo onto my desktop.

Screen shot 2013-02-11 at 9.43.38 PM

Click on “Save Image As.” Select the best place for you, I just find the desktop to be the most convenient.

Step 2: Open up the “paint” program and open up your picture in the program

Screen shot 2013-02-11 at 9.44.53 PM

Note your little “toolbox” to the left of the screen.

Step 3. Select the “eye dropper” tool to select the background color of the photo

Screen shot 2013-02-11 at 9.45.09 PM

Step 4: Select the “paint brush” tool to color over the words.

Screen shot 2013-02-11 at 9.45.26 PM

Screen shot 2013-02-11 at 9.45.53 PM

Screen shot 2013-02-11 at 9.46.12 PM

The words have disappeared!

Step 5: Save the file onto your desktop and open Picmonkey.com

Screen shot 2013-02-11 at 9.46.31 PM

Click on “Edit a Photo” and select your file.

Screen shot 2013-02-11 at 9.46.55 PM

Step 6: Click that little “P” on the left hand sidebar and that opens texts and fonts. Click the “Add Text” button.

Screen shot 2013-02-11 at 9.47.20 PM

Decide what you want to say, the font, color, position, size, etc. There are tons of fonts to choose from. The ones with the “crown” symbol are a part of the upgrade package, which costs money.

Screen shot 2013-02-11 at 9.48.24 PM

For this photo I used the “Bangers” font.

Screen shot 2013-02-11 at 9.48.38 PM

Step 7: Add more text if you chose. Click Save and upload to flickr!

Valentine's Day Caption Challenge

Enjoy your newly created masterpiece!

Now I am sure there might be another quicker method that doesn’t use as many programs to get the desired effects complete. But without photoshop and knowledge of other programs, this is what I use. I hope it was easy to understand!

Additionally, I’m not sure kryptonic is a real word. But for this we will make it work ;)

This is a 2 stars assignment!


The eyes are the windows into the soul

You might ask, like my wife, why am I enrolling in the DS106 course again. Didn’t I get my “fill” of on-line learning a year ago? The simple answer is that there are gaps in my learning that I want to try fill. I have found that through the on-going support, comments, and instructional blog posts of the DS106 community, I can take ownership for my own learning and professional development.

In the previous post, I alluded to the fact that GIF animation had become so much more sophisticated over the past dozen years. Certainly, I was actively engaged in the Spring 2012 DS106 course and I was extremely pleased at the skills and knowledge I had gained. However, as I continued to read other DS106-related blog posts, during the remainder of 2012, I realized that my GIF animation was quite limiTed.

So now that I have “dotted my “T”s … we’ll now cross our “I”s” :-)

Judge Judy Animated Eyes

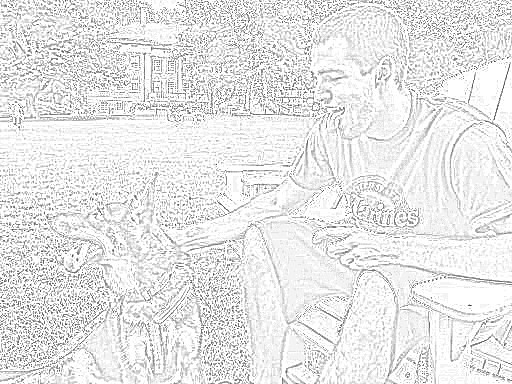
[Animated GIF reflecting "The eyes are the windows into the soul"]

The Back Story
As an educator, I am so grateful to the DS106 individuals, who not only share their assignments, but also take the time to provide insights and instructions into their creative process. Sometimes when we attend Educational Technology conferences or professional development sessions, we are exposed to perfect, polished activities or projects. However, on returning to our classrooms, we may become discouraged when we attempt to replicate the process ourselves. Some of the reasons for this failure might include lacking the necessary hardware, software, or more importantly, the skills that the sharing educator took for granted. I welcome the DS106 model in which participants are encouraged to share their insights into their creative process.

To illustrate the importance of this “Back Story” process, I urge educational readers to view Dean Shareski’s K-12 Online Conference keynote video entitled “Sharing: The Moral Imperative”. Here, Dean suggests that ā€œthe ability to teach and share beyond our classrooms is moving from ā€˜nice to do’ to ā€˜necessary to doā€™ā€. Although this keynote was extremely powerful and the message is still just as important today as it was in the Fall of 2010, it was Dean’s “Back Story” that I appreciated. Later in the conference Dean shared a remarkable, instructional ā€œbehind the scenesā€ video to help educators better understand why and how his original ā€œSharingā€ video was created. Here, I learned a number of tips including how Dean set up his scrolling iPad (above the video camera) to function as his teleprompter.

In the past, the vast majority of individuals were content to be “consumers” of information from sources such as Internet web sites. Only a few were “producers” who created animated GIFs and learned to craft web pages using HyperText Markup Language (HTML). However, there has been a dramatic shift!. Today, the vast majority of students, particularly those in the DS106 community, learn best as “producers of knowledge”, be it their own blog or crafty, video-based, animated GIFs. In order to encourage such production, I recommend that one strive to include insight into how each assignment was crafted through a “back story” process. Through providing such “teachable moments” your learning will improve and perhaps, more importantly, you will provide a learning legacy for others.

My “Animated” Learning Journey
My motivation to begin was the realization that many of the creative “GIF masters” (that I referenced in the previous post) were starting with video rather than a static image to create their animated GIFs. As I was unfamiliar with the process for capturing video, I searched the DS106 website forĀ  information on “animated GIFs”. I was delighted to find a DS106 wiki, which was a veritable gold mine of tutorials. The one that I explored was:

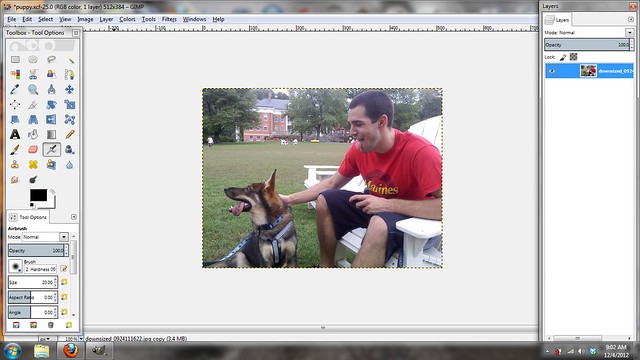
Based on this information, I jumped in “with both feet” and started searching YouTube for possible videos. I selected a video entitled “Judyism: Judge Judy At Her Best”. I thought that the expression in Judy’s eyes might not only help me learn more about animating from a video clip but might also qualify my work for the “GIF Me Again About My Eyes” assignment worth “two points”.

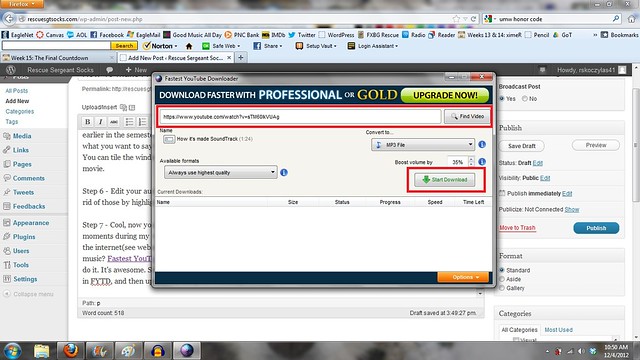
My next hurdle involved finding a reliable mechanism for downloading YouTube videos. I still use an older Windows computer running the XP operating system so my choices of free downloading options may be somewhat limited. I investigated the Fastest YouTube Downloader, Freemake Video Downloader (for Windows) and the Pwn YouTube process.Ā  Gizmo’s FreewareĀ  posted “Finally a Free, Flexible Youtube Download That Works” which recommended Freemake Video Downloader. I had previously installed this software during last year’s DS106 class. However, during a more thorough investigation this year, I became rather concerned when it was revealed that Freemake Video Downloader used the “Open Candy” system during installation. I admit that when I install software, I always read each page and opt-out of any additions of other products or new toolbars. I pay a yearly license fee to run commercial, up-to-date virus protection and regularly run Malwarebytes’ Anti-Malware to remove any potential unwanted threats. So with this latest information, I utilized the Pwn YouTube process, which appeared to be the least invasive approach, to downloading video from YouTube.

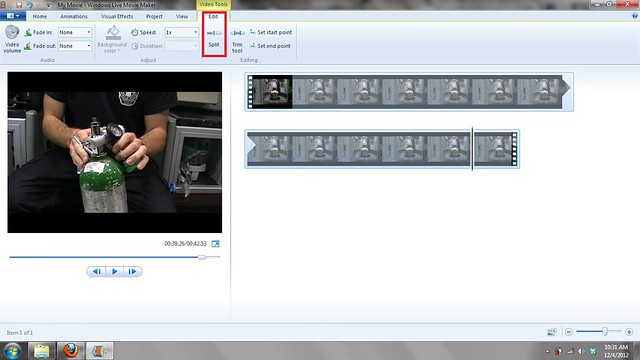
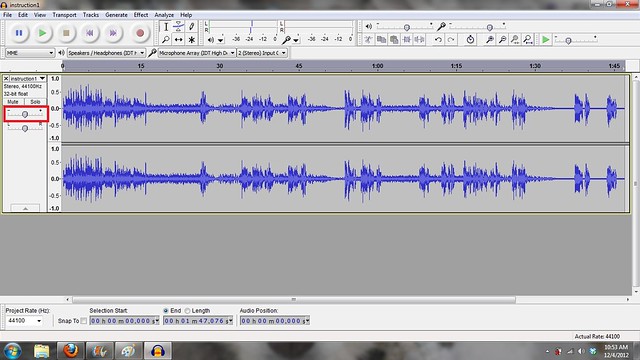
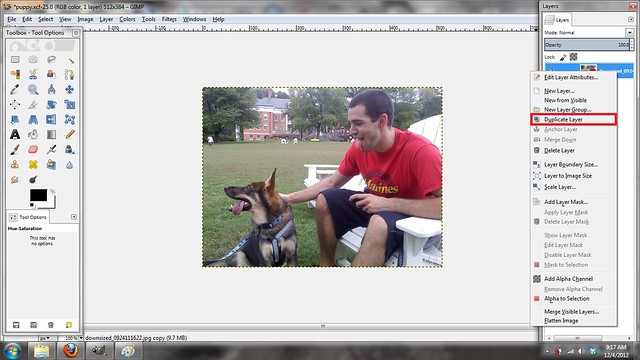
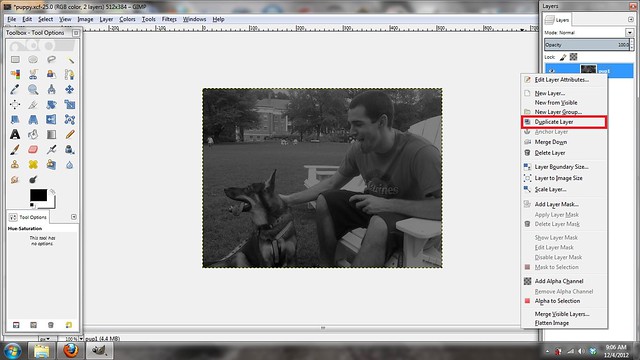
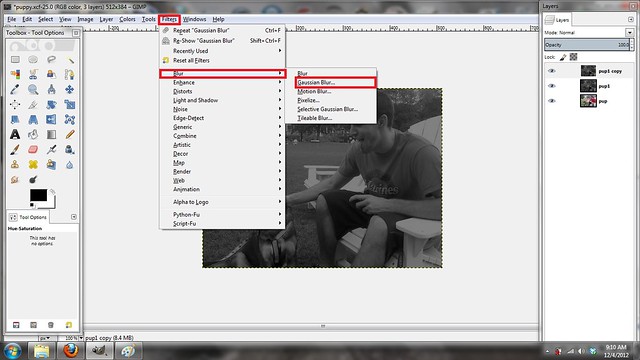
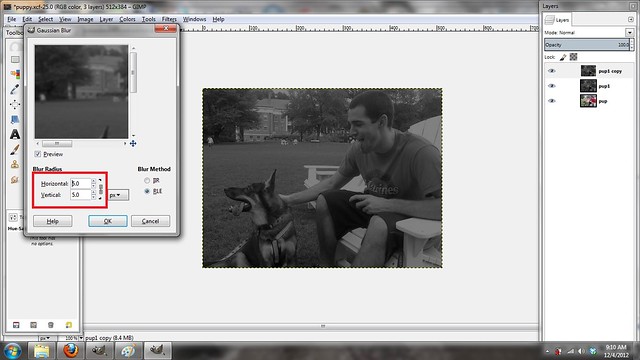
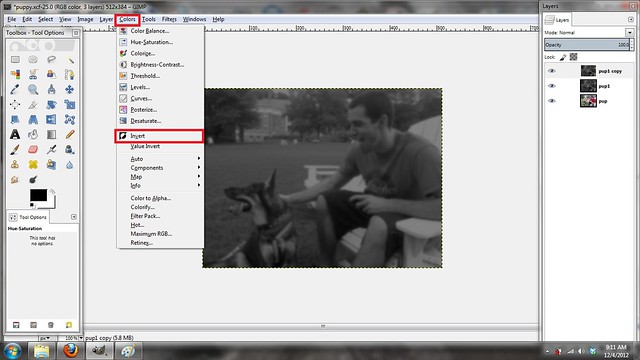
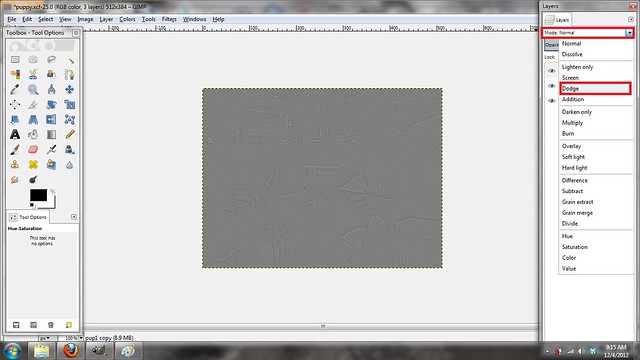
Once I had captured the “Judge Judy” video, I downloaded MPEG Streamclip to trim the frames that displayed the eye movement. I found by using the arrow keys on my keyboard, I could advance along the timeline and select video frame-by-frame. These frames were then exported into the GIMP image manipulation program which I had downloaded and installed.

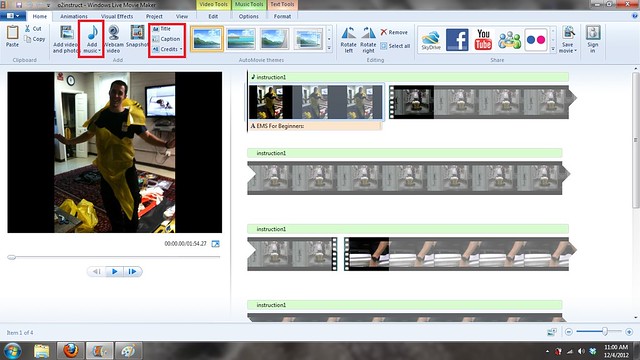
I admit that I do not know very much about making animated GIFs from video. However, I found that by viewing Michael Branson Smith’s excellent “Animated GIF” video and following the detailed steps in the DS106 wiki tutorial, I was able to produce my first animated GIF from video.

The Last Important Question
My wife, who was also a teacher, was very involved in her school divisions “Science Fair”. When judging student projects, one of her most important questions near the end of her interview with students was “If you were to do this over again, what would you do differently?” Such a question is one that I think we, as professionals, should continually ask ourselves.

In my case, I know that there are three things that I would like to attempt:

  1. Explore the process for adding an additional “reverse string” of selected video frames to the exported imagesĀ  to make a smoother, cyclic animated GIF. Michael Branson Smith explained this process do well in his video “GIFFing Video Clips with Photoshop”Ā  (starting at approximately the 5:00 minute mark). However, I’m not sure that my copy of “Photoshop Elements 6″ has all the necessary features.
  2. Explore different YouTube download processes and conversion to different formats. I would like to find the best combination to not capture quality video clips but also display the resulting animated GIF in the best format in my blog.
  3. Most importantly, I’d recommend that DS106-ers use as their primary resource “The DS106 Handbook”. I believe the renovations to the DS106 web site have been spectacular. The format is so much more inviting and is organized in an efficient manner with all the tools you need identified in the handbook. Therefore, don’t search for “Ds106 animated GIFs” like I did, which brought up the older wiki-based information; rather check out the ever-evolving and updated links in the handbook such as:

I admit that this post is rather lengthy but I hope that by modelling the “Back Story” process, I can encourage others to share their tips and tricks along their learning journey.

Take care & keep smiling :-)

How To Make A Movie In 10 Steps

Wow, you’ve come a long way if you’re now reaching your Video Assignment week of DS106. Pat yourself on the back, it’s a lot of work and a lot of thinking! Since you’re here, you must be wondering how to create a video that kicks ass or just for the Everyday Modern Marvels Assignment! Well lucky you, I broke the ice(and am currently 12/4/2012 still the only one who has!) and now it’s time for you to top my video! But, I’m not worried about that, this tutorial is for you to see how I made my video. After watching you can go produce your own masterpiece and 1-up me!

So where to start…hmmmm

Step 0.5 – PREPLAN YOUR VIDEO!!!! Know what you want to do, and how you want to do it. This will save a lot of time, effort, and frustration in the long run!

Step 1 – As with any video/movie, you need, well…VIDEO! So go out with your plan, record what you need, then upload to your computer!

Step 2 – Hopefully you have your video uploaded in .wmv files and can load them directly into Windows Movie Maker. If you have multiple clips, this will mash them together so that there is no skipping/waiting on YouTube. (Like the two videos above!)

Step 3 – Go ahead and watch your video! Do you like it? Is it worthy of editing? If so, begin the editing process now! If there are parts you don’t want in the video simply go to Video Tools, and click Split where you don’t want the video. The clip will split and you can then select and delete it.
first

Step 4 – Next, you probably don’t want the audio that was used(unless that’s how you recorded it to make it easier on yourself) and cut out other people talking/background noise. For this, stay in the Video Tools, select Video Volume and then drag the bar all the way to the left.

Step 5 – Great, now I have a video without audio. Now what? Well you can snag music from the Internet, create your own audio, or BOTH! Let’s do both! Remember Audacity from earlier in the semester? Open it up! Now hit the Record button in Audacity and time it with what you want to say in the movie. (Scripting before talking usually works pretty well!) You can tile the windows side by side so that you can start the audio and then start the movie.
third

Step 6 – Edit your audio! You may have long pauses where you aren’t talking, you can get rid of those by highlighting the selected piece and hitting delete.

Step 7 – Cool, now you have a narration of your video. But wait, there is a lot of quiet moments during my video…what should I do? Simple, you can download sound effects off the internet(see websites from Audio Week) or you can just use music. How do you get the music? Fastest YouTube Downloader. If you didn’t download that earlier in the semester, do it. It’s awesome. So go to YouTube, find a video with the audio you want, paste the URL in FYTD, and then upload the MP3 into Audacity!
fifth

Step 8 – You probably don’t want your narration to get overpowered, so let’s lower the levels by using the Gain Slider. Export your new audio as a MP3.
sixth

Step 9 – Back in Windows Movie Maker, go to the Home tab. Click Add Music, and find the clip you just created! Once it loads into Movie Maker, you can move the audio around to start on whichever clip you want.

Step 10 – Your movie should now be nearing completion. Final edits are in store, such as a Title and Credits screen. These can be found on the Home tab to the right of Add Music. Click Title and it will place a text holder and slide effect at the beginning of the movie. Click Credits and it will place a text holder and slide effect at the end of the movie.
seventh

Congrats on receiving your 3 stars! Now go blog about your creation and don’t forget to mention me! Get creative with your videos, and take what you learned from my tutorial and implement it to other assignments, Good Luck!


Learn To Draw In 10 Steps

Welcome to my DS106 Tutorial on how to create a drawing! If you’re unfortunate, like myself, and don’t have Photoshop, don’t sweat it. This quick tutorial is going to make using GIMP as easy as possible for all you new DS106ers! Now most of you may have clicked this by going through the “Draw it.” assignment and seeing the tutorials…So you must be aiming to get the 2 stars for the assignment, woohoo!

I also did this assignment, A Man and His Dog, and understand the frustrations of using GIMP and other new programs. The Internet is a big help with answers/tutorials, which also helped me with my own assignment. So relax, take a deep breath and get ready to draw!

(If you can’t wait to read and just want to follow pictures, here is a slideshow of the tutorial)

Step 1 – Start with a picture. It can be a picture of ANYTHING! That’s the best part about art, you make what YOU want! Open the picture up in GIMP.
start

Step 2 – Duplicate your layer. You can do this by right clicking on the layer in the layers window and then clicking Duplicate Layer. This is a good practice because you will always have your original photo and won’t edit over it by accident. I learned my lesson in my old Photoshop/high-school days!
start2

Step 3 – Make sure that you have your new copied layer selected in the Layers window, and then proceed to go to Colors on the toolbar. After the dropdown, select Hue/Saturation. A new window will open and you will want to drag the Hue/Lightness/Saturation bars all to the left. This will result in a seemingly black/gray image.
pic2

Step 4 – Just like in Step 2, we are going to Duplicate the black/gray layer from Step 3.
pic3

Step 5 & 6- Making sure you have your newest copy(should be the top black/gray layer) selected in the Layers window, go to Filters, down to Blur, and then select Gaussian Blur. This is just a generic blur that I used. (If you wish to play around with GIMP or your drawing assignment, select another blur and see what you get!) A box will appear and you will want to select how much of a blur you would like to apply. I chose 5, but once again, you can get creative!
pic4

pic5

Step 7 – Continuing to use the same layer, go to Colors. Then choose Invert.
invert

Step 8 – After you invert, you need to change the Opacity of that layer to 50%. This is located near the top of where your layers are located. Once you change the Opacity, you will then right click the layer in the Layers window and choose Merge Down.
pic6

Step 9 – Great, now you have a gray blob. What do you do with a gray blob?? Duplicate that layer as you have done with previous layers.
pic7

Step 10 – Lastly, go to the top of your Layers window. With the newest copied layer selected, change the Mode to Dodge.
pic8

This should result in a “drawn” looking image! Congrats on receiving your 2 stars! Now go blog about your creation and don’t forget to mention me! On my final image, I wanted it to have sharper edges and more “drawn” looking qualities, so I played around in GIMP until I was satisfied. Have fun creating!
puppy

Remix #4 (Video): Frank vs the Tranq Tutorial

This is the tutorial for this video remix.

Steps:

1. I found a solid version of the scene I was looking for and downloaded it. Next, I opened up iMovie, imported the clip, and messed around for a little while with the effects. I wanted to get a sense of what was possible. I wanted that jittery effect from silent films, but evidently iMovie doesn’t have that feature anymore. They do have “Film Grain” and “Aged Film” effects, however, which provide that old, deteriorated quality.

2. I needed some silent film title cards, and I found a template pretty quickly online. I downloaded the template, cut and pasted it into a Powerpoint slide, added a black background, copied the slide a number of time, and found a decent old-timey looking font. I worked on “script” of sorts and created appropriate cards. This is probably an area I’d work on a bit more in the future… I think I captured an Edwardian sort of diction–part of the humor I was attempting was in contrasting styles–but I could probably amp up the clever here.

3. I saved the PPT slides as jpegs, and imported them into iMovie. Then is was just a matter of splitting the clip, inserting the text cards, and adjusting each piece of the film for timing and look (based on the effects mentioned earlier). Part of the trick was establishing silent film pacing–I shaved off more than half the time from the original clip. Even with text cards, a silent film doesn’t seem to have the luxury of extended exposition or comedic build-up (or maybe that’s just a product of my amateur work).

4. I needed some old-time piano ragtime-ish piano music, and found a pretty good royalty-free resource with some interesting piano pieces. (Interesting how the short samples on the site evoke specific mood and character.) I found several I liked, downloaded them, inserted them into the project, and tinkered a little with timing. And I turned down the sound from the original clip.

5. I could have finished the project at this point, but I decided that some more text cards were needed (for the opening, credits, and the classic “The End” convention). So I went back to the PPT and repeated the process to create those… pretty easy.

6. I used Export tool to create the finished film.

Tutorial on Overedit yourself.

Often times when using such websites as picnik.com or picmonkey.com people are trying to improve how they appear in a picture. Ā For this assignment you are attempting to do the opposite. Ā To get started begin my opening up picmonkey.com and click on the Edit the photo link.
Screen shot 2012-11-26 at 4.23.39 PM

It will pull of files where you can pick a picture to edit.
Screen shot 2012-11-26 at 4.30.06 PM

Once you have chosen a picture of yourself to edit a list of effects are in a table on the left.
Screen shot 2012-11-26 at 4.20.31 PM

The first thing I suggest playing around with is Color, increasing the saturation gave the picture a more orange tint.
Screen shot 2012-11-26 at 4.41.43 PM
To save this edit press apply.
To add more effects go to the lipgloss edit button on the left and click eye tint, to change the color of your eyes.
Screen shot 2012-11-26 at 5.11.12 PM
To save the changes press apply, for me it allowed me to use a free trial so I could keep using special effect applications.
Next go to the lip tint and chose a random vibrant color to stick out. (In this case I used green.)
Screen shot 2012-11-26 at 5.21.29 PM
Then press apply and save all the changes. Once you are done with your creation go to the upper part of the page and press save. Ā Where it will give you a save button on the bottom left and you have to name the photo.
Screen shot 2012-11-26 at 5.26.33 PM
Once you have saved the picture to your computer you can then go to flickr.com and upload it by pressing the upload button.
Screen shot 2012-11-26 at 5.31.04 PM

Screen shot 2012-11-26 at 5.35.13 PM
Once you upload your picture you can tag it with the necessary tags:Ā VisualAssignments and VisualAssignments626.
Screen shot 2012-11-26 at 5.35.48 PM
Once uploaded your creation is now capable of being shared on the web!!!
Screen shot 2012-11-26 at 5.44.49 PM

Silent Vader at Disneyland

Not gonna lie – I’m pretty good with iMovie. In fact, I teach people how to use it professionally. (I’m an instructional technologist.) So instead of planning out my video projects this week, and then executing them next week, I’m just going to stagger the projects. And maybe do a couple extras just for fun, we’ll see.

My first project is inspired by the recent acquisition of the Star Wars franchise by Disney. As soon as I saw the Disneyland commercial starring Darth Vader (and a few anonymous storm troopers, as all storm troopers are) I knew I wanted to use it for one of my video projects. And given the brilliance that is Silent Star Wars, I felt inspired to make my own attempt at a Star Wars silent film. A Disney one, that is.

To create this, I followed my usual process of pulling the video from YouTube via PwnYoutTube. I then imported the video into iMovie (File -> Import -> Movie) and copied the entire thing into a new Project. I removed the beginning and end stills and added my own. The introduction uses the “Far Far Away” title format, and the end uses a basic “Centered” title. I then removed the audio from the main portion of the commercial:

  1. Hover over the footage until the blue Options gear icon appears.
  2. Click on the gear.
  3. Select Audio Adjustments.
  4. Bring the Volume down to 0%.

I liked the sound of Darth Vader breathing from the beginning of the original commercial, so I selected that portion of the video in theĀ Event Library and dragged it onto my opening title slide (be sure that the playhead cursor is at the point where you want the audio to begin, in this case the very beginning of the footage). This brought up the overlay menu and I selectedĀ Audio Only. The audio clip wasn’t long enough, so I had to duplicate it to cover all of the opening.

For the main portion of the video, however, I wanted to use a traditional silent film score. Some Google digging brought me to Incompetech’s listing of freely available stereotypical silent film scores (if you are looking for a particular film’s score, you’d probably have better luck with the Internet Archive or another repository of copyright-free resources). The song “Merry Go – Distressed” had the playful tone I wanted (plus, Vader actually rides on a Merry-Go-Round, so it seemed like a felicitous song to use). I dragged it into iMove (again matching the playhead). The song is longer than the footage, so I had to add a fade-out. To do this:

  1. Click on the greenĀ Options gear icon on the audio track.
  2. Select Audio Adjustments.
  3. For Fade-Out select Manual.
  4. I set it to a 1.9s fade. I find that slower fades are less jarring.

The most challenging part of this was generating the film grain – iMovie has some default options available, but none of them had the look I wanted. I went with the Aged Film effect (Options gear -> Clip Adjustments -> Video Effects), and then started to dig for other options.

I really liked what Ben Rimes (@techsavvyed) achieved with his Silent Era Back to the FutureĀ (and discovered that apparently we had used the same score source), so I looked into the Particle Illusion graphics he used. I found working with the individual images to be cumbersome, so I converted them into a separate movie, which you can view or Pwn on YouTube. I then imported the movie into my Events Library and dragged it onto the footage to create an overlay. From the overlay menu I selected Cutaway (some tutorials will tell you to use Picture in Picture, but this doesn’t allow you to change the opacity). I then went to theĀ Options menu for the grain overlay and underĀ Clip Adjustments set theĀ Opacity to 21% (the exact percentage will vary depending on the main footage you are working with, but I’ve found that somewhere in the 20-30 range allows you to see the grain without making the footage difficult to see).

Finally, inspired by the gorgeous title cards Ben had used from CopyCatFilms, I redid the end still of the twitter hashtag #starwarsdisney.Ā And thus was born the Silent Era version of Darth Vaders first trip to Disneyland.

Remix #1 (Visual): Twilight Gothic, Tutorial

Here’s how I went about this remix.

  1. Starting in Pixlr’s advanced option, which looks similar to Gimp or Photoshop, I first uploaded three images (Bella, Edward, and the painting).
  2. I used the Wand tool to cut around the heads of the figures in the painting, deleting them and creating an empty space. In retrospect I probably didn’t need to do this, since the new heads would have covered the old.
  3. Then I cut the head from the image of Edward, clicked on the painting, created a new layer, and copied his head onto the painting.
  4. I realized at this point that I didn’t have the sizes correlated for each image, because Edward’s head was tiny and I couldn’t figure out how to make it bigger. So I deleted the layer I’d just created, went back to Edward’s initial image, enlarged it until his head was proportional to the gent in Wood’s painting, and went through the process again.
  5. I did the same process with Bella. Through this process I saved at multiple points with different filenames so I could backtrack easily if necessary.
  6. At this point I used the pointer tool to move the heads into position. Edward’s looked pretty good, but Bella’s was more problematic because of the lighting. I probably should have stopped and found another photo at this point… but I didn’t.
  7. I “flattened” the image, essentially merging all the layers into one. The I began to finesse the image to make it look less fake.
  8. I used the “magic brush” tool highlight areas that needed color, and then used the “clone” tool to copy a nearby section and reproduce it. This took some practice and backtracking before I got the hang of it.
  9. I tried adjusting Bella’s skin tone and highlighting, but after a long time messing with it, I still didn’t see it getting much better. At this point I saved again, and then reopened the image in Pixlr’s “efficient” option.
  10. I used the Touch-up and Airbrush tools to keep working on Bella. Then I played around with Color, Color Splash, Contrast, and the Effects option. A more sepia toned look seemed best.

Overall, I was fairly pleased with how it turned out, with the takeaway that next time I’ll spend more consideration on matching the original images for lighting.

Who would win in a fight?

Have you ever been asked a question like, “who would win in a fight Batman or Spiderman?” Chances are there were times when this question was stuck in stalemate, with no victor ever being agreed on. Well that’s where you come in. For my last original assignment, crossover battle royal, take two fictional characters from separate universes and create a scenario of what their battle may look like. You can use any media format to present this battle: image, video even audio if you can somehow make that work. Show people your choice pick!

Although you may choose to have your battle end conclusively, I decided to take a different route. For my combatants we first have Marian Cross (D. Gray Man): exorcist and general of the Black Order. Being a profound scientist and sorcerer Cross has many forms of attack; however he mainly uses his two innocence weapons, Judgement and Grave of Maria. Next up we have Kisuke Urahara (Bleach): being the former captain of squad 12 of the Soul Society Urahara has been widely recognized for his spiritual power, but above all his intellect. Using his main weapon, his zanpaktou Benihime.Well this is where you come in, I have created a video that depicts what their fight may look like but instead of me showing a victor I want you all to choose by voting via the poll below:

Note: There is a poll embedded within this post, please visit the site to participate in this post’s poll.

Lastly I would like to show you all how to add polls to your website:

  1. Going to the dashboard portion of your website go to install plugins and download the WP-polls plugin.
  2. To create your first poll find the Poll settings and go to add poll.Ā 
  3. Next you simply input your data including your question, answers (2 or more), whether or not people can vote for more than one option and when your poll ends, if ever.
  4. After creating your poll you should be able to see your poll on the “Manage polls” section which includes its ID # you will need that:
  5. So next you can add a poll to any page or post by going to the insert poll option on the tools menu then input the ID # for your poll and there you go.
  6. You can also add your polls to the side bar of your site through the widgets settings.


Movie trailer

Have you ever tried to describe a movie or a TV show to someone but you just couldn’t find the right words? Well you know what they say a picture tells a thousand words; in that case a moving picture must tell about a million words. For my next original assignment, movie trailer,Ā  create your own movie trailer for a film or even a TV show and show people why they’re worth seeing. The examples I have made for this assignment are actually all part of my final project, each detailing an anime I reviewed:

Like I said your movie trailer should try to capture the attention of the viewer and make them want to go out and watch whatever you’re promoting. Now I took two paths to doing this, the informative and the curiosity. For informative the examples are Eden of the East and Katanagatari, these trailers go over the grand plot. Telling you what the situations these characters are in and will face; and should incite your viewers to want to know what happens next for the man with the mysterious phone or what is so special about these blades of Shikizaki Kiki. For curiosity the example is Kill me baby, this trailer is supposed to make you question why these things are happening. It’s presented in a manner that gives you very little information, who are these girls? Are they friends, are they enemies? What led up to a situation where the blonde girl had to pole vault over a bear? In overall this should make your viewer want to know the answers and watch. Lastly my Fairy Tail trailer is kind of a mix. The start off is very informative, you’re told this is a world of magic and wizards who form and work in guilds. After presented with this information though you’re sort of blasted straight into the action of the series. You don’t know who these characters are or really what trials they’re facing but the action is moving by so fast that it becomes appealing to see these fantastical powers.

As an additional source of help I would like to walk you through the process I took with making these trailers. To be specific I’m going to show you how to make an anime trailer, since obviously that’s what I made, but you can no doubt take these same steps and apply them to any other sort of film, that is if you’re using Windows Live Movie Maker like I was anyways.

Step 1: Choosing your anime (obviously) Picking a series you like is a plus, but another thing you may want to consider is if the show has been dubbed in English yet. This honestly serves little purpose in the grand scheme of things, but let’s say there’s a scene you want to present muted with a score associated in for dramatic effect. Although you can remove the sound, the subtitles will still be showing throughout the video. This may just be me being a perfectionist, but those subs are really quite distracting to the viewers; not to mention may spoil a scene you may want to be mysterious. So the obvious method to solving this is to use dubbed anime as a material which for the most part has no subbing; or you can even try and use raw episodes, which are episodes in their original form and language; but those get increasingly harder to find after it’s finally subbed.

Step 2: Downloading or ripping material After selecting your series clearly the next step is to acquire as many clips and scenes as possible. If you have a DVD of the series then congratulations you just made your life easier. All you need to do is rip the material off them. The method I used was with the VLC media player which allows you to record the movie while playing. If you do not see this option, go into the view drop down menu and select advanced controls. After that just record any scenes you want, can’t be any simpler than that.

However if you don’t have a copy of the series then this gets to be pretty tedious. First and foremost, you need a way to download these videos online. What I have been using is the video download helper Firefox add-on. Where after downloading, you can easily download most videos online in varying formats. Next you need to find these animes and download them, this is where it can get tiresome and annoying if you’re searching for the best quality. A source I’ve been repeatedly using is the FUNimation Youtube page which actually offers many series online; you do have to make a trade-off with the FUNimation logo being stuck on the video but chances are if you got your materials from any other site they too have their logo or site name printed all over it. Download as many episodes as you need, I’ve downloaded literally entire series before just to compile into a 2 minute video.

Step 3: Editing With your clips in hand, now we move onto using Windows Live Movie Maker. How you start out your trailer is completely up to you, but the simplest and maybe even best way is to use the opening dialogue of the anime itself; which could be very informative or foreboding. This leads me to the tools you’ll be using, now hands down the tool I used most while editing is the split tool. If you want to take out a specific clip or scene from your video you can use the split tool to remove it from the original video which can then be placed any where you want. Alternatively, you could use the set start and end point function to do the same thing, but I prefer the split tool as you can still use the rest of your video while the start and end points remove anything that wasn’t selected. For the most part this is all you really need to do in selecting what to present in your video lather, rinse and repeat till you have all that you need.

Step 4: Audio Along with Windows Live Movie Maker a program that I use hand in hand with it is Audacity. For me, how long each clip made from the previous step would last depended on how long the audio I had accompanying it. You can of course just stick any old MP3 file on your video by dragging and dropping and have it play throughout; but that’s pretty lazy. I however, like to develop a score for my movies which usually involves me cutting highlights and fading in and out of songs. I would go into greater detail about this but Audacity is really quite straightforward, you just have to feel around for the controls at first and then you can mix any sound you like. But as for attaching sounds to your clips, what you may want to do first is mute them which is a rather easy process through the sliding bar pictured below. There are also more options on Movie Maker itself such as fade in and out, but since you’re using Audacity for most of your sound work already it’s not really necessary.

Step 5: Publishing Once you have your scenes and audio up there really isn’t much more to do, just simply save your video to your desktop. Keep in mind though that the point of a trailer is to show a preview of a film, don’t try to tell the whole story, leave the viewers guessing and wanting more. Try to keep it around 3 minutes maximum.

Lastly I just want to add that yes this tutorial would probably be much more bearable in video format, but just like all of you I am swamped with last weeks of classes and if I had more time I would gladly make this a video tutorial.