art is the only way to run away without leaving home


Mission Defamiliarize was my favorite assignment! I enjoyed taking everyday items and photographing them in a way that portrays them as unfamiliar items. The first picture is of my kitchen cabinets, taken from an angle underneath them and then I tweaked the coloring by using the night vision option in Picnik.

The second picture is of my dishwasher in my kitchen. I zoomed in extremely close to the grate and tilted the camera trying to create an angle that would add to the mystery of the object. I also changed the exposure of the image on Picnik as well, creating a darker picture.

The third picture is of the stools in my kitchen. This picture was the most effective in terms of the initial photographing. I didn’t have to tweak much because I was so pleased with the way it initially came out.

The fourth picture is probably my favorite one, it’s my coffee pot. I took a picture of the side where the numbers indicating the right amount of water are listed. I then uploaded it to Picnik and changed the coloring.

The fifth picture is the latch on my window in the kitchen. I chose to photograph this particularly because it’s not an object people are usually familiar with so the latch in all it’s simplicity is already half-way to being defamiliarized. That being said I didn’t too much to this photo after I took it.

The sixth picture is a birds-eye view of the light-switches in my kitchen. I thought this was kind of clever because typically people down look down on light-switches. If you’re anything like me, you don’t even look at them, just absentmindedly flick them.

The seventh picture is of the shelf in my dining room. It has a candle holder (with the candle in it), part of a pumpkin decoration, and the rim of a sombrero in the picture. I took it intentionally so the focus of the picture would be the empty shelf in the middle of all these other unidentifiable objects.

The eighth picture is the surface of one of my favorite games, catch phrase. It was sitting in the kitchen so I tried to take an elusive picture. All I did after taking it was change it to black and white.

The ninth picture is of a candle at an angle in a candle holder in the shape of many intertwined hearts. I used the duo-tone option in Picnik to edit this photo but it ended up looking very similar to the sepia option which would have required less effort on my part.

Last but not least the tenth picture is a sleeve of oreos that I uploaded into Picnik and posterized giving it the painted look.

I’m interested to what everybody else thought these pictures were of! I asked my sister prior to composing this post and she couldn’t guess a single one!


sometimes speech isn’t superfluous: the hidden art of spubbles

The most challenging aspect of this assignment was finding a picture that would work well with a speech bubble. Once I had this picture picked out all I could think of was the actual conversation that took place while this picture was being taken so I think that hindered my creativity a little bit. In retrospect I probably would have produced something more intriguing if I had used a photo other than my own. I enjoyed the process of creating a spubble, I used Picnik to insert the speech bubble into this picture.

deceptive perceptions


I had fun collecting the items to photograph for this assignment. Everything in this bucket was sitting somewhere in my kitchen. I chose these items because they were brightly colored and I thought they would make for an interesting color twist. I tweaked the color in this photo by using the invert option in Picnik.

On the other side of the caution tape– “return to the scene of the crime”


This picture was taken earlier in the semester with one of my best friends Alyssa. I had fun finding a picture that I could take to the place in which it was taken.  When I was taking the picture of the picture I realized just how many pictures we take in the kitchen. That seems to be the place we all gather to be around one another. We have some great memories in that kitchen!

Abbey

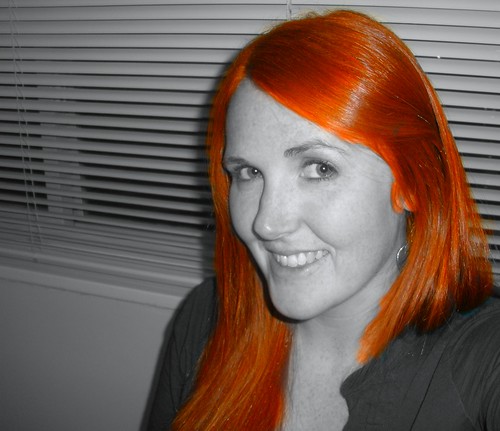
Meet Abbey.  She is kind and sweet and has red hair.  I saw Abbey this weekend and we had this conversation:

Me: I want to take pictures of your face.

Abbey: Ok.

Me: No, really.  I have my camera and I want to take pictures of your face.

Abbey: What? Wait, what?

But like I said, Abbey is kind and sweet.  She let me take pictures of her face.  See, I was going to color-splash her gorgeous blue eyes.  There is something so fabulous about her hair though, that I did that instead for the “Splash the Color” visual assignment.  I also fiddled with the saturation and temperature of the color on Picnik.  It was a little difficult to get her hairline and ends to look nice and not too harsh but overall, I’m pleased with the final product.

So here she is, color-splashed Abbey:

Abbey

Find Yourself

My name is very difficult to find on anything. In all my years of searching I have only found my name on one thing. I found it on a small solar powered flashing keychain in Virginia Beach and I still have it on my key chain. For this assignment I chose to walk around the Spotsylvania Mall (beacuse it is freezing outside). I took pictures of every sign I could find and then uploaded them to my computer. Since I have yet to find an easier way, I inserted the images into Word and cropped the letter I wanted. No two letters of my name came from the same image. Once I had compiled the images together I took a print screen and pasted it in GIMP. I cropped the image and saved it as a jpg on my desktop. After that I just uploaded it to my blog.

Return to the Scene of the Crime

  by CandiceBenshoff

This picture is of my boyfriend and I before our senior prom. We took this picture in front of Hurkamp Park in Downtown Fredericksburg. Luckily I have always lived in Fredericksburg so the majority of my pictures occured here. Because of this, this assignment was relatively easy for me. I printed out the picture of us, drove downtown, took the picture on my cell phone, uploaded it to flickr, and the shared it with my blog. I love the idea of this assignment and really think that it turned out well.

the making of…

the go-getter

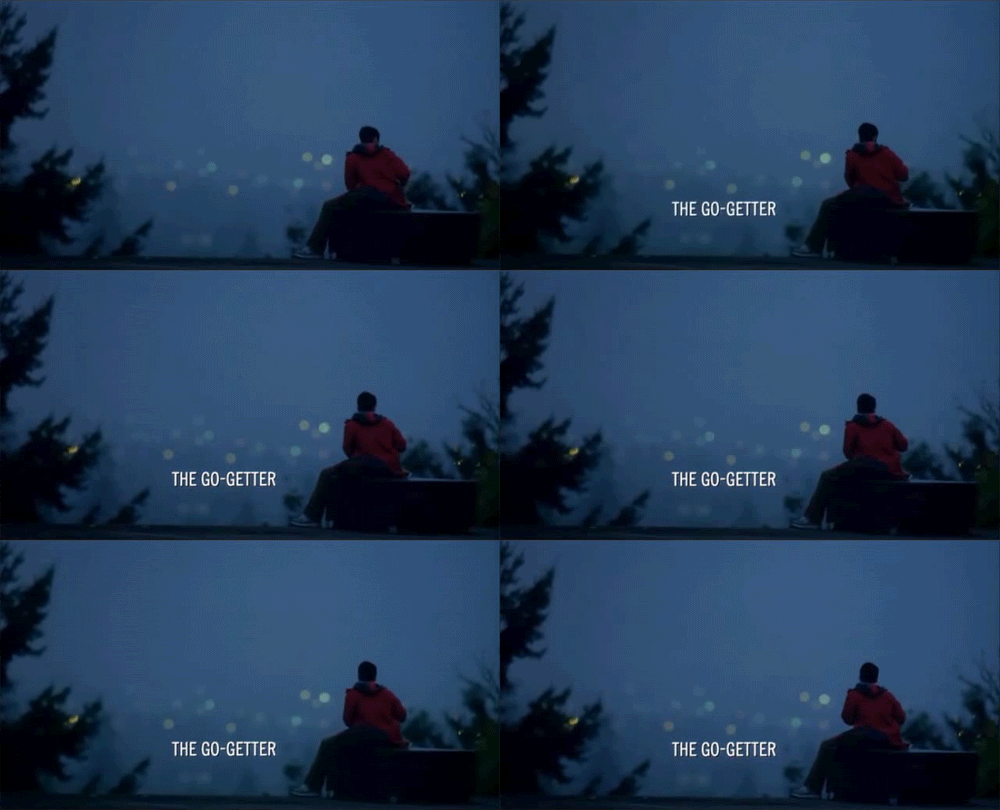
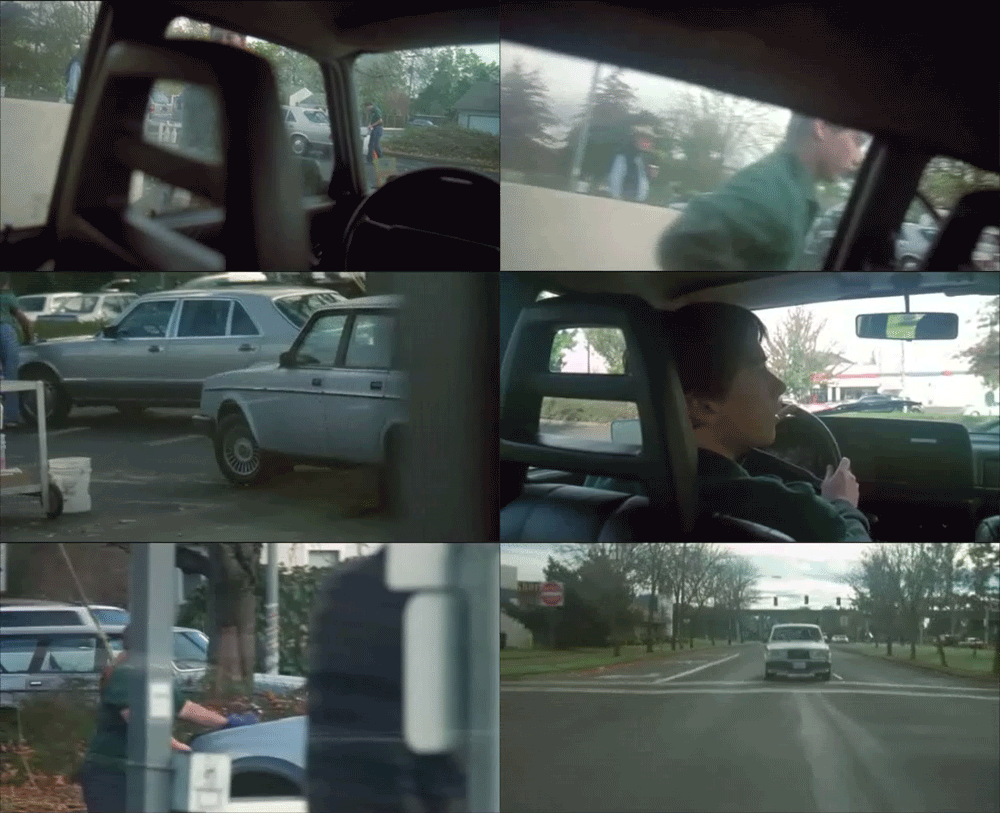
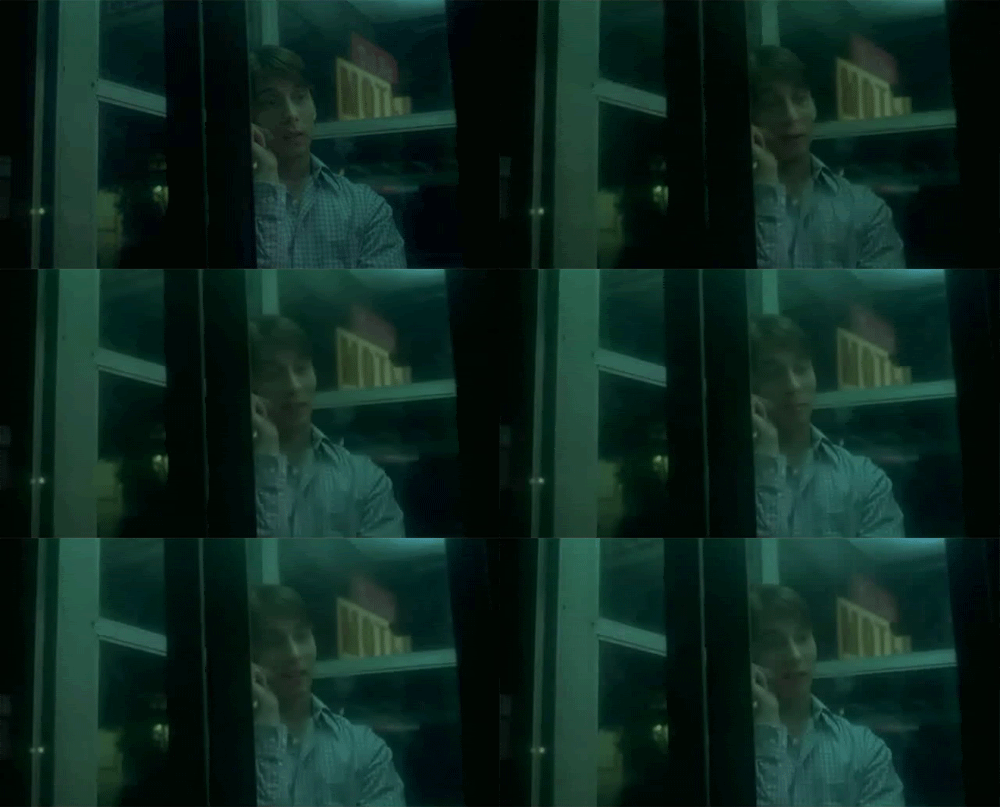
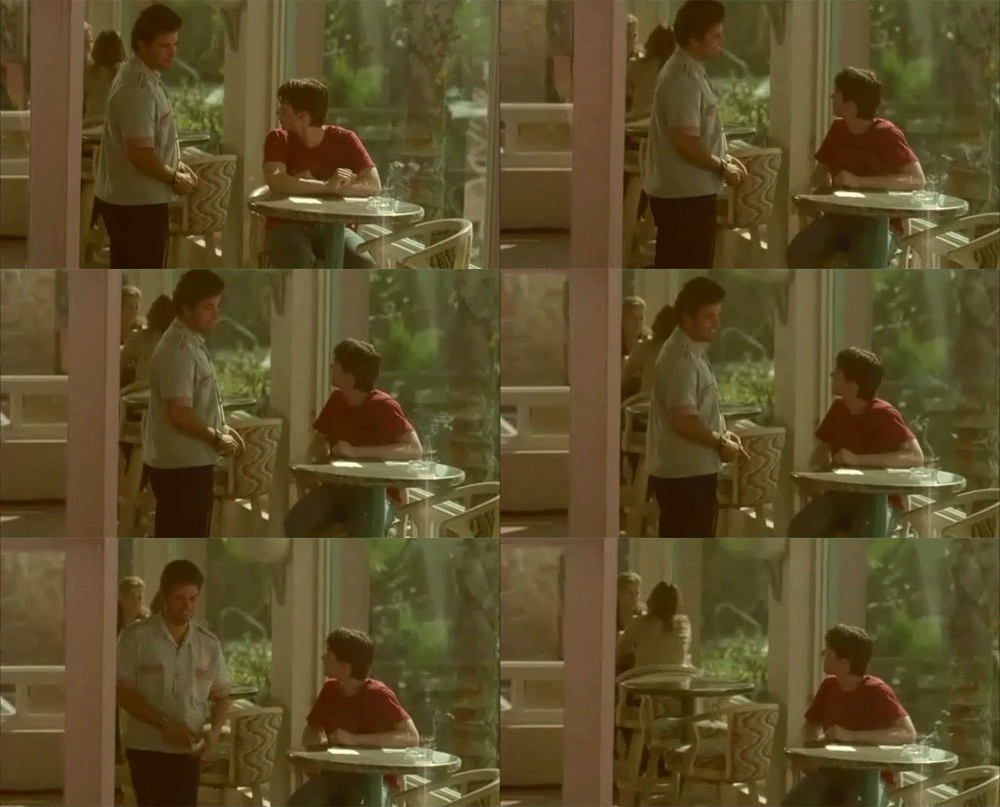
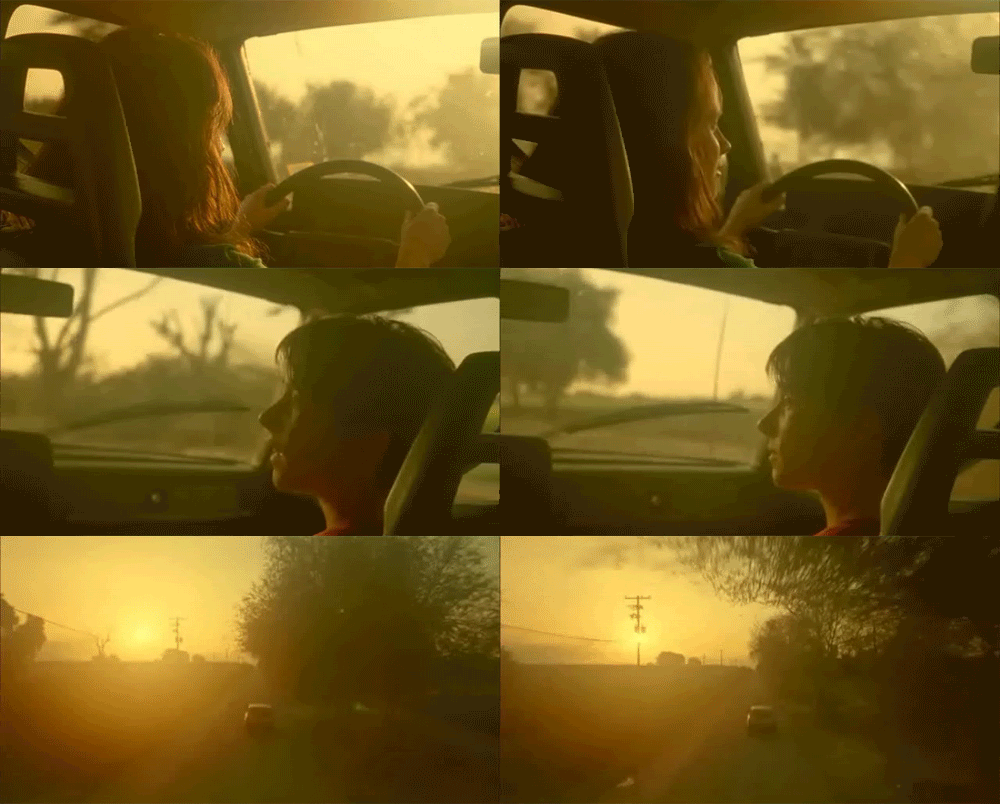
For a Digital Storytelling visual assignment, I made animations from the movie The Go-Getter. I chose this movie because I like the unusual story it told and the unique way the movie brought the two characters, Kate and Mercer, together in an unconventional sort of love story. The first time I watched The Go-Getter, I remember always being afraid that Kate wasn’t really there. While making the gifs of the key scenes in the movie, I still had that fear. In the first half of the movie, all the scenes with Kate are from Mercer’s imagination. When she finally appears, I still had a hard time believing she was really there. The ending still leaves me unsure, however I want her to be real for him, so I end up believing she’s there anyway.

a gif by gif breakdown

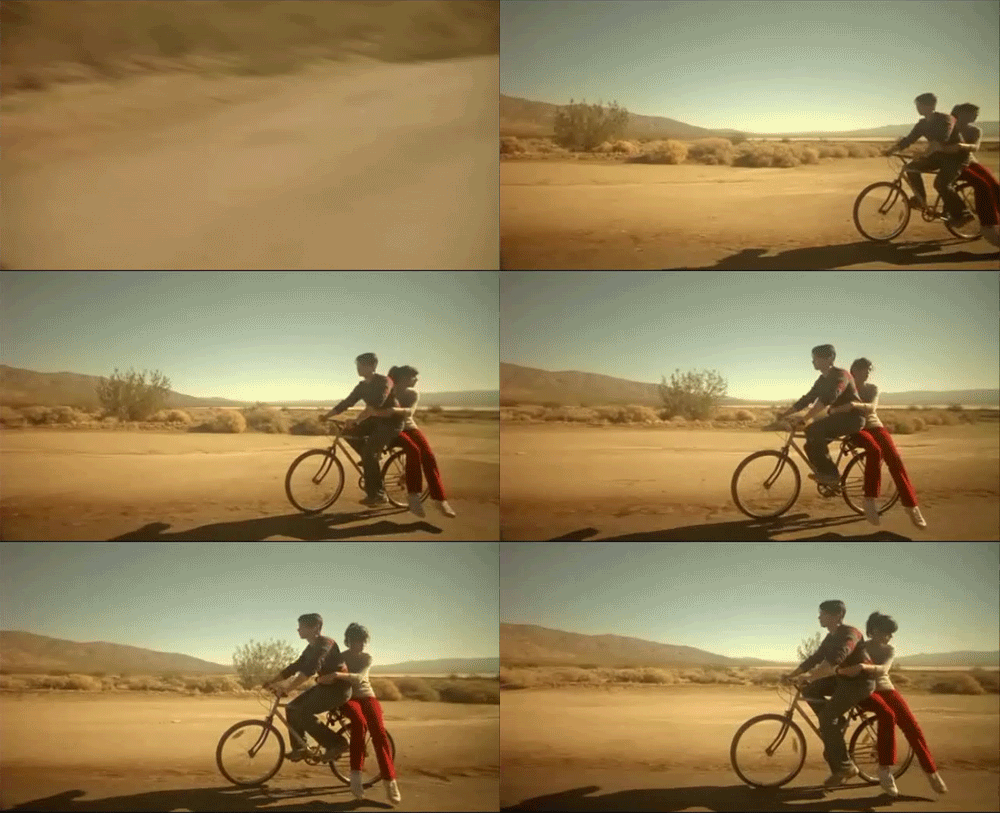
#1: In this animation, the title of the movie is shown and Mercer, the protagonist, is introduced.

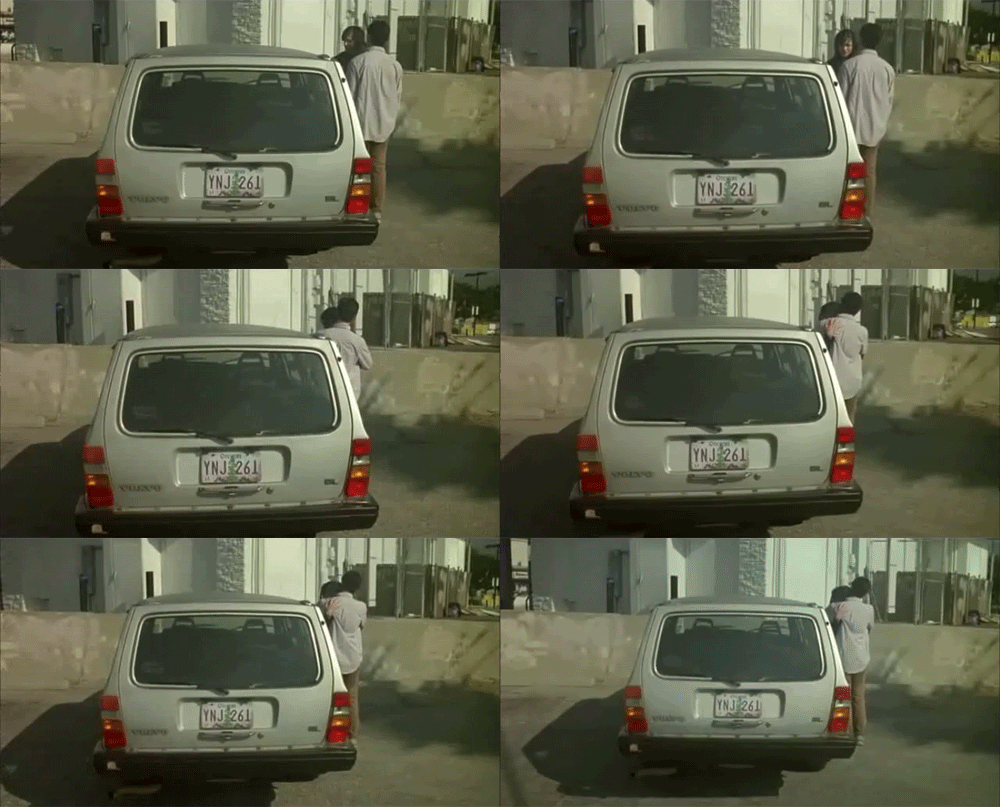
#2: This animation shows the key action of the movie, when Mercer steals Kate’s car.

#3: Throughout the first half of the movie, Mercer talks to Kate on the phone, imagining her being there with him. This animation shows one of many scenes of Mercer talking to Kate.

#4: This animation is one of Mercer’s imagined scenarios. I chose to make a gif of it simply because it’s always been my favorite scene of the movie just based on aesthetics.

#5: This animation shows Mercer and Kate finally meeting, which is a turning point in their story. After this point in the movie, I was always afraid he’d wake up from a dream and she wouldn’t really be there. That didn’t happen, but I couldn’t relax for the entire second half. (Although, they did sort of meet once before, but you’ll have to watch the movie.)

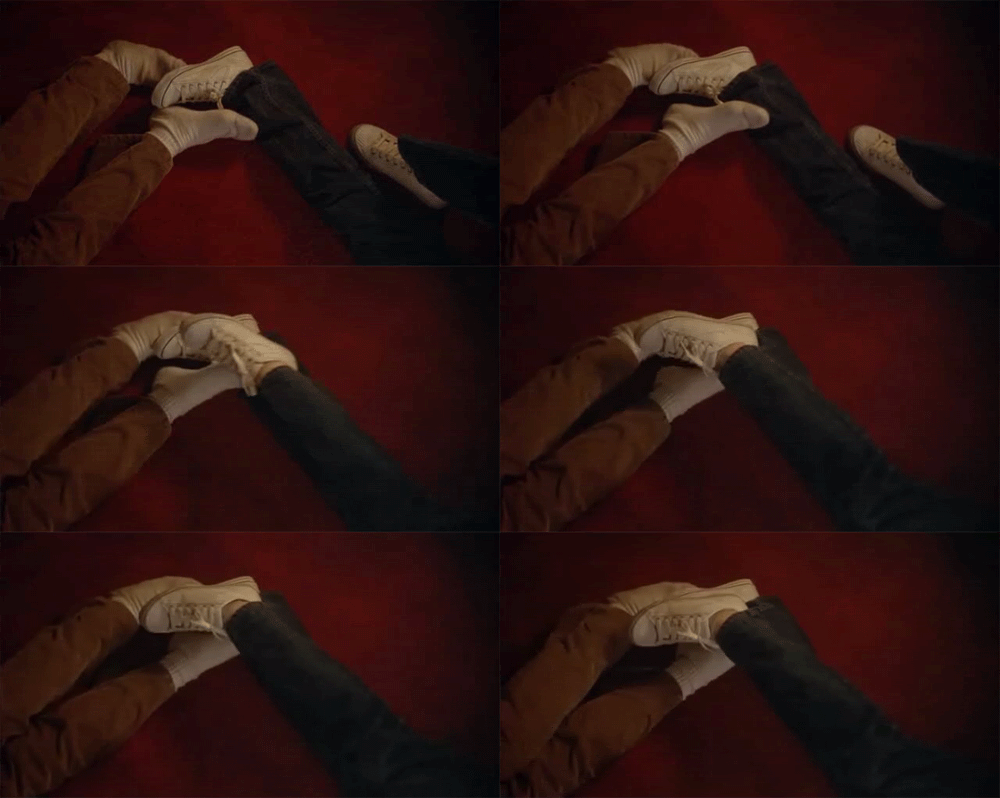
#6: I chose to animate this scene because of the quote Mercer says about the dream that he had. After this scene, it shows Mercer’s dream. His dream is a popular scene from the movie featured in many gifs already, which is why I animated the scene right before his dream, showing their feet touching.

#7: Mercer began his roadtrip to find his brother, and this animation shows his first encounter with his brother.

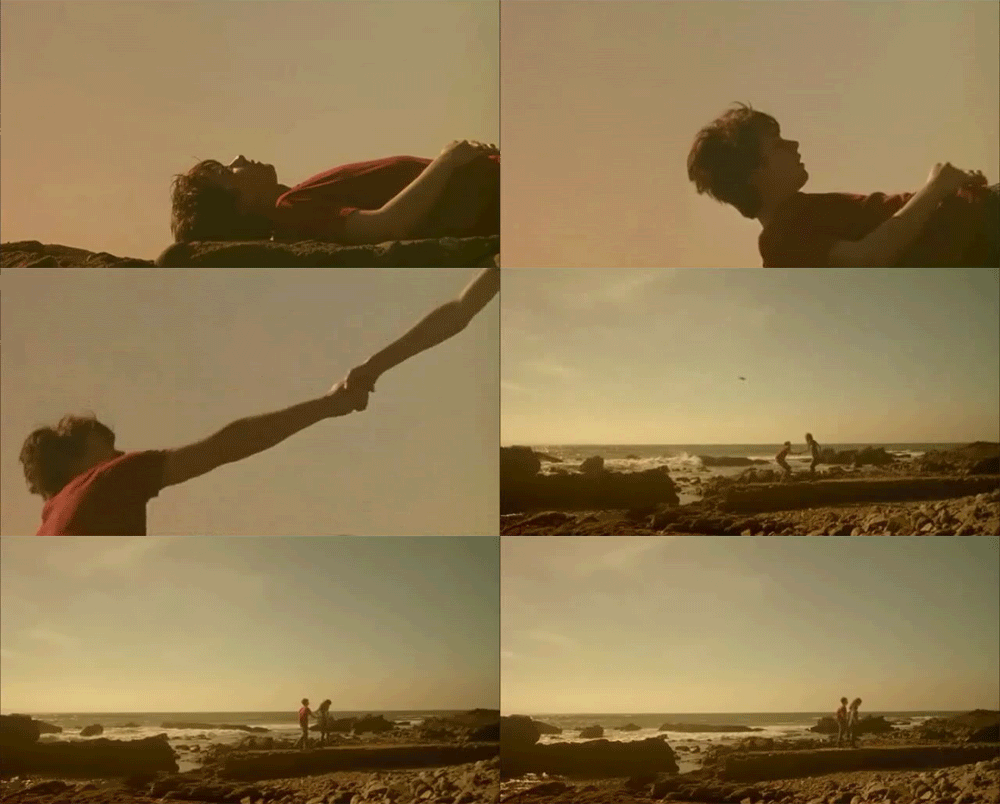
#8: This animation is a representation of what Kate is for Mercer throughout the movie. She is there to help him on his journey. First, she kept him company on the phone, and in this animation, she’s helping him up and guiding him to where he needs to be.

#9: Because Mercer’s search for Arlen is the focus of the movie’s plot, this animation shows their final interaction after Kate helps Mercer back to his feet.

#10: The last scene of the movie is featured in this animation. Kate and Mercer are going back home. She’s driving, and he’s letting her take the lead. Although the journey Mercer intended to take was the journey to his long-lost brother, he ended up driving all the way to Mexico to find Kate so she could bring him back home.

The gifs were made using this tutorial and Adobe Photoshop CS5.

the go-getter

The film opens with Mercer, dealing with the recent death of his mother, stealing a car to find his long-lost brother. He finds a cell phone in the car that he stole, and he starts talking to the owner of the car while he’s on his roadtrip.

“You’re a jerk, jerk, jerk…but I like the sound of your voice.”
- Kate

Through their conversations, Kate and Mercer get to know each other and become closer.

Kate’s voice becomes Mercer’s companion on the trip, and he starts to imagine her with him, keeping him company and helping him find his brother.

“Doesn’t anyone know anybody at all?”
- Kate

Finally, Kate finds Mercer and tries to steal her car back. Once they meet, their connection through the phone translates into a connection in person, and Kate accompanies him on the rest of his trip.

“It was the dream I had that night. You might’ve had it too. It could’ve passed through our feet.”
- Mercer

“I’m looking for Arlen.”
- Mercer

Throughout the film, Mercer makes various stops looking for his brother, who moved from place to place. When he finally finds him, Arlen makes a comment about their mother, not knowing that she died.

Kate, now there to accompany Mercer in person, helps him in his journey to find his brother and closure after the death of his mother.

Mercer and Arlen talk about their lives and the one thing they have in common, their mother. Afterwards, they go their separate ways.

Kate and Mercer drive back home after the long trip they took together to find themselves and each other.

Evolution

iPhone Evolution

The evolution of the iPhone is something that I have witnessed first hand. I got the original iPhone when it first came out. Since then, someone in my family has had every version that ever existed. Many of these phones died tragic deaths, from the washing machine to large falls to giant ocean waves. Losing an iPhone isn’t just losing your ability to make phone calls, it is so much more than that. I use  it for everything. Whether it is listening to music, taking photos, surfing the web, or checking my email. If I can’t do it on my phone, chances are I’m not going to do it.

It is always exciting to wait for the next software update to see what new things they are going to come up with next. Phones have come to do more than we originally ever thought possible. iPhones have not only changed themselves, but also changed the way that we use and think about phones. Phones aren’t just for making phones calls anymore. They are miniature hand-held computers with which we can do such a vast range of things. They are now customizable for each individual. They are a part of who we are and how we communicate in the world. They are not only a part of our electronic evolution, but also our social evolution as humans.

In order to make this image I first found individual images of each type of phone. I saved all of those images to my desktop and opened GIMP. I set the background size to approximately 600×2000. I then opened each image as a layer. Next I used the move tool to put them in the correct order. It took while for me to figure out how to get them the same size. When using multiple images you have to make sure to resize each layer individually or you will end up resizing the entire project. Finally I used a  the tool that looks like a magic wand to select the background area of the image I wanted to delete. Once you select the area by clicking on it you just press the delete button on you keyboard and it goes away. Since that tool is often not perfect, I used the eraser afterwards to remove the lingering background particles and clean up the image. This was the most challenging part. I took a great attention to detail and awhile to get the hang of, but in the end it worked rather well. Once the image was put together correctly I saved it as a jpg so that it could easily be uploaded to this blog.