Splash The Color

Gotta love those Blue Birds. They provide so many opportunities for amazing photography. I used picnik and photoshop for this assignment. Initially I uploaded the picture into photoshop and enhanced the blue-ness (is that a word?) of the blue bird. I then uploaded it into picnik and meticulously removed all of the color around the [...]

Splash the Color – ds106 Visual Assignment

Conservatory Water Lily


Visual Assignment 340: Splash the Color
Color splash is a technique to emphasize details- you remove all color from a photo, and then restore original color to a single object, e.g. a green apple on a table.


Steps the I used for the Assignment:

  • I opened up Photoshop and drug in the photo from the Explorer folder that I wanted to use. 
  • You could also open it from the File menu. 
  • I duplicated the background photo in the Layers palette and applied a black and white adjustment layer (the half black/half white circle at the bottom of the Layers palette). 
  • I then went back to the adjustment layer menu and choose the Curves adjustment.  Within this dialog box I pumped up the blacks by dropping that portion of the histogram (bottom left)  and pulled up the whites (top right) to add punch to the photo. 
  • Then I went back to the black and white adjustment layer and started painting with black paint on the layer mask. Anywhere you paint on the mask with black shows the color layer below. If you make a mistake you can switch the paintbrush to white and paint out anything you have painted in incorrectly. You can cover a large area with black paint and fat brush and then go back to the edges for refining the image with a small brush and white paint (always check to make sure you are painting on the mask layer only. You can tell it is the layer mask because when you are on the mask there will be a black box surrounding the mask when it is targeted). 
  • You can change your brush size on the fly by using the left (to make the brush smaller) and right  (to make the brush larger) bracket keys when you have the brush tool selected.
  • Once you have painted back in all of the colored parts of the photo by using the mask – you should save the file (both as a PSD for future editing and a JPG for posting to the web.
 Conservatory Bromelaid

Lots O’ Peppers 
Lots O’ Peppers 2

Color Splash

Roses are red

Picnik collage

Visual Assignment: Splash The Color

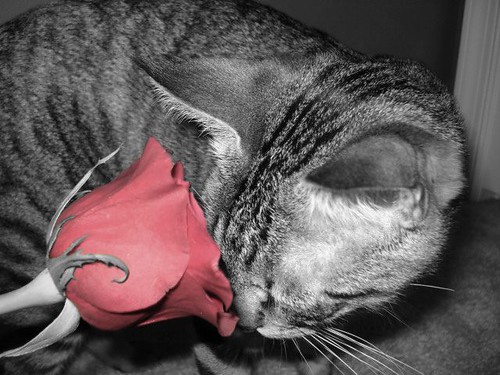
With the color splash visual assignment, I found an old picture of my cat on my computer with a bright red rose and thought this would be perfect to use for the splash of color. For this assignment I used Picnik to create the black and white with color. I used Picnik’s black and white filter for photo and then it has an option to erase the black and white with a paintbrush. I adjusted the size of the paintbrush and painted the area that where I wanted the color to show through. After saving this, I but another black and white filter over the image and then faded it so the rose color wasn’t as harsh and had a more vintage look.

Color Splash Gif

I felt like I needed to do one more assignment to get the number of stars needed for the week, even though I’m not doing this for a grade. I really wanted to try the movie summarized in gif ones but the movies on my computer right now didn’t really lend themselves to that assignment.
I really liked the color splash assignment but I was itching to make a gif for the Say it Like the Peanut Butter assignment. So I combined them, and here’s the result.

It’s the scene from A New Hope where Obi-Wan is about to face Darth Vader, I haven’t seen the movie in awhile but I remember it being a pretty pivotal scene considering the outcome of the battle.

I wish Obi-Wan didn’t lean to the side, and only the lightsaber was moving but it was hard enough trying to get just the lightsaber be the only thing in color. I also wish that Obi-wan had the red light saber because I feel like that would’ve stood out more in the black and white gif, but alas he was not on the Dark Side.

There is a tutorial I was working on for this but it ended up too long so it’s going to get its own post. It should be up before the day is over.

Visual Assignment: Splash the Color

The assignment: “Color splash is a technique to emphasize details- you remove all color from a photo, and then restore original color to a single object, e.g. a green apple on a table. Think of the Girl in the red dress from Schindler’s List.”

So, I chose a picture of my friend, Emily, because her shirt was a very bright magenta color.   I looked online for a few ways to do it using photoshop.  I was having a tricky time with the tools, so I improvised and used the eraser tool and took advantage of the concept of layers in photoshop.  

I decided that I might as well make a tutorial out of this, for those who are also not as photoshop savy.

First, I loaded my photo into photoshop (clicked and dragged it from the desktop to the photoshop icon).  I then selected the entire photo, then copied and pasted it right onto the same document.  This creates another layer.  

Next, make the top Layer (Layer 1) black and white.  Image>Adjustments>Black & White.

It should look something like this:

I then used the eraser tool and erased from the black and white area the part that I wanted to be in color, in this case, my friend’s shirt.  You want to make sure that you are on Layer 1 (it will be highlighted) when you are erasing, otherwise it will look like you are doing nothing or a message will pop up saying something about the layer not being selected.  In case you didn’t know, the Eraser tool is found about the Paint Bucket Tool and the History Brush Tool.  You will be able to tell immediately when it is working.  Zooming in and adjusting the size of the eraser makes it easier for smaller or more detailed areas.


Splash The Color

Red Berries

This picture is of a tree outside of where I work. When I saw the berries i knew that it would be perfect of the color splash assignment. Not knowing how to make a “color splash” image in GIMP I consulted YouTube. Here is the link that I used to learn how to do this assignment: http://www.youtube.com/watch?v=Pi6e8Z7MxG4 Once I was walked through the steps this was a relatively easy assignment. The most painful part was moving my mouse around in small circles to make the berries red. My hand started to cramp up after a while of doing this. Hopefully this is not a serious injury. The things I do for DS106!

Splash of Color

summer days

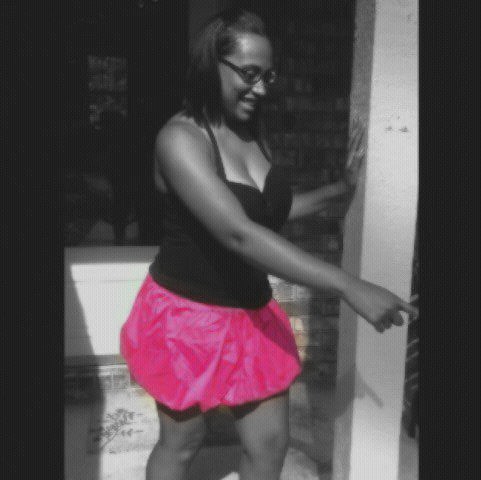
I chose this image to do the color blast on because i felt like the pink skirt is really what draws most peoples attention to this particular photo of me. So this picture was taken by my sister over the summer she needed to see if her camera was working so i tried to stand in a pose that wasn’t too unrealistic ha! When doing this photo i uploaded it to picnik and followed the instructions that were provided by a fellow classmate.

LovelyLashe <3

Go Blue (or, Go Maize)

I completed my first visual assignment last night.  I chose to use the color splash on the University of Michigan football helmets.

I have always loved the contrast in colors of the maize and the blue.  The Michigan uniforms are unique, and thought the color splash would go well with the helment.


I used GIMP to complete this assignment.  It was a lot easier than I though it would be and I really enjoyed it.  The color splash is cool way to add emphasis to certain parts of the picture.  Cool stuff.


Here is the tutorial I used, which was straightforward and overall very helpful.  http://www.gimp.org/tutorials/Selective_Color/

Blood harvest (The Softain Biopsy) – Visual Assignment 340: Splash the colour

By now I’m sure many of you are quite familiar with the ground-breaking work of specialist surgeon Dr Sigmeund Softain. Dr Sigmeund Softain is the doctor responsible for pioneering The Softain Biopsy medical procedure*.

The Softain Biopsy is a medical procedure involving the sampling of diseased human cells or tissues for examination, repair, duplication and then re-insertion back into the patient.

What isn’t known is how Dr Sigmeund Softain manages to repair the diseased human cells. Well, earlier this week I had the privilege of spending time with Dr Sigmeund Softain in his lab. During this time I managed to find out out more about Dr Softain’s cell repair technology. "You see, it’s all rather simple" Dr Softain told me. "I use a rare species of spider that lives in a citrus tree common to suburban Australia to repair and then harvest diseased blood and human cells."

*Dr Sigmeund Softain is currently undergoing an investigation from the Australian Future Medical Procedure Organisation (AFMPO) and has had his practise license withdrawn.

Visual Assignment 340: Splash the colour

Color splash is a technique to emphasize details- you remove all color from a photo, and then restore original color to a single object, e.g. a green apple on a table. Think of the Girl in the red dress from Schindler’s List.

You can do this in a number of ways with photo editing software or using mobile apps. The answer lies in the Google.

Color Splash Take 2: FLAMINGOS

I went to the Philadelphia Zoo last year and took a picture of flamingos. Now, they weren’t as bright as I have seen them in many pictures so I decided to help them out by having them be  the only colorful thing in the picture.
Things I learned while doing this 1 Flamingos have very skinny legs. and 2 Grass is annoying.