Tell a story using nothing but sound effects. There can be no verbal communication, only sound effects. Use at least five different sounds that you find online. The story can be no longer than 90 seconds.
When I was working out what to do with this one I seemed to have missed sound effects and no longer than 90 seconds.
This is an idealised walk combining sounds I’ve recorded over the last year or two when walking, some as audioboos.
Starting with traffic, there is bird song & rooks, footsteps through some wet ground, ducks, footsteps on a rocky path, a raven, a hill burn (small stream) finishing with the sound of one lark. It is mostly pretty quiet. it is also about 5 minutes long.
Five minutes of footsteps and tweets
This is as noted above a lot longer than the 90 seconds limit. While this particular example may not hold a listener for 5 minutes I do think that longer audio without speech has its place. Last year when I went to Field Recording at the Scottish Music Centre I noted:
what I'd take away was the quality of listening shown by the audience & presenters. The time taken. Timothy Cooper's Blast beach gave plenty of time to look at the images: audio can be slower. I am thinking again about Ian Rawes' "the ravenous eye and the patient ear", Tim Nunn's theatre performances in the dark.
Use Google Maps to create your own custom map that includes photographs of places.
I’ve been playing with google maps and the google maps api for a while so was please t osee some familiar territory for this Assignment.
This afternoon Dorothy, my wife, and I took a walk round Ardinning Loch, we do this nearly every week often twice a week in the summer, It is a short walk that is always interesting. Ardinning is a SWT reserve.
I used Trails on my phone to record a kml and gps track. The kml file was imported int oa new google map. I uploaded the photos it was then just a matter of dropping on some pins, filling in a title and pasting in the url to the image file.
Over the last few year I’ve played with developing a workflow for creating maps like this using the GoogleMaps API. For this I use SuperCard, a mac scripting application. The project allows me to import a gpx file exported from Trails, get exif data for some pictures, iPhone photos have location data imbedded (It also lets me add locations to other pictures by comparing the time taken with the gps file). It then exports a gpx file which I upload to this website and a php file created a map.
Here is the Ardinning Walk map 120303 Ardinning and a whole set of Mapped Walks. In my opinion this has a few advantages over using google maps, you can embed audio & video, and the popup boxes link in sequence. It is also a faster to produce. Obviously it has the disadvantage of being a wee bit trickier to set up.
I’ve a fair number of blog posts going into this in a bit more detail: tagged googlemaps.
But what is it good for?
I think these sort of maps add another dimension to telling a story or presenting information. helping to tell a story in space as well as time. I can see this being incorporated into all sorts of class room projects, either for mapping learning experiences or creating fictional maps. This one The Kidnapped Trail – Google Maps is a great example of the possibilities.
Alan Levine’s post about watching cool flick’s with Jim Groom finally got me to get of the snide and finish this animated movie poster for the amazing Hitchcock classic Rear Window. I have an older post with animated GIFs from Rear Window, but all things GIF need to ratcheted up a notch every few weeks.
This poster is was created for the limited theatrical re-realease of the movie in 1999 after an extensive restoration. I am a little disappointed with myself as if I were to really make something truly awesome, it would have been modeled after the original theatrical poster, which showcases all the happenings in the many neighbors windows. *Note to self, amazing summer project might include creating a number of Hitchcock animated movie poster GIFs.
To make this poster, I used the James Stewart GIF from the previous post, as well as made a new one for Grace Kelly. The work on Grace Kelly’s GIF was a lot tougher as it required the erasing of the background on ten separate frames (not fun). Here’s what one of the frames looked like beforehand:
To create the animation, I used the animation timeline in Photoshop in which you basically turn on and off different layers per frame. This is also a bit tedious, but it allows you to create some interesting timing options. Each frame can be assigned its own amount of time, which is how the pauses work. Here’s a look at a few frames of the animation timeline:
And here’s a look at the layers:
Since Alan’s post refers to Blow-Up as well as Rear Window, looks like I still have more work to do.
Create and share animated GIFs and 3D anaglyphs using more than 40,000 stereographs from The New York Public Library.
Since I’ve spent a fair bit of time animating gifs for DS106 of late this was interesting.
Stereoscopic photography recreates the illusion of depth by utilizing the binocularity of human vision. Because our two eyes are set apart, each eye sees the world from a slightly different angle. Our brains combine these two different eye-images into one, a phenomenon that enables us to “see,” ever so slightly, around the sides of objects, providing spatial depth and dimension. Stereoscopic views, or stereographs, consist of two nearly twin photographs — one for the left eye, one for the right. Viewing the side-by-side images though a special lens arrangement called a stereoscope helps our brains combine the two flat images and “see” the illusion of objects in spatial depth.
and
The Stereogranimator joins these latter-day adventures of the venerable GIF, mashing up an important early genre of internet folk art with a nearly forgotten species of folk photography.
You get to play with the creation of the gif, this creates a 2 frame animated gif and alternates between them.
One of the things I’ve really been enjoying about DS106 is riffing off the ideas of Alan Levine (CogDogBlog) like many edubloggers I’ve been following and being inspired by his blog for years. 50+ Web 2.0 Ways to Tell a Story is a standard teacher 2.0 text I’ve also, like many, used Feed2JS on several occasions. A while back I even tried to get a piratebox working after reading of the Storybox.
Anyway it is great to watch Alan teach his ds106 sub group and to follow his hyper activity on his blog. The other day, playing with the current #ds106 audio section he blogged: CogDogCodeAcademy: A Random Freesound Generator – CogDogBlog, this struck a cord as I recently posted #edtechcc Assignment 2 The Sight of Sound using the wonderful Freesound site. Revisiting it and looking at Alan’s code I notice that Freesound has an API. This looked interesting. I’ve now managed to create what I hope may be a ds106 Assignment flickrSounds.
flickrSounds
flickrSounds is a simple mashup that searches Freesounsd and flickr for the same word. It then display the sound and picture. You can reload either until you get an image and sound you like. This can be added to a list, and the exercise repeated. Once you have a set of picture/sounds you can grab an embed code to put hem on a blog. A set of pictures/sounds could create a story, illustrate a quote, saying or slogan.
Example
This is for searching for ds106 4 Life. I clicked through a few images and sounds for each word.
ds106 by electrovert Attribution-NonCommercial License
I’ve built in a Jim Groom busy widget into the webpage, the default search is dog, my example plays off the ds106 4life meme. Stephen Downes suggested in a comment that ds106 might be being over-branded I love ds106 but I think it?s being over-branded, this didn’t go down too well, but has inspired a lot of interesting stuff:, Martha Burtis’ The Cult of 4LIFE a graphic jokey one and I?m Still Chewing on that Over-Branding of DS106 Comment | mbransons and the comments on that post stand out for me.
It was an interesting idea, as someone just joining in I can see what Stephen Downes means. A lot of the DS106 rhetoric is fairly full on, there is a lot of self reference and pride/ego involved. I also could be put off by not sharing a culture with many of the other participants, being much older, having different frames of reference etc. Looking across the Atlantic it there is a very USA vibe. Lots of other folk with different backgrounds would have different reasons, I can see how DS106 could seem a bit hard to penetrate when looked in on. I thought a wee bit before joining in. but…
There are a couple of things that point the other way, DS106 is incredibly welcoming, the instructors are obviously giving a huge amount of time to the course and still have time to engage with the drive-by participants. They even made an effort to include my rather non standard blog RSS feed in the ds106 site. This seems to me to more than compensate for any exclusivity that ds106 might project.
The over-branding can be seen as glue, very important when you are trying to get participants to work together, and is more over more often than not obviously jokey, mocking the course and the organisers. #jimgroomart (eg: Blue Jump Suit #JimGroomArt #ds106:) is just an example, mock the teacher is one way to strengthen the connection, personalise the course, have fun and in weird way honour the amount of effort Jim makes to comment and make folk feel welcome in DS106.
I am also blown away 1 by the delight ds106 participants take in someone else grabbing what they have created and playing with it. The flickrSounds page is an example of this, without Alan’s positive reaction to my first tests I would not have carried on with this and had so much fun learnig a wee bit more JavaScript.
Code Thoughts
The root of this bit of fun was Alan’s post, in it he compares ds106 style learning with the new badges style learning:
Heck, I would rather do my own code challenges than someone else?s monkey see, monkey do. Thats the rub with this stuff, the motivation changes completely when it is something you need/want, versus someone else?s rote exercise for badges.
I commented to the effect that I found codeyear quite useful. I’ve been trying to keep up with the weekly JavaScript lessons there (just 3 weeks behind at the moment), as an afterthought I noted that Freesound have an API. This got me started on flickrSounds. In a way this proves Alan’s point, I’ve spent much much longer playing with this than I have in several weeks of codeyear. Partly because of the intrinsic interest of the task and partly due to Alan’s encouragement (blog comments and twitter).
But… I have messed about with javascript a few times now, but this is much neater code than usual (still horrible but relatively better). some of the improvements came from my experience of another CogDog/ds106 inspired piece Visualize That Quote but partly due to codeyear, where for the first time I’ve had the beginnings of an understanding of the basics of JavaScript.
There is a way to go with FlickrSounds, I need to add the ability to remove sound/pics from a ‘saved’ set and I need to test in IE, I’ve never manages to write any JavaScript that worked in IE first time.
Spirit of DS106
This has not been a ds106 assignment, I’ve not done any this week. I’ve only done one daily create, but I feel pretty much in the ds106 zone this weekend.
Footnotes:
1. blown away is the nearest I can get to the DS106 comment style. This is much less reserved that my usual nice ↩
The assignment is to reduce a movie, story, or event into its basic elements, then take those visuals and reduce them further to simple icons, four of them. Write your blog post up but do not give away the answer, let people guess! The challenge is to find the icons that suggest the story, but do not make it so easy.
No one will have difficulty guessing this one I love the noun project. The workflow suggested in the task is, I think, screenshots, I downloaded the illustrator files, copied the icons to fireworks.
For this assignment, I created all my images in Photoshop. To move the balloons, I first had to cut out the balloons by using the quick selection tool and move it into a new layer. Then for just the background, I used the cloning tool to erase the balloons from the picture. Once I just had a plain background and the balloons in a separate layer, I was able to create multiple images by moving the balloons and it’s shadow for each screen shot.
Design Assignment 313: Pick a movie poster and animate it. You can see an awesome example and quick explanation by Michael Branson Smith here.
The Product:
The Process:
It took me only a few minutes of contemplation to come up with this idea, but the execution was a lot more involved than I thought. That always seems to be the case, though. When I see my idea in my head, it always seems very easy and simple. No problem. But when I start working on it, it’s a whole new ball park.
The overwhelming majority of individuals who are engaged in the DS106 course are doing so remotely. Today’s statistics indicate that there are 596 active DS106 members whereas less than a total 80 are in attendance in the two sections facilitated by Jim Groom and Alan Levine at the University of Mary Washington.
However, if you are part of the vast majority of off-campus DS106 participants, imagine if you could acquire a Blu-ray Disc which contained the following:
all DS106 lectures of both Jim Groom & Alan Levine
featured student reflections from past DS106 courses including the talented artist Giuila Forsythe, two of Saskatchewan’s most influential educators Dean Shareski & Alec Couros, and inspirational designer and DS106 facilitator Tim Owens
tips on how to acquire a personal domain and quick-start steps to setting up a WordPress blog & theme
time-saving tips on how to use GIMP and Photoshop
sample student and instructor progress conferences
top three assignments (voted by peers) for each of the eight assignment categories from past DS106 courses
How much would you be willing to pay for such a Blu-ray resource? I know that as a non-credit online “freeloader”, I may not have paid money to enroll in the DS106 course, but I would certainly pay handsomely for such a DVD if it saved me time and provided me with additional resources to improve my learning experience.
When I was considering enrolling in this course, I was impressed by what Jim Groom stated in his welcoming post entitled “ds106: We’re open and you’re invited“.
… what made it amazing was that anyone can do as much or as little as they wanted as part of the open, online section and leave the rest. We don’t accept apologies and we don’t believe in guilt, there is no sorry in ds106. Simply come prepared to make some art, have some fun, give some feedback, and leave when you want.
This important statement “there is no sorry in ds106” resonated with me. True, it provided me with a guilt-free opportunity to learn. However, this quote was also quite similar to an important line and theme from the 1970 movie “Love Story” staring Ali MacGraw and Ryan O’Neal. In fact, it was this quote that motivated me to consider designing the following Blu-ray Disc cover as part of the “Animated Movie Poster“.
In that most participants in this DS106 course were likely born after 1970, and may not be familiar with the original movie, I thought that I would share the following original image:
I realize that my attempt to animate this image is somewhat elementary when compared with my colleagues’ more sophisticated submissions. However, I am just learning to use Photoshop Elements and I hope, in time, to eventually improve on the animation process using this application.
In the meantime, I chose to use a free, Windows tool called Ulead’s Gif Animator Lite (GALE). I concentrated on the word “STORY” because the focus of DS106 should be on the STORY (and not the software). Unfortunately for me, I am spending many hours becoming familiar with the intricacies of the Photoshop Elements software and I can assure you that I do have a story to tell about my learning experiences.
To animate a word, I knew that I would need to save several copies of this Blu-ray Disc cover, each with the word “STORY” in a different color. I began by changing the black “STORY” in the original “Love Story” font to red and learned that one does not want to have to change the letter colors pixel by pixel. This discovery only took me 2 hours! I then decided to replace the original black “STORY” with a similar font in Photoshop Elements where I could highlight all 5 letters and select a new color. Since only .BMP and .JPG images can be loaded into GALE, each Blu-ray image, with its own “STORY” color, was saved in a .JPG format.
In GALE, one selects the “Layer > Add Images” menu items which allows selection of the prepared colored “STORY” .JPG images using this important technique. Each of the individual color images were then set to display for half a second. By clicking the “Start Preview” button, one can determine if there needs to be any changes in the respective color time delays. Once the animation test looks reasonable, one can click the “File > Save As” menu items and save the result as an animated GIF.
In summary, there is no doubt in my mind that my engaged learning within the DS106 community is indeed a “Love Story” of sorts. My only concern, is that I have not added too much friction, with this Blu-ray fiction.
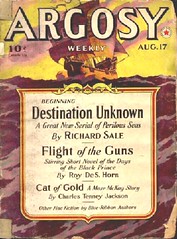
I found this through a google image search. Since it was posted on a discussion forum, I was able to contact the creator (stuart) for permission to molest his work. I’m not sure if this movie project is still underway, but that’s okay. I doubt it would have been an improvement on the book.
The first thing I do when working on something in Photoshop is duplicate the background layer, then hide the background by clicking on that eyeball thing. That way if I totally mess something up, I still have the original handy.
I don’t know how I’m going to animate it at first, but I think I could do something with the stormy sky and the text, and maybe that face on the mountain. So I start breaking the image apart. I carefully trace along the mountains’ edges and the upper sides and top of the image, so I have a sky/background selection, then copy and paste it on a new layer. I use the magic wand to select the blank part of the new layer, then select-invert and go to my background duplicate layer and delete the sky area. That gives me a foreground and a background on separate layers, but the image appears the same.
Separating out the type is a little tricky. I used the rectangle selection tool to copy each block of text and paste it on a new layer, and I tried to keep very close to the letters so I was only getting a minimal amount of background. But then I had to delete the type from the background. On the bottom part of the poster it was easy, because I could just fill my selection area with black. For the lines of type in the sky I would copy and paste bits of sky and use the clone stamp tool to cover the letters, then use the smudge tool to blend the hard edges. It doesn’t look quite right, but it’s passable.
I then decided to separate out the face image from the mountain. Trace the face, copy and paste, and then I had a face layer. To cover the face on the mountain layer, I filled the area with black, then I selected other parts of the foreground and copied and pasted them. The blurry snowflakes were helpful. I found that using the lasso selection tool with 10 pixels of feathering worked pretty well too. Feathering softens the selection edges so the bits and pieces blend better. I selected all the patch layers and the foreground and used the merge function in the layer panel to combine them.
It helps to name the different layers so I know which is which. I made a copy of the background and played with the layer adjustments – levels and so forth – to make a darker sky. I could use that for a lightning effect.
Once I had all the parts, I copied and pasted frames in the animation pane and experimented with turning layer visibility on and off. I tweened between some frames and let others flash to make it look stormy. I think it came out okay.


