Gold Squad

For this assignment the task was to create a “find the difference” picture with at least 6 differences.

My inspiration for this was my photography work in which I edit objects and things out of photos all the time to get a polished “perfect photo” look. For example this piece of previous work below comparing a “before and after” of the editing of a photo:

Instagram Photo

I therefore decided to take a twist on the assignment by editing a photo that I had taken beforehand. I would remove some bigger elements to create differences like the assignment asked and then would go on to do my “perfection” editing where I remove everything I find annoying or distracting within the image to create the best/cleanest photo I can.

I started using Adobe Lightroom to edit the image using Spot Removal Tool which works by specifying a source circle and then a destination circle for the source to be pasted over. You can also speicify “Heal” or “Clone” to determine how the source is pasted over it; whether it is just copied identically or healed/merged into place. The Spot Healing Tool view with my edited circles can be seen in the image below:

lightroom

To perfect the image I also used Adobe Photoshop to finalize some of the editing that I started in Lightroom and to remove some other parts that wasn’t possible with the Spot Removal Tool. I used the Spot Healing Brush Tool to get rid of minor parts since it fills them in automatically and then used the Healing Brush Tool to specify appropriate areas of the photo, position these copied areas over the parts to edit out and then blend them in using the Eraser Tool. My Photoshop Editing screen can be seen below:

photoshop

Here’s the final “Spot the Differences” or “Before and After” photos:

IMG_9196-2.jpg

img_9196-edit

As you can see there are quite a few big differences in the photos as well as the small minor “polishing” changes. The big changes include the guy in front of the door on the right, the guy by the Range Rover on the left, the red car/line in the bottom left and all of the Michael Kors and Dior branding on the shop fronts.

I was very happy with how this photo turned out since I edited it to the point where it is as good as it can be that I actually decided to post it online. For this I re-imported it into Lightroom, square cropped it and re-watermarked it in the new crop before posting it to Instagram as seen below:

Instagram Photo

I think my finished “before editing” and “after editing” photos shows some of the power of modern computer image editing and manipulation. There has been quite a lot of controversy online over this sort of “extreme editing” with relation to pictures of models/people edited by businesses or the media which set unrealistic standards/goals to society. For example this recent story demonstrates a magazine possibly trying to make a model on the cover look slimmer than she actually is. Another example of Photoshop editing being caught out which I find particularly funny is these North Korean state-published images which are in some of the quite blatantly not real.

Enter Destination…

For this assignment the task was to create a story using Google Maps about a trip that you have taken. This would be done using the directions tool on Google Maps by entering the start location and then 1 or more destination locations.

My inspiration for this was from one of the other examples where someone had previously completed this assignment. Their blog post as seen here detailed the journeys they completed over a short period of time while travelling over their summer holiday and was very interesting to read with the added maps and photos to illustrate the adventure. This inspired me to want to do this assignment about my summer holiday in 2016 since it was probably the most travelling around I’ve done while in another country. I also wanted to be sure to use quite a few maps and photos to illustrate the journey to make the story engaging like in the example.


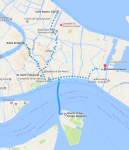
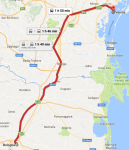
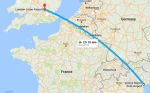
My journey begins on the 15th of September 2016 with a short drive to Luton Airport to begin my summer holiday with my family. From here it was just a short wait before boarding the 2 hour flight to Venice Marco Polo Airport. I spent most of the 2 hours looking out of the window (I don’t like flying if I can’t see the beautiful views outside).

luton-to-marco-polo

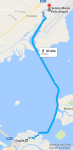
On arrival after stepping out into the surprisingly moderate weather (I was expecting it to be hotter!) we then had to set about getting from the airport which is just on the mainland (right on the edge with water each side of the runway) to the city of Venice. This is slightly more difficult and unusual than it sounds as there are only 2 ways to get to the city (or 3 if you count swimming but I wouldn’t advise that). These are over the road/rail bridge which stops right on the edge of the city or via a boat.

IMG_5996.jpg

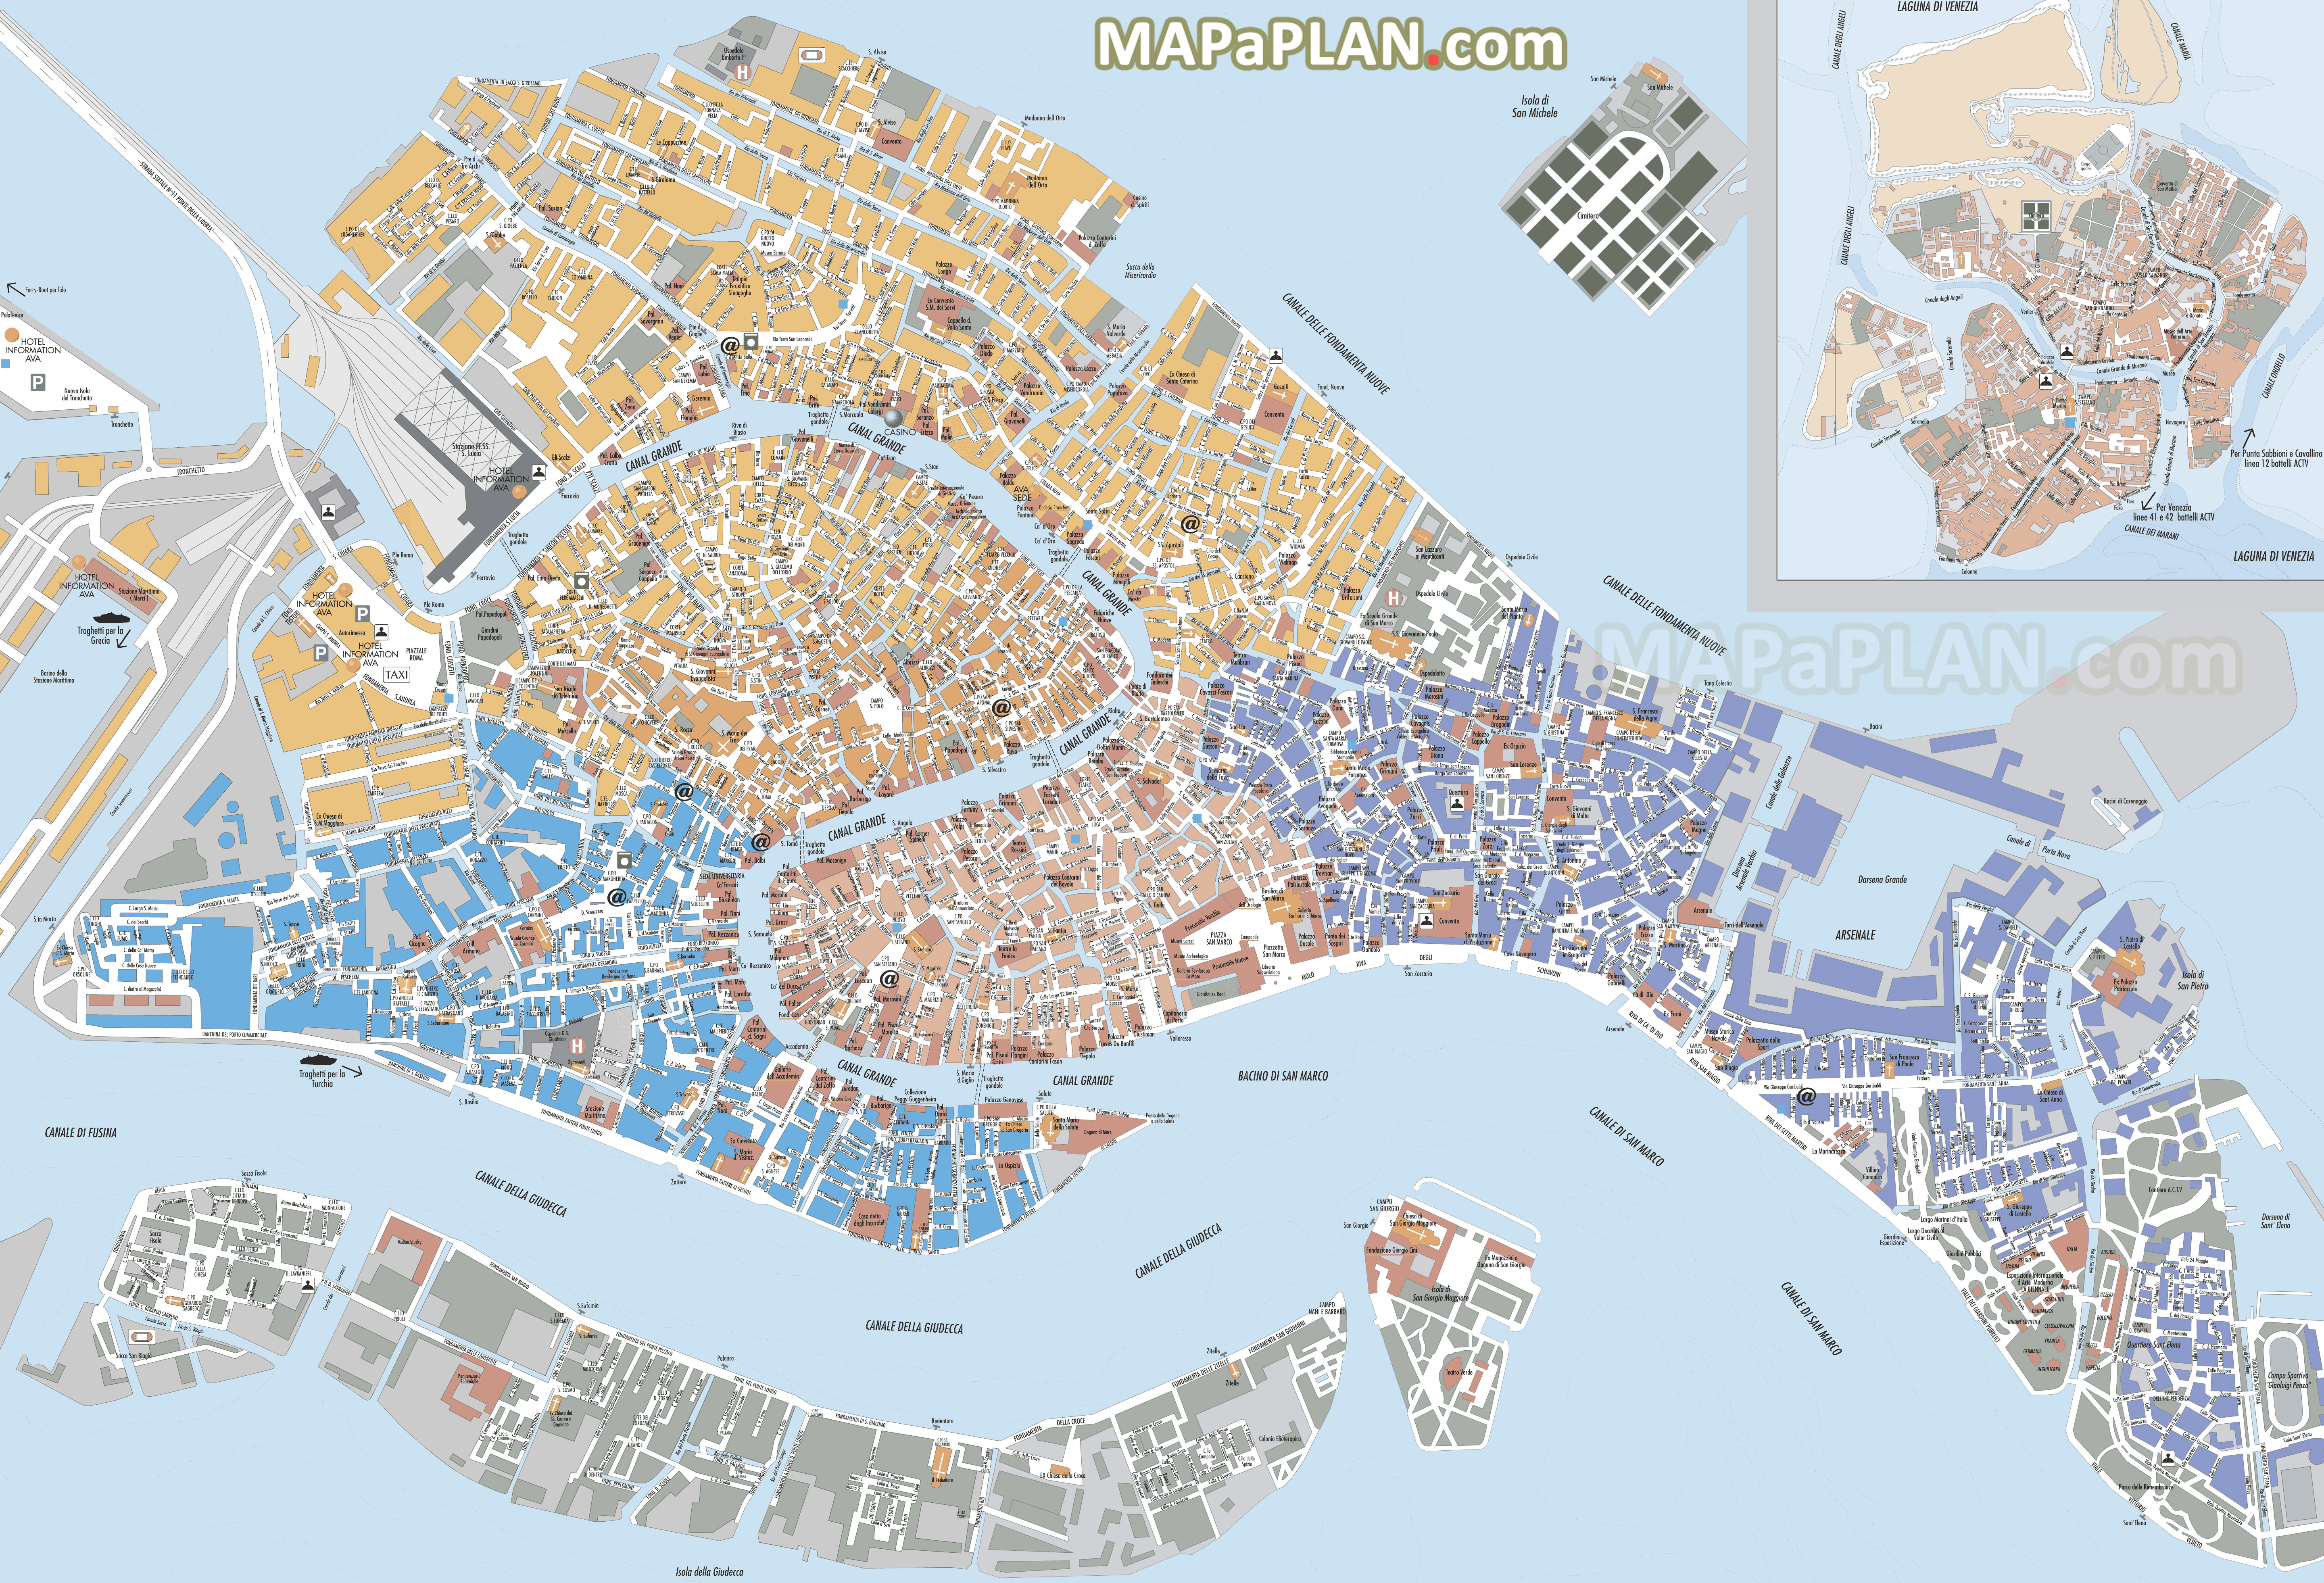
We got the bus from the airport to Piazzale Roma which is the bus station in a square on the edge of the city. In this square at the end of the road/rail bridge the roads simply stop with this being as far as wheeled vehicles can physically go into Venice.

airport-to-venice

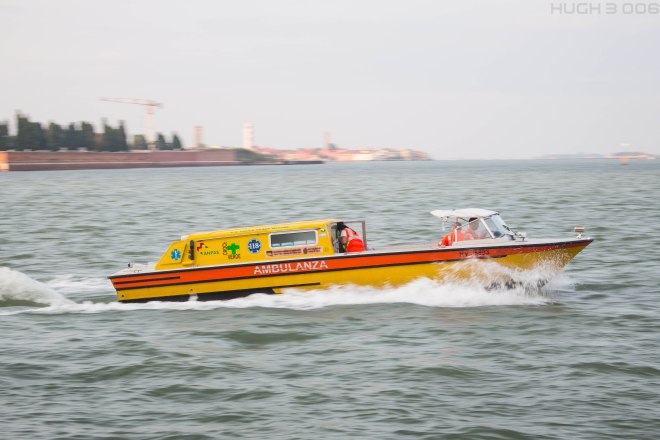
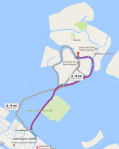
The journey from Piazzale Roma to the Flat we were staying at near Fondamente Nove was quite eye opening catching the bus (which was a boat) around part of the city to the bus stop there. As obvious that it is that everything which we have in normal “on land life”  is a boat in Venice it is quite crazy actually seeing it in person! E.g. you have Police boats, Ambulance boats, Fire boats, Bus boats, Taxi boats, even rubbish removal boats and the list goes on! (Even the bus stops are just floating pontoons parked off the edge of the land).

plazza-roma-to-flat

IMG_6033.jpg

That evening after unpacking in the flat we went for a walk to St Marks Square which is the iconic big square in the centre of the main Venice Islands. Even a simple task such as this of going on a walk is more complicated in Venice because not every path you go down leads you to somewhere with often them just being dead ends with the water “road” at the end. Therefore it was necessary to use a map to ensure we went down the right paths with the necessary bridges. You often have to take a loop to get to where you want as there are few straight paths to get to places. That evening we also discovered that we’d come to Venice just before the city flooding starts in the winter months where the water just rises up through the drains in the ground covering most of the paths in the city used to get around. Thankfully since we were there in the weeks just before the water only rose a few inches in certain areas around St Marks Square.

flat-to-st-marks

Over the next few days we explored various places around the main Islands including  the Rialto Bridge, St Marks Square again, accidentally finding the Venetian Arsenal and the Church of San Giorgio Maggiore. One day we also took a bus trip to the Island of Murano which is a bit further out from the main group of islands and is where all of the Venetian glass factories are. A particular highlight for me was going up St Mark’s Campanile with the stunning views you can get of the whole of Venice from the top. You can literally see the water around most of the main Venice Islands where they just stop!

various-places-on-main-islands2
murano

img_6687

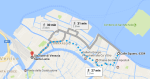
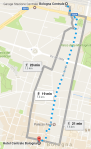
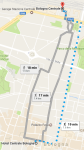
The next part of the holiday involved moving from Venice to Bologna where we would stay for another couple of days. First we had to walk to the station across Venice at the end of the road/rail bridge and then catch a train from there to Bologna which is a bit further south. The journey was quite interesting looking at all the towns and countryside out of the window. After arriving in Bologna we walked from the station to the hotel and went out that evening to explore a bit.

flat-to-station
venice-to-bologna
bologna-station-to-hotel

The next day we went to the Lamborghini Factory and Museum which involved getting a taxi to there in order to be on time and catching a bus back quite a few hours later. The day was amazing as I finally got to visit Lamborghini which I’ve always wanted to do (and was actually how the whole holiday came about when I half jokingly said we should go there). I must have taken nearly if not more than 1000 photos on the day, saw the latest cars being produced and saw many rare limited edition cars that I never thought I’d see.

bologna-to-lamborghini
lamborghini-to-bologna

IMG_8179.jpg

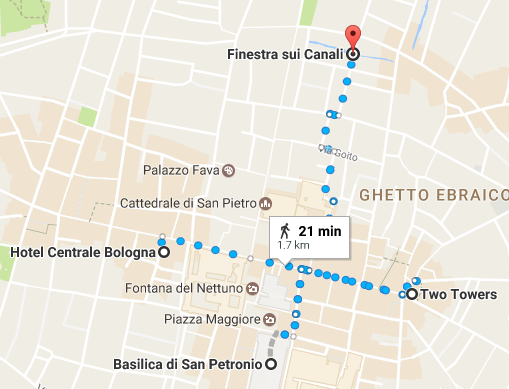
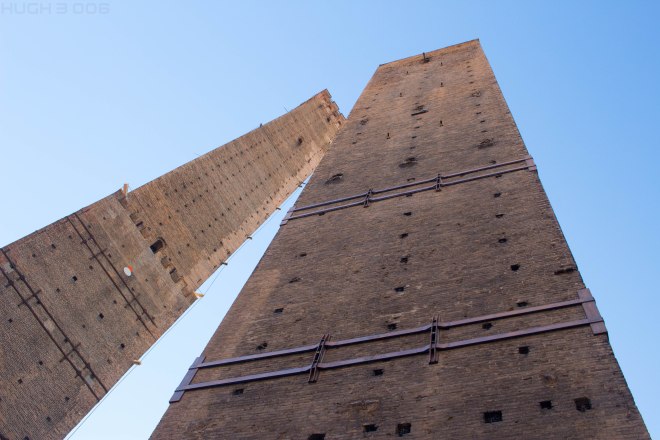
The following couple of days we explored various places around the centre of Bologna including Basilica di San Petronio, the window in a wall overlooking the old canals that run under the city and climbed up one of the iconic olden towers (Asinelli Tower). This tower climbing was a very scary experience seeing as the tower leans quite a lot and the staircases are wooden with low hand rails, narrow , have uneven steps and also lean.

bologna-various-places

IMG_6989.jpg

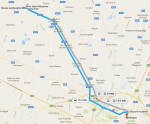
After the few days in Bologna it was time to begin the journey home which involved retracing our steps by walking back to the train station and then catching the train back to Venice.

bologna-hotel-to-station
venice-to-bologna

Once back in Venice we decided to get a boat to the airport which turned out to be quite interesting arriving by water having sailed down the side of the runway.  It was then waiting for our flight and arriving back at Luton Airport in the early evening. A short drive home then completed the return journey having traveled on Foot, Train, Bus, Boat, Plane and Car all in a single day!! Probably the most interesting and fun holiday I’ve been on!

venice-to-airport
marco-polo-to-luton

IMG_8726.jpg

Here’s My Card….

For this assignment the task was to create a business card.

41230634.jpg

Whenever I think of business cards I think of this scene from The Dark Knight. Image from here.


My inspiration for this assignment was from my Photography work which I actually needed to create a business card for at some point in the near future. This assignment therefore served as a useful opportunity to actually create a business card that I may actually use in the future.

Other inspiration was taking a look at other people’s business cards like this one from another automotive photographer and other general photography related business cards on this website. After viewing these I had thought that I wanted to have one side primarily of example of my photography work and possibly my logo while on the other side have the standard contact information.

I started making the business card in Adobe Photoshop using two project files. One for the front and one for the back. In the front file I simply pasted in some of my best/favourite photos into the document and resized them in an equal pattern to fit the standard size (3.5 x 2 inches). For the back I inserted my logo and then using the Text Tool to write my contact information. I also used three small icons on the back, two of which I adapted from logos and one which I created using simple shapes in Adobe Illustrator .

This first attempt can be seen below:

business-card-front1
business-card-back1

However after doing the first attempt I wasn’t overly happy with how it turned out so I went on to make more changes. to the design. For the front of the card  decided to reduce the number of images so that I could position the logo and about line on the front. I took 2 photos from the first attempt and found another that fitted well together having the horizon treeline lined up and sky above to provide a minimal background for the logo. On the images I did have to add in more of the sky to fill the height of the card which was done using the Content Aware Fill Tool which automatically creates pixels in that area based on the surrounding image. For the back I just rearranged the remaining content and made it larger so it’s easily readable since the card would be quite small if it were to be printed.

The finished product can be seen below:

business-card-front
business-card-back

I think the finished product looks quite good and I’m glad I was able to find 3 good images of mine to edit together for the front. The card could potentially look cleaner with one single image on the front however one image doesn’t show a “range of work” so that may need some thought before I go about actually printing any. Also on the card I need to finish making my website before I go about printing any. As mentioned making business cards was something I needed to go about doing as over the past couple of months I’ve had quite a few opportunities where it would have been very useful to have some to give to potential contacts/clients at various events I’ve attended. So I will definitely continue to develop what I’ve created above and probably get feedback from people before progressing to printing.

Photoshop Gone Rogue

For this assignment the task was to create an animated mosaic about a movie using a single image that then splits up into a grid of 9 different animated GIF images of various scenes in the movie.

My inspiration for this was from the Jaws example on the assignment page and from my last mashup assignment which was Star Wars Rogue One related. Differing to the Jaws example I had thought that the mosaic would be more easily created if it was using a landscape still image for the start as the GIF animations would be landscape orientated shots from the movie. During the thought process for this I also took inspiration from the Jaws example in that the GIF animations would appear momentarily one after another rather than at the same time.

To make this Star Wars Rogue One GIF mosaic I first sourced the starting still image of from this website. I then set about souring the 9  GIF images using the Rogue One Trailer 1 and Trailer 2. I copied this links to these videos and then using GIPHY as seen below specified the start points and duration of the animation which would make the selected part of the video as a GIF image which I could then download.

capture

After I then had all of the images I then set about compiling them together to create the final product. I first attempted to use Adobe Photoshop since this allows the editing of GIFs in Timeline View however this didn’t work out in the end as inserting more than one GIF created  quite a few problems since Photoshop works by making each GIF frame a different layer in the project file. This resulted in hundreds of layers for only a couple of GIFs and meant that to position a GIF each every layer would have to be moved manually since only one layer (frame) is made visible at a time. Another issue was that the background still image layer would have to be manually toggled to visible for every frame in the animation. Some of these Photoshop issues can be seen in screenshot below:

Capture4.PNG

I then decided to move to Sony Vegas instead to compile the animated GIF images with the still image. After importing them into a project file the still image was inserted on the first track on the timeline and then the GIF images inserted on the 9 layers above so they would be overlaid on top of the image. Theses were positioned on the timeline at various points after 1 second of still image to create the simultaneous appearing transitions and the crop tool used to position them in a 9×9 grid. After this white rectangles were created using Photoshop and overlaid to create the outline grid which would mask any gaps in the GIF cropping and be present on the screen at all times like in the assignment example.

Below you can see the Sony Vegas project file with some of the tracks visible on the timeline:

Capture2.PNG

To then make this into a GIF animated image this Sony Vegas project was then rendered as an MP4 video (since Vegas does not allow exporting in GIF file format). This video was uploaded to this website which can be used to convert video files to animated GIF images. Using this online tool the options  as seen in the image below were selected to make sure the animated image plays smoothly in real time and that it is the highest quality possible. I also did re-render and re-convert the video once during the process to cut down on the still image timing at the start of the animation as originally it took too long before the GIF animations appeared.Capture3.PNG

The finished animated GIF mosaic can be seen below:gif-assignment

I think the finished animated mosaic is quite an eye-catching way to view scenes of a movie and definitely takes a couple of loops to view all of the different GIFs that make up the grid.

The Dark Side

For this assignment the task was to create a mashup of two iconic movie scenes. It was said that we should aim to be as subtle as possible with the mashup image.

When viewing the assignment page I thought that the main given example simply puts the “Wilson” ball from the movie Cast Away as a second moon onto a minor scene from the 5th Star wars movie. So this main example isn’t exactly meeting the assignment brief with using iconic scenes. So on viewing another example of what someone had previously done for the assignment which also wasn’t fully meeting the brief I was given inspiration from their work to create a mashup which also had a different take on the assignment.

Their assignment work which inspired me can be seen here on their blog and as the image below simply took a Range Rover and placed it onto the moon.

moon

Image created by Emily Atkins as seen here.

When I read the description of their finished mashup on the assignment page before I saw it I had pictured something different in my mind to what they had actually made. This inspired me to use their idea as a starting point to create a better mashup like I’d first imagined upon reading this example where I would place a Range Rover or other 4×4 vehicle into a Moon scene and then possibly add in a couple of other elements around it.

I started by gathering the first two images for the mashup which were a photo of a Brabus 700 Mercedes 6×6  from here and a photo of the Moon’s surface from here. These can be seen below:

mercedes-6x6-brabus-wallpaper-3
aa8bf218bcff4ffd81d1b60db59e731d

I opened both of these images within Adobe Photoshop and began to blend them together using the Magic Wand tool, Quick selection tool and Eraser to remove the background of the 6×6 image. I then used the black and white adjustment layer to remove the sand colour from the shadow and window since the moon is monotone.

I then gathered some more images to put into the background of the mashup image to give it some movie relation for the assignment and to make it more interesting to viewers. I felt that the space theme and menacing looking Brabus 6×6 lent themselves to relation to the evil characters (dark side) in Star Wars. I gathered an image of a star background from here, an image of the Death Star from from here, and image of an ATAT from here and an image of a Death Trooper from here. These can be seen below:

4508552-stars-backgrounds
d314_death_star_wall_cling
atat-swfb
star-wars-rogue-one-death-trooper-specialist-sixth-scale-hot-toys-silo-902842

I then inserted these into the Photoshop file to blend into the mashup. The star background was placed over the moon scene and was erased until it just covered the black “sky”. The death star was scaled down, placed in the top left corner and the opacity was reduced to make it blend in with the “sky” more. The background of the ATAT image was then removed using the quick selection tool and then scaled down to be positioned near the horizon.

The death trooper image was then positioned next to the 6×6 and scaled to be appropriately size in comparison to it. To make it look realistic I then created a shadow by selecting the area of the trooper and on a new layer filling in this area with the paint brush tool to get a silhouette. This was then positioned, scale, angled to the same degree as the 6×6 shadow with the perspective transform tool  and the opacity reduced which created a realistic shadow effect.

Using the paint brush I then added a white highlight to the right of the trooper and death star to add even more realism by making them fit with the scene lighting and also used dark grey to cover the 6×6 number plate since I wanted the finished image to be as good as possible.

The finished mashup can be seen below:

mashup-assignment

I’m quite happy with the result of the mashup and while the image is obviously not real or subtle I think that the cleanliness of the Photoshop adds to the effect that it “could be real” as you can’t see where I’ve cut out the images and that they have been blended well. Looking at the finished image it also reminds me of a car advert with the perfectly lit and central car and the other elements engaging viewers into looking at it. (Also slightly somewhat related to the Nissan Star Wars Advert)

I also tweeted the finished assignment to the DS106 participant that inspired me to create this!


Exploring London 28/01/17

For this assignment I had to create a video of the a “day in my life” which meant filming what I did or what happened during a particular day and editing it together into a video.

When thinking about this task I took inspiration from the YouTubers Casey Neistat and Sam “SeenThroughGlass” (who I ended up seeing while filming). When Casey used to create daily vlog videos I would find that his cinematic shots, especially the use of timelapses along with his general fast-paced editing style would make the videos engaging and fun to watch. I also wanted to take inspiration from his “intro sequence” to his daily vlogs where he would simply write the video location and date over the a particular shot. With Sam’s videos I take inspiration from the cinematic shots he uses to break up his vlog style shots since he always uses interesting camera angles and shots.

casey

Screenshot example of Casey Neistat’s opening sequence from this video.

When thinking about the video I wanted to create I had a few ideas of what I wanted to include: Firstly I didn’t particularly want to include myself talking to the camera since I don’t like doing it but instead use point-of-view shots to add a personal feel that it is of my day. This meant I would have to edit the cinematic shots to music as the assignment suggested to engage viewers while using interesting camera shots/angles to get the viewers attention.

To film the video I would be using my Samsung S4 phone, a GoPro Hero 4 and a Canon 700D camera which would potentially pose some issues with differing video looks and video quality. However I felt that this differing quality wouldn’t matter since the video was about making the video to show the content/story and not necessarily to make a polished flawless product. For example on many social media platforms like YouTube, Instagram & Snapchat it’s more important to users to make a bad quality post rather than not to post at all. For example how Casey Neistat keeps filming and uploads it when his external microphone breaks even though the sound quality is worse like in this video or adds in phone shots like in this vlog since it’s better to have the worse shot to make up the story rather than leave parts out because it’s not as high quality. Alongside this something about creating the video which would be difficult for me to do would be making the video solely out of video footage filmed over that one day (since I was doing other things rather than just focus on filming) and also to edit using the footage in roughly the same order it was filmed to create a logical story throughout the video which is not something that I usually do.

During the day while filming it was slightly tricky remembering to try and film every single thing; especially in front of other people in the street when “aimlessly filming” my surroundings. I think I managed this to an extent as I took quite a bit of footage however it would have been useful to have recorded more so that there was better choice during the editing.

For the edit of the video I mainly used Sony Vegas Pro 12 but however used Adobe Premiere CS6 for the editing of some of the timelapse sections. I started out by importing all of the video clips into Vegas and began putting the first few onto the timeline. After the first few I placed the intro scene using a timelapse clip that I sped up using the rate stretch tool in Premiere, added text over it and then went in search of a piece of music which could be faded in here for the rest of the video to be edited to. This chosen song was “Seinabo Sey – Pistols At Dawn (Lucian x Mickey Valen Remix)” which I’d heard before in this video and was good since it has quite regular beat/vocal changes which can be edited to. After this was inserted then I dragged the other video clips on the timeline and set about editing them together using a variety of tools such as the orange markers for positioning important cuts, trim tool for resizing clips and fade tool to fade between clips. Some of the video audio was then muted while some was isolated and increased in volume to make it audible above the music.

To create the best video possible I then set about stabilising (where possible) and colour correcting some of the video footage to make sure it looked as good as possible. Some of this colour correction was done using the standard “Sony Colour Corrector” plugin while some like the example below was done with the more advanced Magic Bullet Looks plugin.


colour-correction-exampleScreenshot of the video before (left) and after (right) the colour correction process.

Visible below is the finished Sony Vegas project file for the video which shows all of the used clips and editing within the timeline:

Timeline.PNG


Embedded below is the finished video assignment:

The Beauty of a Second

Here is my entry for “The Beauty of One Second” assignment. I had it revolve around a clip of someone opening a box with a ring in it. I wanted the clip to leave a sense of ambiguity to the viewer. I used iMovie to edit the clip. Enjoy!

Serenity Now

This is my entry for the Serenity Now assignment. I used iMovie to create it. I used a Nikon D3100 with a 50mm lens at f1.8 to capture the scenes. The music is Telefon Tel Aviv, an electronic band. I felt the atmospheric sound of the music complimented the mood of the clips. I hope you enjoy!

Return to Silent Era

Here is my entry for the “Return to Silent Era” assignment. I decided to use “The Transporter 3″ trailer for it’s eventful action sequences. I used iMovie to edit the clips and create an aged look to the movie. I took all of the audio out of the trailer and inserted a jazz song into it to give it an “old style” feel. The song is “Dinah”, by Louis Armstrong. Enjoy!

Movies by Numbers

Here is my attempt at the Movies by Numbers assignment. I collected pictures related to the number 7 and created a montage out of them using iMovie. The song is related to the number as well. See if you can figure out how. (Hint) Musicians might have an easier time.