No, I do not play D&D.

For my second tutorial, I’m going to try something a bit out-of-the-ordinary. While most DS106-ers stick to working on technical aspects during their tutorials (bless Hope for this Mozilla Popcorn tutorial), I’m going to get a bit more creative and open-ended.

Intrigued–and also filled with mild trepidation–by the section titled “Fanfic Assignments” in the Assignment Bank, I was quite pleased to see a creative writing exercise that I often use myself listed in the project suggestions.

I love writing. I’ve had a poem published and attended workshops at the University of Virginia to hone my craft, and I recently finished and am sending around my novel to writing agents. To help myself flesh out characters and build worlds, I will often create a character profile.

Since I usually have the general plot of my story planned when I begin to scribble, my characters are created as ways to forward said plot. They’re tools, but, as any book-lover knows, tools aren’t fun to read about! To make the characters deeper, layered like actual human beings, I’ll go through and create back stories, fears, loves, interests, flaws, etc.

This is actually one of the most challenging parts of writing for me, because I prefer to let the words and ideas flow rather than spend a lot of time painstakingly thinking out details. Sometimes, though, working through details such as full names, dates, etc. for continuity is essential, and every writer should learn how to do this!

Therefore, my second tutorial will be giving everyone tips on how to create their own character and creatively write in general!

First things first…

(1) OKAY, WE GET IT. SOME PEOPLE DON’T LIKE WRITING.

If I had a dollar for every time I heard a peer or older adult say that they hate writing, English class, poems, [insert literary task here], I would probably have enough money to fund Alan’s vacation to Kansas.

Guess what? The world is amazing with all its differences. There are people who love writing, who win Nobel Prizes and move millions with their words, and then there are people who develop amazing math theorems that change science or learn ten languages and contribute to diplomatic cooperation. Point is: people have their likes and dislikes. Don’t shut out something before you’ve really tried it just because you had a bad first experience–like AP English.

(2) THERE ARE DIFFERENT TYPES OF WRITING.

The thing is, creative writing and literature studies such as those in AP English are quite different. I’m not the biggest fan of penning analytical essays about the motif of poison in Hamlet, but assign me a poem, and I’ll have a blast.

Creative writing AKA this ds106 assignment is meant to be fun. It isn’t timed. It isn’t graded. It’s a stretch of the imagination, and the only limits are the limits you place on yourself and your mind, so…

(3) RELAX.

Unlike science, history, or other intensely academic subjects, there are a lot of different writing styles (see: Faulkner and Hemingway), and not one of them is more correct than another. This leads to my next point…

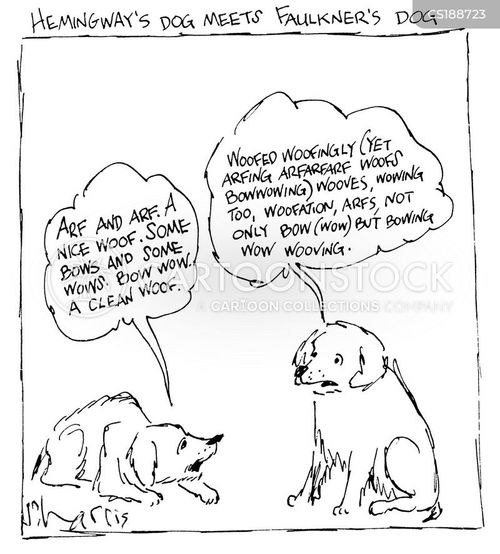
Hemingway & Faulkner’s dogs.


(4) DON’T COMPARE.

Again, creative writing is for your own enjoyment as a creator, as an artist, as a human being with a soul and a brain and ideas! Don’t compare your prose or poetry or scripts or whatever with your favorite author, because no matter how much you try to hone your craft or copy their style, no two writers will be exactly alike, and guess what? That’s awesome–the more diversity, the better! Everyone has something to bring to the world with their words no matter the form, style, or skill level of the piece. Stand strong in that knowledge and let yourself be empowered rather than discouraged as you explore and sample all different kinds of writers, some of which you’ll enjoy more than others!

(5) FREE-WRITE AND DON’T SECOND GUESS.

Don’t make creative writing more difficult than it needs to be; don’t over think it! Just write! Write words, connections, descriptions, ideas, questions…see a particularly pretty butterfly one afternoon? Describe it! Hate the assignment you have for a different class? Complain about it. Just get into the practice of transcribing your thoughts and mental images into words on the page. Again, look to number 4: the words don’t have to be beautiful, excellent, perfect…they just have to be your words. You’ll be amazed how easy the practice of writing will become after you’ve practiced it once or twice.

Also, as you’re writing, don’t go back and edit! This will just distract you from the creative moment and flow. It will also discourage you. Don’t discard ideas; don’t judge ideas. Just let them come and write them down. Leave editing for later and live second-to-second as your hand moves across the page or keyboard.

(6) SET GOALS.

Try to write maybe 200 words a day. Then, up that limit to 500, 1000, etc. The words don’t have to be brilliant or short stories. They’re more like journal entries–again, practicing putting your thoughts into sentences and fragments.

(7) ONLY SHARE IF YOU’RE READY.

Don’t share if you don’t feel comfortable. This can really intimidate a writer. Realize that writing can just be an enjoyment and stress relief for you and you alone if that’s what you want it to be. You don’t have to submit your pieces to critics or even your best friend if you don’t want to!

(8) CONGRATULATE YOURSELF!

Any amount or type of writing takes bravery and dedication! If you complete a piece, no matter how short, that’s an artistic feat that some people rarely–or never–accomplish. Pat yourself on the back and re-read your words with pride.

QUESTIONS FOR CREATING CHARACTERS: SEE WHAT CHARACTERS THESE ANSWERS HELP YOU DEVELOP!

Are they similar to you in personality? Looks? Or are they completely opposite of you?

Are they extroverted or introverted?

What color is their hair? Their eyes?

What world do they live in? Is it our world, or is it a completely new, fantasy world?

Did they grow up with parents? With siblings?

Have they ever been in love?

Are they gifted in any way (this can be an everyday gift like intelligence or more magical like manipulation of the elements)?

Do they like animals? Are they more of a dog or cat person?

What’s their favorite food?

What’s their favorite school subject/thing to study?

What do they want to do as a career?


All right, now that I’ve given you my version of a basic writing tutorial/some basic writing tips, let’s start on this assignment. The original poster gave us very simple parameters, which is awesome. These are character basics and not super intimidating, so remember, HAVE FUN! Write down whatever ideas you have, however odd they may seem at first, and then edit them later before posting your final character description. Take as much time, reflection, and privacy as you need, and plan your writing accordingly (you don’t want to post the assignment late and lose points, for example).


MY CHARACTER: FINN

paragraph of back story & personality & place in their world:

At age 19, Finn is the younger of a set of fraternal twins. Due to his age and the ever present, oh-so-judgmental gaze of his twin sister, he consciously–and subconsciously!–embodies the little brother trope. He’s a bit obnoxious, over-eager, and immature, but he’s got the biggest, sweetest heart and will do anything for those he loves. Sacrifice isn’t an issue if the sacrifice helps someone he cares about, and his generosity knows no bounds. Despite his wild and at times careless demeanor,  he is also highly intelligent; this surprises those he meets, and Finn is constantly squashing expectations. He his sister are very close, and both are studying to work with their father and mother in the city university’s robotics lab and department.

appearance:

Finn’s looks match his crazy personality. He sports a dark green mohawk with equally green eyes and a big, sparkling smile.

likes:

sleeping in, cookies, comedies, puppies, old record stores, tinkering with machinery, computer coding, sudoku, swimming, cargo pants

dislikes:

hipsters/generally pretentious people, high fashion/haute coture, smelly perfume, people teasing his sister, gerbils, scooters, slasher flicks


See–that wasn’t so bad! Make sure to go into any writing assignment with a positive outlook; this is supposed to be fun. Writing is an act of creation, and as humans, we are born to create. Whether it’s a science experiment or a novel, our brains are wired for invention.

Now, I leave you with one of my favorite quotes and wish you well on your writing journey!

Dead Poet’s Society


Favorite Musician Gif (Tutorial)

Before we begin, choose the GIF application you are most comfortable with. Photoshop is recommended, but for those who are not familiar with making animated gifs, I will guide you through with the simplest method. Next, think about who your favorite musician is, and then find your favorite video of theirs that is on Youtube (Best quality, HD if possible). And now we begin.

Step One

Screen shot 2014-10-25 at 3.13.46 PM

Once you have found your video, type gif in front of the url link exactly how it is in the screenshot above. Hit enter, and it will automatically take you to the Youtube GIF creator page.

Step Two 

Screen shot 2014-10-25 at 3.15.58 PM

You will now configure your GIF, selecting a portion of the video you want to use. Then drag the slider to adjust the length you would like your GIF to be (I usually keep mine under 5 seconds). Once you have adjusted both sliders, the screen will then playback the GIF over and over according to the settings you have chosen. If you are not satisfied with the outcome, keep playing with the sliders to your liking, and then click on the green box below to “CREATE GIF”.

Step Three

Screen shot 2014-10-25 at 3.16.39 PM

You will then receive the url for your animated GIF and options to share on different social media platforms. In this case, we want to upload it to our WordPress blog. There are a few extra steps to achieve this, so pay close attention. Click on the Switch to GIF button and then right click to save image.

Step Four

Screen shot 2014-10-25 at 3.24.52 PM

Login to your WordPress account and generate a new post. Click on “Add Media” and upload the gif image you have just downloaded. Finally, click “Insert into post”. You will notice the GIF won’t play in the post, but don’t fear, we will solve this with ease. Right click the GIF in your post and copy the url now that it is hosted on your blog. Now delete the image in your post.

Step Five

Screen shot 2014-10-25 at 3.32.11 PM

Click on the “Add Media” tab again, but this time you want to use the “Insert From URL” option. Insert into post, and BOOM, Done Deal!

Screen shot 2014-10-25 at 3.32.25 PM

And here is the final result once you click the Publish button on your blog. You have now created and added an Animated GIF to your blog. Congratulations!


(Not) Stuck in the Drive-Thru: A Tutorial

Before you read any further, please make sure you have appropriate background music playing. You’re welcome. Everyone needs a dose of Weird Al every now and again.

Now, this audio assignment is one of the easiest in the Bank–worth only one star. Despite this, it has a lot of room for creativity and good ol’ goofiness. Plus, I’m showing you all how to do this assignment on Garageband, an application for Mac OS, so fellow Apple users, read on. PC users, read on, as well, because chances are, at some point in your higher education or career experience, you will encounter Mac computers and have to use Mac software. This is a nice way to ease into the OS.

1) First things first: open the application! The icon looks like this and can be found in Finder > Places > Applications:

ROCK 'N' ROLL

ROCK ‘N’ ROLL

2) Double-click the icon, and be patient. There’s a lot to load in the app, so it might take a while. When it does pop up, you’ll be greeted with this window:

Yeah, this is as awesome as it looks.

3) Since you’ll be recording your voice, double click the mic stand. Name your file whatever you’d like. The .band extension is default for Garageband; you can change that later, so no worries.

  • 3A) For future reference, if you’re penning a song and know what key and time signature the piece will be in, you can alter the file’s details before it loads. This assignment, however, doesn’t require any musical theory.


My personal files are blacked out; that black rectangle won't typically be there!

My personal files are blacked out; that black rectangle won’t typically be there!

4) Your newly loaded workspace should look like this!

Such opportunities await.

5) Now, “Female Basic” and “Male Basic” are just fancy terms for vocal tracks laid down for you to record over with slight attention to pitch variation that occurs between genders. Don’t worry about it, but if you prefer one or the other, go ahead and choose. The differences are quite subtle.

  • 5A) To delete a track, click it, and then hit COMMAND + DELETE. It should disappear from the left hand column.

6) Again, we’re not doing anything fancy with this assignment, so, the first thing I recommend is to turn off the metronome that counts you in during recording. When it’s turned off, there will be no check mark next to the word, and you won’t hear any clicks rhythmically echoing through your headphones.

Metronome

7) Now it’s time to record! When you’ve prepared your script and accent, press R. You are now recording. Say what you will!

8) Once you’re done with what you’ve decided to order, hit the space bar. This will pause/stop your work. Your space should look a little something like this, with variations in audio marks–little ticks along that line–and overall section length.

Feelin' like a rockstar, yet?

Feelin’ like a rockstar, yet?

9) Click back at the start of your recording, near the 1. Press the space bar for PLAY and take a listen. If you’re satisfied, move onto Step 10!

  • 9A) If you’re not happy with the recording, that’s totally okay. This is a learning process, and Garageband is tricky at first! You can get rid of/select all or portions of your recording by literally highlighting sections of the colored area and COMMAND + DELETING. Feel free to take as much time as you need to record over and over and mess around with effects if you’d like! This is a simple assignment that’s fairly wide open, so you have room to fiddle with different details.

10) Once you’re happy with your recording, hit COMMAND + S. This will save it as a Garageband file on your Mac so that you can go back and edit or access it whenever you want. To upload it to SoundCloud, however, you have to make it a .mp3 or .wav file.

11) To do this, move your cursor to the top tool bar and click SHARE. Then, click EXPORT SONG TO DISC.

Export

I’m suggesting you save your file as an .mp3, so when it comes up with this window, just hit EXPORT. Don’t change any details.

MP3

Title your piece something memorable and/or awesome and save it in your chosen folder.

name mp3

So, don’t title it this!

Viola! Your recording is now saved as an .mp3 and can be uploaded to SoundCloud like the rest of your audio work!


I hope this tutorial helped! Let me know what you think or if you have any questions in the comments below!


Anaglyph Tutorial, Part 2 – Separating the Foreground and the Background

Anaglyph-Tutorial-Part-2

Think Before You Act. Save and Save and Save.

As you start to work with your image, please bear in mind that you should always work on a new duplicate layer each time move ahead in the process. Although Photoshop can be considerably forgiving with the wonderful Edit>>Step Backward, it is always good to be able to delete a layer attempt that isn’t working out and go back to a previous stage to start over.

As we work through the process of separating the foreground(s) from the background(s), it is prudent to carefully name each new layer and keep them logically organized so as to avoid confusion.

Isolating Elements

Let’s start with the foreground. In Part 1: Selecting the Image, we identified John’s hands and face as elements we decided to work with as our foreground.

My first step now is to isolate John’s hands and John’s body, making a layer for each of the left hand, right hand, and head/body. For your image, select what you want, and then use Layer>>New>>Layer Via Copy to get that selection on its own layer.

Here is my image of John with the hands and his head/body selected.

John is selected. The Marching Ants show what I want to use for the foreground.

John is selected. The Marching Ants show what I want to use for the foreground.

My technique for getting clean elements tends to depend on how close the Magic Wand or Quick Selection tool can get me to what I want. I will err on the side of getting more, and do some pixel cleaning of the new layer with the eraser (and sometimes the clone brush) to get as best an image as possible. What you select will depend on the image you are working with.

John is cutout. The Layer>>New>>Layer Via Copy action makes a new layer with only the selected parts of the picture.

Once each foreground element is its own layer (in this case: right hand, John, and left hand), we can move on to the background.

NOTE: The “marching ants” image above may be misleading in that I actually selected each element (2 hands, John) one at a time, and made each it’s own layer over three steps. For John’s image, it was a bit finicky and it was easier to work each one on its own. However, we are going to use a nice photoshop trick in a moment to get easily back to this same “marching ants” state from our 3 new layers.

Now for the background.

Although the foreground image will be in front of the background in the completed 3D Anaglyph, I have found that there can be artifacts or ghost images that can interfere, and so it helps to “remove” the foreground objects from the background wherever possible.

Select foreground layers (while hidden) using SHIFT+ COMMAND and then apply Edit>>Fill>>Content Aware to the background. Then tidy up.

At this point in time, I have 5 layers in my .psd file.

  1. left hand
  2. right hand
  3. John
  4. Background copy
  5. Background

We are going to “remove” the foreground element from the background copy layer using the Edit>>Fill>>Content Aware action.  This will create a sixth layer (in my example to the right it is shown as, “Background copy 2″)

First, we need to return to something that looks like the “marching ants” image above.

  1. Hide all layers except for the Background copy layer.  (watch the GIF to the right)
  2. Hold down SHIFT and COMMAND (or SHIFT and CTRL on PC) and click on the thumbnail images of the foreground layers (see the three clicks in the GIF on the right)
  3. This returns the “marching ants” for the foreground layers, but only the Background copy layer is visible and active.  In my example, I am back with something that looks like the marching ants image above.
  4. Use Edit>>Fill… >> and Content Aware option in the dialogue. After a bit of processing (spinning cursor), Photoshop will provide you with a new copy of your background layer with the foreground stuff removed.

In my case, this is what I got.

John is removed. There is still some cleanup to do, but it's a start!

John is removed. There is still some cleanup to do, but it’s a start!

And without the ants.

Messy Background after the Edit>>Fill...>> using Content Aware. We'll clean it up!

Messy Background after the Edit>>Fill…>> using Content Aware. We’ll clean it up!

To get something a bit neater, I just used the Clone Tool to make things more uniform. I lost the door lock and re-defined the back of the sofa, but it all works in the end. It doesn’t have to be super perfect, because the foreground will be back in front shortly, but something like this without the foreground elements is desirable.

Background Tidied Up Some

Here is an animated GIF that shows the process from start to finish.

  1. Original image
  2. Foreground elements selected.
  3. New Foreground layer created via selection
  4. Back to a copy of the original image
  5. Use SHIFT+COMMAND to select the foreground layers to apply Fill …>> Content Aware
  6. New Content Aware replaced background layer (showing selection)
  7. Content Aware background layer (no selection)
  8. Edited background layer (liberal use of the Clone Stamp Tool)
  9. Final Background with Right Hand (foreground)
  10. Final Background with Right Hand and John (foreground)
  11. Final Background with Right Hand, John, Left Hand (foreground)
"A GIF of the Process"

“A GIF of the Process”

 So exactly what do we have now?

We have our image now separated into independent layers that represent elements of foreground, mid ground, background, etc. With this saved, we will be ready to move on to colour treating our layers in preparation for making our anaglyph.

In the case of the “John Gets His 3D Glasses On” anaglyph, we have four layers

  1. our heavily edited background
  2. right hand
  3. John
  4. left hand

At this point, you may want advance to Part 3: Colour Filtering (link to follow), but first take a look at the result of separating the foregrounds, mid grounds, and backgrounds of the Sisyphus anaglyph:

Separated Layers for Sisyphus Anaglyph (animated)

Separated Layers for Sisyphus Anaglyph (animated)

In the case of the Sisyphus anaglyph, we have six discrete layers:

  1. Sisyphus and hill foreground
  2. Large Trees (to the right)
  3. Smaller Trees (behind)
  4. Village and Mountain
  5. Sky
  6. Ring

As you can imagine, with more layers, this took a bit longer, but some aspects of the separation were easier due to the fact that the edges are very clearly defined and thus easier to select. The monochromatic nature of the image also made it easier to retouch as well.

A couple of notes regarding this one:

  1. My first step was to remove the ring from the main image, and following that, I applied a 101% scale factor (very small) to the circular image so that its outer edges would be slightly hidden behind the inner edge of the ring. I did this because I noticed a bit of noise/artifacts at the inner ring edge of the pg 8 Skeleton anaglyph.
  2. Similarly, I extended the “sky” layer outwards slightly in a couple of places using the clone tool because there were a couple of “holes” visible between the ring and the sky.
  3. I also applied a similar minor scaling of the Large Trees layer, and translated them slightly so that they would blend nicely with the inner curve of the ring.

Some of these adjustments were made later (during steps 3 and 4) but I mention them here as they are part of the layer preparation process. In practice, it is sometimes necessary to return to Step 2 with a layer or two and make adjustments before re-processing that layer again with Steps 3 and 4.

As I said earlier — think and save as you go. Backup if you need to, and keep all of your experimental layers until you know you don’t need them.

  • At the end of Step 2, the “John Gets His 3D Glasses On” .psd file has 4 layers.
  • In my final .psd file: 29 layers  (not all used in the final image, but used in the getting there!)
  • At the end of Step 2, the “Sisyphus” .psd file has 6 discrete layers, plus a couple copies of the original image.
  • In my final .psd file: 22 layers  (again, not all used in the final image, but necessary along the way.)

Next up: Part 3

Next: Step 3: Colour Filtering (link to follow)
Then: Step 4: Positioning the Layers to Simulate Depth (link to follow)
Then: Step 5: Extending the Technique to make an Anaglyph-a-GIF (link to follow)

Get your 3D glasses ready! 

Anaglyph Tutorial, Part 1: Selecting the Image

Anaglyph-Tutorial-Part-1

Before You Start

You will be well served to have on hand a pair of red/cyan (or red/blue) 3D glasses so that you can view the images in the Tutorial and so you can test your images when they are done. I have also found that it can be quite helpful to actually wear the glasses during various parts of the process. (Throughout the tutorial, you may wish to watch for the “Please Put On Your 3D Glasses Now” notices! ;-))

Unlike traditional stereo photography which makes use a pair of slightly different originals to create the perception of depth in 3D, we will be developing a 3D anaglyph making use of a single source image.  Before we delve into the process too deeply, first a little bit of foundational theory.

The Simple Explanation

Our perception of depth comes from the way our brain integrates two images from our two eyes — each eye seeing from a slightly different angle. We can simulate depth by providing each eye with it’s own discrete image – in this case, one red and one cyan. Without 3D anaglyph glasses we see both images (and so there is a “double image” effect — but with the use of such glasses, one image is filtered out with one lens, and the other image is filtered out by the other, so each eye gets its own discrete image. If the two images have been slightly adjusted in position (and this is emphasized if we do this differently for different layers) then we can be tricked into perceiving depth when the brain combines them.

Selecting An Image to Work With

Not all still images will be ideal for the creation of an anaglyph. The simplest image will have an object in the foreground and then a defined background behind. A more complex image may have a variety of foreground, mid ground, and background elements which can allow for a more interesting anaglyph.

Throughout this tutorial, we will understand the process through the exploration of the following original source images.

Sisyphus, by George Wither

George-Wither-011_TT_Sisyphus_ORIGINAL

“Sisyphus, Illustration 8″ from Emblemes: Illust. by Geo Wither (1635)

While originally drawn/engraved on a flat surface, this image has considerable perspective detail that provides visual cues as to depth — the foreground hill with Sisyphus, the trees (two depths of them — the large ones on the right and the smaller ones behind), the city and mountains in the background, and the distant sky. If we wish to isolate each of these elements, we can emphasize their relative positions along the z-axis (into and out of the image).  As you can see, this image is an ideal candidate for turning into an anaglyph. (See the completed image)

John Gets His 3D Glasses On

John Gets His 3D Glasses

“John Gets His 3D Glasses,” image by @johnjohnston, via Twitter/TwitPic

As a photograph, John’s image provides a good capture of foreground and background elements. John’s hands and face are forward and will provide our front layers, and the seat, door and wall are clearly behind him and will provide our background layer. (See the completed image)

Foreground and Background Elements from "John Gets His 3D Glasses On."

Foreground and Background Elements from “John Gets His 3D Glasses On.”

Your Image

If you start with a photo or image that allows you to perceive elements as belonging to either a foreground or background, then you have a candidate for an anaglyph.

If a focus element in your image is also centred in the foreground of your image then it is a candidate for emphasis. We will be emphasizing John’s hands (and his face, to a lesser degree) after we have isolated them.

Next: Part 2

Next: Part 2 – Separating the Foreground and the Background (link to follow)
Then: Part 3 – Colour Filtering (link to follow)
Then: Part 4 – Positioning the Layers to Simulate Depth (link to follow)
Then: Part 5 - Extending the Technique to make an Anaglyph-a-GIF  (link to follow)


Six-Word Memoir Tutorial

For this assignment, I used my iPhone 5 with the Insta-Frame App.

In the app, I had to choose a frame.

step 1


Then, I picked the background and chose an effect.

step 2

Next, I added text to it and chose a font that I liked.

step 3

Lastly, I saved it to my phone and uploaded it via e-mail.

step 4

Vine It Tutorial

I created this six second video by downloading the Vine app into my iPhone 5s. I created an account. Then, I begin to create a video by clicking on the video camera icon on the top right in the third picture. Lastly, I begin recording segments by pressing on the screen.

IMG_9855IMG_9856

IMG_9857

IMG_9858

As you record, the bar on the top will fill up with a green color. When your video is ready, it will allow you to proceed to the next page where you can choose to keep or discard the different segments you recorded. When you are satisfied with your video, it’s time to press the check mark with the green circle as shown in picture 3 below. You will be directed to the Share page. Pick a great title and connect to Twitter and Facebook. Wala! That’s how you create a vine.

IMG_9862IMG_9859IMG_9863IMG_9861

Original photos by Ivette Harvey  edited in Photoshop by the…


Original photos by Ivette Harvey  edited in Photoshop by the DS106 Shrink using awesome tutorial by Jack Hylan Both just starting DS106 at University of Mary Washington for a grade and for fun!

This photo set is my way to say thanks to both for joining in with us open participants and making our community that much richer.

A Remix Remix

I am sure you have already listen to a remix where you can hear a song interrupted by someone saying something. This is exactly what the tutorial is about.

I will create this kind of remix and by that telling you about the foundations of Audacity which is a sound editing software and which you can download for free. But first listen to the example.

I have used a song I created for a different tutorial and I will record me saying one of the many definitions on remix.

The following 8 but short tutorial videos will tell you about all. Just before watching them download and install Audacity. Note that I am a PC user, Shortcuts I mention may be different with a Mac.


The Audacity interface, loading an audio file and previewing it:


Select, copy and paste to a new track, remove clipping noises:


Generating new audio parts and moving them.


Recording and noise removal.


Taking parts of the speech and remixing it with the song. 


More parts of the speech will be remixed with the song.


Exporting as mp3.

Music Production and Sharing

A series of tutorials about how to produce pieces of music and how to share them on Soundcloud and Tumblr.

The first video shows you how to find the download page from a great free sound editing software called Audacity.

The next video shows you how to produce a beat with the free online software Soundation. When have created the beat it is opened in Audacity where a voice track is recorded. (You could record in Soundation, but not in the free version.)

The third video is about sharing a Soudcloud track onTumblr blog.

?