Tutorial: May I Take Your Order

This is a tutorial for May I Take Your Order audio assignment. The assignment required you to using your best accent, pretend your at McDonald’s and order something off their menu. Don’t just order a cheeseburger, but be picky and order a cheeseburger with no lettuce and tomato.

In order to do this assignment you had to record yourself using some form of recording software. I chose to use SoundCloud. SoundCloud is free audio software which can be downloaded off the internet. It’s very much like YouTube, but instead of sharing video’s your sharing audio recordings. SoundCloud was perfect to use for this assignment because it gives you the ability to upload audio stored on your computer, or you can record and share audio right on the sight.

I chose to record this assignment right on SoundCloud because it didn’t require any editing, and it was short and simple. In order to record audio on sound cloud, just sign into your account. Once you sign into your account you will imidately see two options, upload and share, or record. If you choose to upload and share just select your audio file and upload it. If you choose to record your audio directly on SoundCloud just click record.

After you upload your audio file or record it directly on SoundCloud, you want to share it. Simply just click upload your recording. The screen is shown below.

After you upload your recording, you will be brought to a page where you can give you audio a title, and tag it. Place the appropriate title for your audio recording, and properly tag it show is shows up in the assignment SoundCloud sight. The screen is shown below.

Draw it.

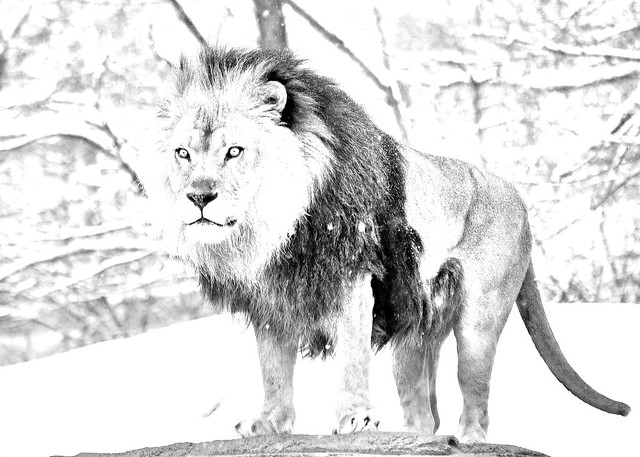
I was able to come up with one more assignment idea, Draw it! This one asks the students to take a picture, whether it be there or one from the internet, and get some experience with Photoshop by converting it into an image that look drawn.

I actually got the idea for this one from a previosu assignment that I did –  Da vinchi Invents the Kitchen Sink. When I worked on that assignment, it required me to figure out how to convert my chosen images into a format that looked hand drawn, which took me a little bit to understand how to do. That being the case, I decided to provide a simple tutorial on how to do this.

Tutorial for Photoshop:

1. Import the file you want to work with. (File > Open)

2. Now we want to make the image black and white. (Image > Image > Adjustments > Desaturate)

3. Create a duplicate layer ( Layer > Duplicate Layer)

4. Invert colors. (Image > Adjustments > Invert)

5.  Change the blending mode to Color Dodge. The layers pallet should be in the bottom right and will have a drop down menu (mine is originally on “Normal”)

6. At this point, the majority of the image will be white with a few black spots (maybe). Dont worry. Go to Filter > Gaussian Blur. From here you can just slide the Pixels bar to make it lighter or darker based on your personal preference.

My example:

Before:

Lion

After:

Photoshop converted drawing of a Lion


Something I’ve learned…

I made a few videos using Windows Live Movie Maker, and I’m going to show you how I made my Nicholas Sparks’ kissing scenes video for the one archetype, five movies, five seconds. So on with the tutorial… First thing to do, is open Windows Live Movie Maker. Then you will click on the “Click [...]

Tutorial: How to separate audio from video on iMovie


In this tutorial, I explain how I extracted the audio from the interview of Anthony Hopkins and put it together with appropriate video clips as a part of my video essay on Titus.  This part took the longest time to edit, and it turned out to be much more tedious than I had anticipated.  But I learned a lot, given the fact that I had no idea how to do any of this before starting this project. :)


If you have any questions, please leave a comment below.


30 Second Documentary – tutorial

To Complete this assignment i did the following:

I used my Nikon camera to record my video. I uploaded the video to my computer and then opened it on windows live movie maker. I added the visual effect called edge detection to give the video the cool look. Because the assignment called for a silent video where you show instead of tell..i muted the video and to take away from a awkward silent film i added music to the video, i used a track that was already pre-loaded on my computer. Then i uploaded the video to YouTube.


Film Essay – Curly Sue Tutorial

For this video essay assignment these are the steps i took to complete the assignemt:

I went to YouTube and in the search box i typed curly sue.. after doing so a bunch of different videos popped up. After carefully selecting the three videos that i wanted i selected them and then clicked on pwnyoutube (which enabled me to save the clips to my computer) after this i uploaded them to iMovie and carefully selected the parts that i wanted use because the clips that i chose were each about 10 or some minutes on their own. After carefully choosing all the clips i inserted some animations to easily transition into the next clip. I decided to leave the video playing in the background as i recorded my voice in the video..i used headphones to do this so that my voice would become elevated in the clip..

A Day In The Life

This was my first video assignment using iMove. I recorded some of my average weekday, which normally just includes waking up, going to class, doing homework, and then repeating the next day. It so happened that it was a nice day, so I was able to sit outside and get some work done. It was pretty to do, and  I think it came out well. The camera is a little shaky, but I guess that was inevitable with walking.

To create this video I did several things:

1. Sped Up Video:

I recorded about 15 minutes worth of video, by speeding it up I was able to condense it down to about 3 minutes. In order to do, I double clicked on the clip itself. A menu will come up which has the option of speed. I had to convert the clip, just by clicking convert, I don’t if every video needs to do that. There will be an option ranging from a turtle to a rabbit. For some clips I sped it up as far as it would go, but for most I sped it up to the second to last option.

2. Add Music:

For this, I used Dirpy to convert an instrumental to an MP3. I clicked to music note option on the right hand side and searched for the Mp3 to add it in.

3. Add Transitions:

We learned how to do this in class, but to reiterate: I clicked the hourglass looking icon on the menu on the right hand side. I couldn’t record myself in class, so I just added a transition there.  I played around with some of the texts until I liked it.

Flipper

*For some reason the embedding link made the video very large and it gets cut off. To view the video, please click the video to go to the youtube location. Or click here.*

For my first video assignment, I decided to relive an old classic – Flipper. I havent seen this movie in years, but I remember liking it. I was able to find some interesting clips online, so I decided to remake the opening credits.

I had a lot of fun working with this assignment, although  I found it very tedious. Putting in the  credits took forever, while the actual video editing (importing, cutting, animations, etc) did not take very long to do.

Tutorial:

To make this video I used Windows Live Movie Maker, which made it rather simple.

1st) Find some nice video clips that you think you can use. Its better to have an idea of what you want to do, rather than doing it on the fly (In my opinion at least)

2) Import the video clip by simply dragging and dropping it into the program.

* From here you can go many different ways, but I will just go into detail about what I did*

3) I first played my video clip to look for any specific moments where the text I will be putting in would stand out the best. I also cut any unwanted segments by sliding the cursor to the beginning of the unwanted segment, hit split (Edit, Split), then again at the end of the segment. Click the segment and delete it. From here you can piece together other segments and add animations and transitions to make it smoother.

4) To add text, go to Home, Add Caption (next to Snapshot) and adjust it accordingly.

Grettings From DS106 (tutorial)

For this assignment i used an app that i have on my iPhone 4. I went to Google to find three images that i thought would represent what i would send to someone to show them that i was in Fayetteville and happy. After selecting the three images i sent them to my phone through an email and then used an app called Photo Collage to create and make one image with the three images. You open the app and select a frame, after selecting the frame you insert the images and adjust the color, margin and corners to your liking.

This was my end result.

Grettings

Alternative Book Covers (tutorial)

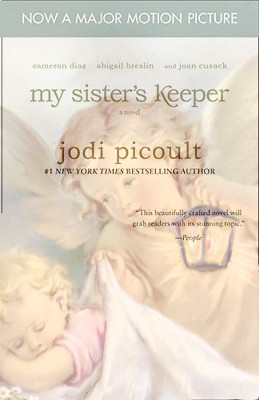
For this assignment i used Gimp. I did a Google search of the book cover of my choosing ( i used my sister’s keeper). I saved the image to my computer and then opened it in Gimp. After opening the image i used the erasing tool to remove the image that was at the bottom of the cover. After the image was completely removed i used the another image that i chose from google and faded it in, as to kind of make the image seem a little distant.

Here is the finished product.

Alternative Book Cover