Rocket Design in a Nutshell

For my first assignment this week, I did the five-star assignment called “How-To Tutorial”. While I don’t feel like this lends itself to a story particularly well, I feel like helping someone new to something is the right thing to do if you have the particular skills for that thing, which is why I decided to make a guide on rocket design for new players to Kerbal Space Program. My family has actually been deeply involved in NASA – my biological great-grandfather was the guy who would put engines in the rockets at Wallops Island. Unfortunately, I never got to meet him, as he passed away before I was born.

Because of my family’s connections to NASA, and the fact that I have been interested in games and space since I was a kid, I decided to make this guide to rocket design. I decided not to include actually piloting the rockets for two reasons: because I am awful at flying rockets, and because my main guide was intended to focus on the design process for rockets and how I go about building them, as well as deciding what I would use for a particular mission.

Easily the worst part about working on this assignment for me at least was working in iMovie on my dad’s Mac – since Microsoft discontinued Movie Maker and I couldn’t find a very good online movie editor like Movie Maker, I had to both learn how to work with a Mac as well as with iMovie. As far as the part that took the longest, that would be a three-way tossup between recording the gameplay, recording my voiceover, and then writing the script I used for the video. I intended the guide to be like a Destiny raid guide from youtuber Datto, both in terms of pacing and in terms of the music in the background.

I first started by recording several sessions of myself playing Kerbal Space Program, as well as writing the script during free time. Then I cut down the footage to record the final build and launch, and ultimately played that footage back a little bit faster to ensure the guide wouldn’t be terribly long. After that, I recorded my background narration in GarageBand, exported it, and trimmed it to work better with my guide and the length I had set. In iMovie I mixed it so the music wasn’t too loud and muted the actual game footage, and then uploaded it to Youtube.

Childhood Story

For my second video assignment, I completed the “This is My Story” prompt. I decided to share a funny/crazy childhood story.

This story is inspired by a true story that happened to me when I was younger. When I am asked to tell a crazy story, I always think of this one. A lot of things happened to me when I was a kid, most of them happened because I was a rebellious kid that rarely listened to my family…

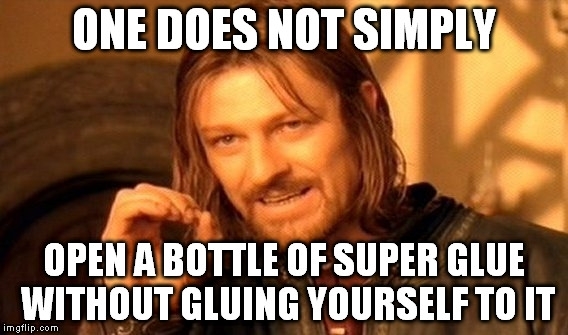
So story time: I accidentally super glued my eye shut and it wasn’t pretty. I guess you can say that it was a sticky situation! As a kid, being stuck in bed for weeks and not being able to see was the worst. But lesson learned: Don’t mess with super glue, duh!Image result for sticky situation meme

To make this video:

Before filming, I typed my story out on my Notes app. I separated the story into multiple lines so I know what to write on my flashcards. Then I used my iPhone to record the video.

After filming, I went to iMovie to start a movie project.

Then I named my project and picked my theme. I went with Playful.

I imported the video and clicked Audio to pick my background music. I used Theme Music- Simple.

I made sure to remember to add a starting and ending title!

Once I saved the video project, I uploaded it to YouTube and all done!


Jinkies!

For my last video assignment, I chose to do a Supercut of one of my favorite cartoons, Scooby Doo.  A supercut is when a creator will take short clips of reoccurring themes, styles, or lines from different movies or television shows, and put them altogether with no transitions.  The idea is to showcase whatever theme or line you choose in a very quick way.  I decided to take multiple scenes from Scooby Doo where the villain is unmasked and out them altogether.

This process took a LOT of time.  First I had to find the clips of old Scooby Doo episodes.  I found a channel on YouTube that made this process very easy, since they had a playlist that contained shortened clips of the show that were labeled as a “reveal”.  After finding the clips I liked, I used the video downloading website SaveFrom.net to download them onto my computer.  Because the cartoon is so old, it made downloading them very fast due to the fact that the resolution is already so low.


Once I had all of the scenes I wanted to use, I put them into iMovie and began cutting them down.  This was the most tedious task out of the whole process.  I had to make sure that the clips were long enough to get the point of the scene but short enough to make sure my video was still considered a Supercut.  After I had all of my scenes cut down to size, I added a title and an ending and uploaded my video to my YouTube channel.


This process was fun, and I think I would enjoy making another supercut if I took a long time to do it.  When I say a long time, I mean months.  It would be a really fun project to pick a line in a movie or a camera technique just casually come by them and add them to a supercut.

Overall I am pretty happy with how the final product turned out, but I do wish it was a bit longer.

A Day in My Life

For my first video assignment, I chose to do the “60 Second Day” prompt. This was filmed on Saturday, June 15th!

I’m going to be completely honest, this week hasn’t been the greatest. I felt like I had little to zero energy. The first half of the week, I didn’t even leave the house… I mostly stayed in my room and was on the computer. But I was either working on my blog or just watching YouTube videos. I guess it was just that kind of the week.

Related image

So when I had a somewhat productive day on Saturday, I had to film this video. I agreed to do a Zumba class in the morning with my sister. It was my first time going and I know that I’m not the most coordinated person. But to my surprise, I liked it more than I thought I would.  Then I filmed the rest of my day!

Image result for zumba gif


How I made this video:

After transferring all the video clips I made throughout the day to my computer, I went to iMovie and started a Movie project.Image result for imovie

Immediately, I picked the Simple theme on iMovie and named my video project.

After that, I imported all of my video clips and put them in the right order.

I moved on to creating the opening title at the beginning of the video as well as an ending title. 

In between some of the clips, I added some transitions.

I slowed down one of the clips, using Speed – Slow 50%.

After watching the video all the way through, making sure the transitions and everything are fine, I went to Audio – Jingles to select a song for my background music. I chose to use a jingle called Peach Cobbler.

Once the background music is set up, I saved the video project and uploaded it to YouTube!

a day in my life: castanza decent

“If you take everything I’ve ever done in my entire life and condense it down into one day….it looks decent.” “Everything in my life is the complete opposite of what I want it to be.” Two quotes from the one and only George Castanza from Seinfeld. As I mentioned in quite a few posts last …

healthy vine challenge

I try to eat healthy most of the time. When I’m making a quick, healthy meal I tend to stick to staples that are easy to prepare. So, I knew this video assignment was one I wanted to do!

Track & Field Highlights

Throwing Highlights – UMW Track & Field

Super Hero Family

Visiting Red Rock Canyon with Super Hero Family!

I’m gonna steal it

Today, I decided to turn give everyone yet another reason to laugh at Nicholas Cage by dong the Chipmunk Style assignment.  I took one of the most pivotal scenes in National Treasure, where Benjamin Gates is talking about stealing the Declaration of Independence, and I tweaked it a little by making Ben and Riley sound like chipmunks.  The process was significantly simpler than I thought it would be.

The first thing I did was download the scene from YouTube onto my computer using a free downloading website called SaveFromNet.  I then opened iMovie and imported the clip.  Once the clip was opened in iMovie, I exported the clip as a file and saved only the audio.  I took the audio from the scene and imported it into Audacity.


There, I was able to manipulate the pitch of the audio.  I chose to increase it by about 40%.  The scene’s score is quite loud and there is a good amount of background noise (others talking and walking) which meant that if I went any higher in the pitch, it would have sounded extremely distorted, and not in a fun, chipmunk kind of way.

Changing Pitch

When I was satisfied with how the audio turned out, I exported it as an MP3 and inserted it in my original clip in iMovie.  To ensure there was no overlap, I just turned the volume of the original clip all the way down.  Lastly, I added a title and uploaded the video to my YouTube channel.

I am really happy with the final product.  For some reason, having such a high pitch in the dialogue of the characters makes their mannerisms 10x funnier, especially Nick Cage.

Hope you enjoy!

Week 12

I enjoyed this week! Even though I had 3 papers and 1 exam I was able to complete the assignments. I think video is just extremely hard to complete because it takes so many factors, and all the mashup stars I chose this week were visual design/photo tasks. I receive more entertainment from creating designs and pictures because theres more structure, video is more free and I find it more work. I even got commenting in this week!!

Incorporating my character into an image, I used her form as a leopard, I wanted to show her being able to walk around without being noticed in the dark. The background was an image of the dinning hall on UMW’s campus that I took at night.

For her closeup I used a free photo of a worried woman in a hat in the sun, and used my own photo from Kenya to make the background. It was supposed to be Aitana right after she left the statue and was running away and trying to understand why she felt different than before.

For the two other assignments I did design projects, one was mashing up two different logos to make them look as one. I did Pepsi and Coke combined into one soda logo!

The last assignment involved contrasting an emoji and human. I chose my step-mom who welded and used that picture of here from her fb profile and the dark-haired, girl, welder emoji. I was so into this assignment that I also made my tutorial on it!

For the remixes I also chose one photo editing and poster design. I got to photoshop (but really just used Preview app) myself into a different “universe” and for that I made myself sit on the plane of a wing (both photos were mine). An then altered the color to look drastically unpleasant and unrealistic.

The other remix I did was of a lost and found poster. I remixed it to “the opposer” and instead made a flyer for selling the hat/trying to get rid of it instead of find it.

The two daily creates I did were more opinion based than “creative” this week. First the account had simply stated “Sadie Hawkins Day” and I looked up the link they gave, it provided background to the dance I was aware of but never went to growing up. I stated:

The second T.D.C. was captioning a cartoon image, I found this was funny and came up with two captions just because I enjoyed it so much:

My group got the “special assignment” of creating a “This week in ds106” post. Ours was on all the video assignments people made. We weren’t able to get it done until Thursday because communication was such a struggle. But we did finally get to honor the hard work of our fellow classmates!

Overall it was a busy but good week ?