The Red Eagle Knight

As per what I understand is good etiquette for the class, I took the liberty of completing my own created assignment.

Setup is simple. Open up the image editor of your choice (in my case, MS paint), set the properties of the image to be 16 pixels by 16 pixels, zoom in to the image, and use the pencil tool for good measure. I looked at animation sprites for 8-bit videogames, such as early Mario for inspiration.

I looked specifically at people since I knew I wanted to try my hand at a person. What I learned is that the sprites focus on two or three main features, it is alright to have goofy-looking appendages, since any person will understand that they are in fact arms and legs. Prominent in the Mario sprite are the mustache and the suspenders, while the arms and feet are somewhat out of proportion.

My result:

Red knight enlarged

Here, I went for getting a visor, sword, shield featuring a red eagle emblem, and cape. Needless to say, I was surprised at how much detail I could cram into the image. In an ideal world, the eagle could use a few extra pixels, and I could put a little more detail into the sword, but constraints are constraints! I added the cape at the end, because I felt the right hand side of the sprite was a little bare pre-cape, and it suddenly hit me that a cape is appropriate garb for a cartoon character.

Overall, I am quite happy with how it turned out.

We’re Going Down!

For this mashup assignment, we had to take two iconic movie scenes and mash them together.

My inexperience with media in general is a detriment to this assignment. Iconic movie scenes? None ring a bell.

I ultimately did find a scene I thought would be appropriate to mashup, this movie poster of a scene with the Enterprise crashing down to earth gives a plot of action and a convenient blank space to work a little magic, something where inserting something won’t make it seem crowded because if anything, the space is TOO blank.

star-trek-into-darkness-poster-excerpt-660x577

So what to put into it? I didn’t think much of the movie itself, so why don;t we insert something that pokes fun at the plot? The Enterprise is crashing, so why not give it a reason to crash? I considered putting in a spaceship from some other series, like a star destroye, but ultimately decided that would be too expected. So, to keep with a somewhat comedic feel here, I bent the rules of the assignment and swiped an object from what I consider an iconic opening scene of one of the better TV shows to travel the airwaves:

So, I brought up powerpoint, indserted the movie poster in a slide, then a picture of the barrel monkey from the futurama wiki. Thanks to the raltively constant background, powerpoint had no trouble removing the background of the photo when I inserted it into the slide. Just to keep some perspective, I also tilted the image slightly. The end result:

Monkey Trek
I was relatively happy with the end product. I considered darkening the gorilla and planet to make it fit in better with the dark colors of the movie, but I also wanted to keep the lighter cartoony feel that the brighter colors provided. The ship is central, but the brighter color almost demands attention, but it is small enough to get second notice.

All About Morlium

Who is Morlium? This video gives all that we can share about him.

Putting together the video was an arduous task. I first had to outline how the documentary would transition, then find clips and pictures appropriate to the narrative arc. I was able to extract general clips from youtube videos using clipconverter. I found the clips and pictures, but had to split them into enough pieces using Windows Movie Maker to give some change to the scene. Once I had a workable video, I again recorded a voice overlay on audacity while watching the movie. I stripped the sound out of the nature clips and reduced the volume of the static clips using the Video Volume option in Windows Movie-maker.

All in all, this is admittedly a rush job. I was unable to find some clips that I wanted, such as a first person view of running through the woods or some computer-modeling animation, both of course devoid of context-specific details. As a result, I had to make due with what I could find in the time available.

Signs of Trouble

For this assignment, I needed to sign something in letters, let us see if you can pick up on it.

As a hint, this once was a very popular phrase, and still is if you are part of the correct circles.

I came across this assignment looking at other peoples’ blogs. It turns out I had learned how to sign letters a very very long time ago (1st grade I believe?). This assignment was a great refresher on those signs, as I actually periodically find myself wanting to sign these letters, but often forget some critical ones such as ‘r’ or confusing the ‘a’ with the ‘s’ (I think after this one I finally have a system to remember, the ‘a’ is a ball plus tail (thumb on the outside), while the ‘s’ is one complete squiggle (thumb on the inside)). I was really unsure of how to delimit words and double letters, but I think after a couple tries I got it down. I also had to pay attention to how visible my hand was during the movie, that it was always facing the camera and in the field of view. It was slightly more difficult than I expected.

And for those who want to know what the phrase was, it is the primary phrase in the following…

(media not embedded so as not to spoil)

Wanted: Morlium, Dead or Alive

It looks like Morlium has a history…

When I saw the assignment, I knew it would be a perfect fit for getting a little deeper into the host characters. The character, of course, would be Morlium. As a practical consideration, I wanted clips low on volume so I could do an unmolested voiceover of a news reporter. This, combined with Morlium’s history in Alaska made nature scenes the natural fit.

This is the first time I ever edited video or put a sound overlay. I obtained clips of nature from http://thecliparchive.com/index.php?category=NPS. It turns out some windows computers, including mine have a moviemaker already installed (just search moviemaker in the search programs). Once inside, you can add clips to play one after another. There is a tab for video editing in which you can trim the clips to the desired lengths. Once the movie was created, I played it while recording a speaking part into audacity (so that my speech matched the video). I then exported the speech as a wave file. Windows Moviemaker has an add sound button on the homepage, which I used to insert the speech. Since I recorded while watching the video, the two aligned quite nicely.

I would have liked to put a little more into the wanted parts, but the assignment specifies at least 5 different sources, and I felt the need to give a piece with every scene change. In hindsight, most news reports care very little about what is going on in the video, so I may have been able to be a little freer with my speech.

Luscious Hair and Fabulous Faces

I am awesome…errr….lets just show a video.


Lets just say, this is highly out of character for me. That is part of the reason I took on this assignment. Most of the things I could brag about bore other people. I wanted something a little more…tangible. That is why I decided to brag about physical appearances. In my experience, you don’t have to look good to brag about appearances in the slightest, you just have to act confident. I chose hair as one thing because it has been getting a little long, and has become an active hindrance. I cannot not be conscious of it, so it is more or less on my mind a lot.

My face is a little more serious as a bragging point. Between being a non-talkative socialite, having two young nieces, and playing a brass instrument, I have had plenty of experience making odd faces. I actually am not too happy with how they turned out, but after trying several takes, I realized that I would need a better outside stimulus (such as a funny situation or odd spoken word) to pull them off to the degree I was hoping.

As for the very end, yes, the newspaper did taste awful. I thought I had a bag of animal crackers next to my chair (and indeed, you see me reaching for them), but I accidentally put them away between takes. As a result, I just reached for the nearest thing I could which I could attempt to cram in my mouth. An ad-libbed moment, I thought it worked out relatively well, and was an interesting punctuation to the slight awkwardness that receded it.

Window Wanderer

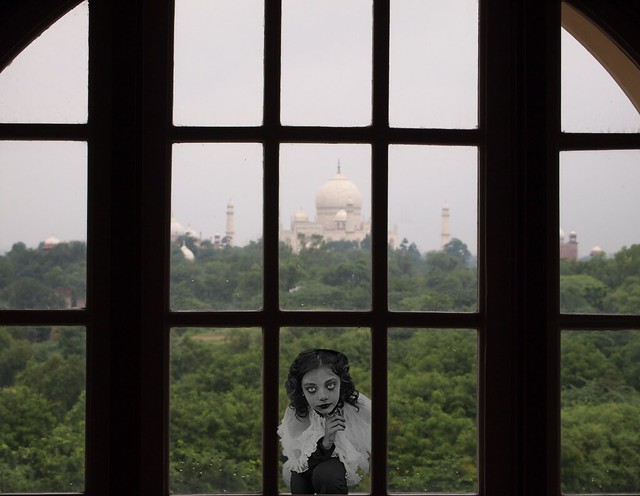
For this visual assignment I had to show what would be scary to see outside a window. I decided to use my friend’s host character, the Death Whisperer, because she is extremely scary.

Window Assignment

I took the picture of the Death Whisperer from my friend’s blog and cut out the background from the picture. I then found a cool looking window and put the Death Whisperer in the window. This required a lot of changing of the size of the Death Whisperer because she was rather small to begin with. I enjoyed this assignment because I got to stray from Bloody Face for awhile, since I have been using him a lot.

Abstract Face

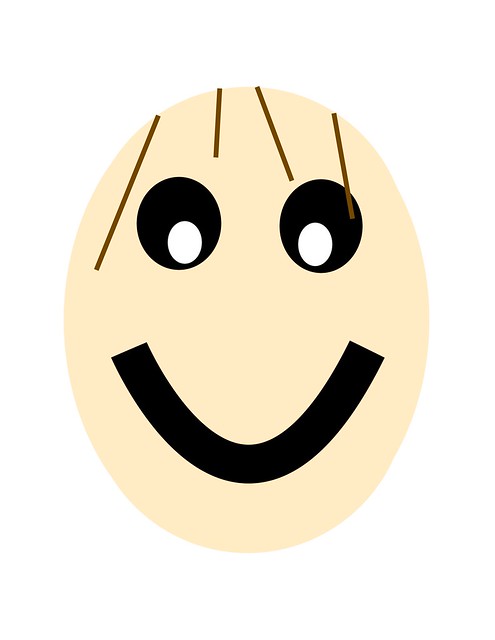
For this visual assignment I had to create something out of 4 lines, 5 dots, and 1 curve. I decided to make this assignment about my host character’s older brother, Johnny, who becomes Bloody Face after following his father’s footsteps.

Bloody Face Mask

I used 1 dot as the face, 2 dots as the eye holes in the mask, and 2 dots as Johnny’s eyes behind the mask. I used the 4 lines as pieces of hair coming out of the mask. I used the 1 curve as the smile that is cut out of the mask. I decided to also make my friend’s host character. Bridget is a girl who was locked in Mr. Fogg’s mental asylum in Sweeny Todd: The Demon Barber of Fleet Street.

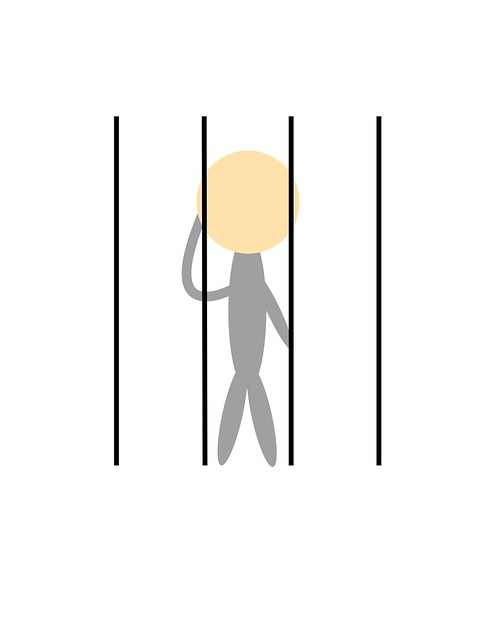
Bridget

I used the 4 lines as the bars that kept her locked in the asylum. I used one dot as Bridget’s head, 1 dot as her body, 2 dots as her legs, and 1 as one of her arms. The curve is her bent arm as she tries to figure out how to escape. Overall, this assignment was very fun while also being challenging to figure out how to portray two characters in 4 lines, 5 dots, and 1 curve.

Love At First Shot

love-at-first-sight_21766576859_o

LJ and Alexis were strangers all through high school. Never a “hello”, wave or anything. They had a couple classes together yet still no communication between them. The reason for this was LJ was very shy. He thought that Alexis was the most beautiful girl in school, but he never spoke to her because he did not want to get embarrassed. He thought she would laugh at him and turn him down. So he kept his distance, until senior year came along. LJ had played basketball every year since he was a freshman, but this year something changed. Alexis his crush, became the boys’ basketball team manager. LJ was shocked and nervous because he knew now he would sometimes have to talk to her. But at the same time he thought to his self this is his chance, it was time to make his move! So he began to talk to her, they became amazing friends. LJ knew he had to tell her his feelings to he did, and shockingly she felt the same! They started to get closer and closer, and he finally asked her to be his girlfriend. Of course she said yes! They have been together since then and it’s now it’s coming up on 4 years and the couple couldn’t be happier with one another!

Forbidden Love

LoveGif

“Take/Find a picture of a couple who are obviously in love. Use the picture to tell a story. Give the story some background and maybe even create a dialogue between the two or tell the story from each point of view. Just give it some detail and create a background to your photo! It can be a true story or a completely made up one, just have fun with it!”

The year was 1863, during the middle of the civil war in America. The north and south were fighting over control of a beach in Virginia. After a long day of fighting on the beach, the nurses from the north came out to assist the wounded. One nurse in particular, whose name was Amy, was tending to the wounds of an injured northern soldier. Laying next to the northern soldier was a man who fought for the south. His name was Adam. While the nurse was taking care of the wounded, Adam opened his eyes and saw Amy next to him. He asked her to help him since the south had left all their wounded men on the beach because of their recent defeat. Amy, looking into Adam’s eyes, noticing the sincerity in his voice, couldn’t say no for an answer. After helping her own wounded, she tended to Adam’s wounds as well, even though he was form the opposite side. From there on, they both instantly knew they felt something for each other but knew they couldn’t be seen together because they were on opposing sides.

After caring for his wounds, Amy sent Adam on his way back towards the southern side. But every so often, they meet back up on the beach where they first met, under the veil of night, to express their forbidden love for each other.


I chose this photo to make the love story because I when I saw it, I knew instantly that I could make a story out of it. The two horses and the individuals coming from either side of the frame suggested that they came from opposite sides. The horses gave me the idea of a time when they didn’t have automobiles and the lighting gave me the idea of some sort of forbidden love since this picture wasn’t taken in the light of day where people might see. Putting all of that together, I came up with the idea of a forbidden love during the Civil War where a nurse from the north and a soldier from the south cross lives.

The process to complete this assignment started with finding the right picture. I decided to Google Image search “couples in love” and eventually stumbled upon this one and downloaded it onto my computer. To make the photo into a GIF I first had to download GIMP which is a photo editing software much like Photoshop. I started by opening up GIMP, then under the “File” menu on the top left of the window, I chose the option “Open as Layers…” and selected the image of the couple. Next, I duplicated the original layer by right clicking on the layer under the “Layers – Brushes” window, and then clicked duplicate image. Then for one of the layers, I selected the “Blur/Sharpen” tool, which looks like a teardrop, located in the “Toolbox – Tool Options” window of GIMP. Using this tool, I made my GIF by blurring one of the layers. Then, under the “Filters” menu at the top of the window, I clicked “Animation” and chose the “Optimize(for GIF)” option to optimize it for a GIF. Then from there, in the new window that popped up after optimizing it for a GIF, it was time to save it as a GIF file. I did this by clicking “Export As…” under the “File” menu in the window. Then I changed the file type to GIF image and exported it which saved my GIF.