Historical Selfie- 3 stars

This assignment is to take a historical figure and make a selfie of them before a tragedy. This is Harry Houdini in front of the Princess Theater in Montreal. At this theater, a student named J. Gordon Whitehead had punched Houdini, supposedly rupturing his appendix.

houdini selfie

Dark Night Selfie

I decided to get started early on the visual assignments for week 3 of noir106. I took some time this evening to work on the Chimeratic Composition assignment submitted by the great Tom Woodward. The instructions are as follows:

Take at least three pictures (your own or someone else’s) mash them together into something that makes them more than the sum of their parts, something that would have been impossible in real life. Include the original images so we can see how they build on one another to make your final composition.

I love the example Tom provides:

Chimeratic Composition by Tom Woodward

He used four of his own images to create this supernatural, gothic moment. So I got inspired to try my hand at this assignment. First up was finding some of the images I had taken recently to mash together. I came across the following images I took while on a trip to NYC with my family. After browsing I got the idea of doing something with the life-size lego Batman and the shot of downtown Manhattan from the top of the Empire State Building.

Lego Batman

Life-size Lego Batman at FAO Schwartz

NYC City scape

View of downtown from Empire State Building

I also found this shot I took while on the Staten Island Ferry of what looked like a helicopter size drone. Flickr user Bill VanderMolen commented on the shot to say it’s actually a “V22 Osprey. Tilt-rotor aircraft that the military plans to use to replace troop transport helicopters.”

V22 Osprey. Tilt-rotor aircraft that the military plans to use to replace troop transport helicopters.

This got me thinking, wow, that’s very Batman. State of the art, military-level artillery. I now had my third image. I opened each image as a layer in GIMP and started playing around. I cut out the parts I wanted use with the magic wand and lasso tools. I then scaled each layer to the proper size, and changed the colors. I made the city black and white, kept a bit of color on Batman. The Osprey was already black, so that was easy. I probably spent more time futzing than I need to, but I kinda like how it came out.

Batman atop the Empire State Building

After realizing that Batman’s positioning made it look like he was posing for a selfie, I decided to double up on this one. I returned to yet another Tom Woodward visual assignment: “Historical Selfies.” Gyeore Lee had done this assignment earlier in the day-–reminding me how  much I love it—so I decided to actually illustrate Batman’s selfie on a smart phone thanks to this template made available. It has all the layers, I just pulled my Batman selfie image in as a layer and cropped it for the phone screen. After that I added likes and tags.

And with that I have my first visual assignment of the week. I am only giving myself 3 stars for this one because I am committed to only doing assignments I haven’t tried before. I took a stab at the Historical Selfie last semester, which was fun. But I have to admit I think this one is much better, although not very historical at all.

Historical Selfies

Wright Brothers Selfie

The most of the pictures in my phone are the pictures those were taken from the trip in Florida. Among those pictures, it was taken when I was in the airplane on a way back to Virginia. As I looked through the pictures, I immediately thought of Wright Brothers because they were the first airplane inventor.

Wright_brothersSI10461h

I cut this image and pasted to the sky view of Miami (below). I did not know any photoshop website or did not download it so I utilized drawing board that was already exist in computer. I pasted them on the bottom of the background, but the up side was kind of seem empty. So I pasted the plane (right) that was invented by Wright Brothers.

16190765780_b732bf3bef_m

Nevermind the Selfies

sid_selfie
I took the opportunity of teaching ds106 again to finally take a stab at Tom Woodward‘s historical selfies assignment. If I hadn’t waited until the last minute, I would have done a string of The Wire selfies, which I still plan to do. But given I did all my visual assignments in two hours last night, I’ll think of this as a warmup for bigger things to come. Because I have to say this is a very fun assignment, a a few other ds106ers have been trying it as well to great effect.

But in the meantime, I tried to do something punk rock because if it doesn’t look that good its all right because it’s part of the ethos ;) I took the following shot from Alex Cox’s brilliant 1986 film Sid and Nancy as my image of Sid Vicious (so already a couple of mediations in given this is actually Gary Oldman).

Chloe Webb and Gary Oldman in the film Sid and Nancy

I cut Sid out of the above image and pasted him into a layer with the old school, black and white image of the Chelsea Hotel (included below) using GIMP. Once I had the selfie image, I brought it into the Photoshop template (which worked seamlessly in GIMP) that Tom Woodward shared as part of the assignment. I scaled the selfie layer to make sure it fit over the image area in the template. After that, I adjusted the likes and hashtag layers in the template to show Sid was out of favor at this point in his career (only 2 likes!), and was in NYC—if you didn’t pickup on the Chelsea Hotel bit. Also, it was worth reinforcing his relationship status with Nancy. But the hashtags were an overt, if not pedantic, foreshadowing that this may be his very last selfie.

hotel_blog

pumpkins, pooh bear, photoshop.

My three visual assignments this week took me a LONG time, but they were so worth it! I’m very happy with the results.


Image with a Message

1 star


pooh bear!

I have always had a love for quotes. Maybe it’s my passion for writing or my strive for optimism and inspiration, but I can remember being as young as 11 and handwriting quotes to cut out and decorate my bedroom door. One of my favorite quotes that I’ve ever heard (and I first heard it many years ago) is from the movie Pooh’s Grand Adventure.

I was obsessed with Pooh Bear when I was a kid, and this movie was one of my favorites. A quick summary: Pooh Bear is upset, because Christopher Robin says he won’t be able to come visit the 100 Acre Wood as much as he has been recently. He won’t tell Pooh Bear the reason for his schedule change (turns out, they find a note that says he’s left for “SKOOL,” which Owl–in his infinite wisdom–misreads as “SKULL,” leading the gang on a terrifying adventure to the dark parts of the 100 Acre Wood).

When Pooh expresses his sadness, Christopher Robin gives him a hug and assures him the following:

“You’re braver than you believe, stronger than you seem, and smarter than you think.”

With its alliteration and sheer sweetness, I’ve always kept that quote close to my heart in times of trouble; we are so much more capable than we believe ourselves to be, and we should start giving ourselves credit for all the wonderful things we accomplish.

I found an adorable Creative Commons picture of this crocheted Pooh Bear doll and simply added text via the Paintbrush app for Mac. I chose the handwritten font to add to the fun, airy feel.


Apophenia

3.5 stars


Halloween!

I’M REALLY EXCITED FOR HALLOWEEN, YOU GUYS.

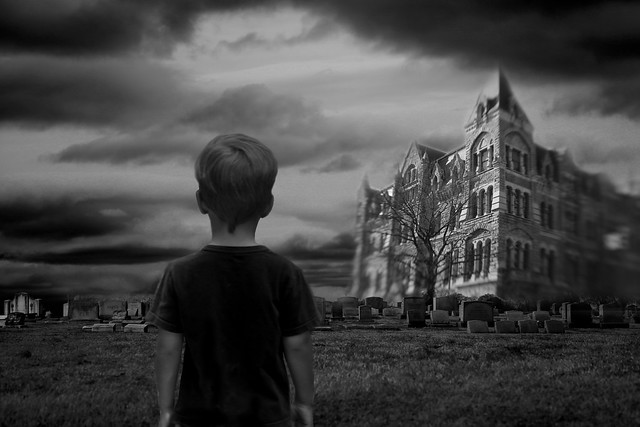
Like you saw in last week’s summary, I have decorative pumpkins, so I thought: why not create my own spooky pumpkin patch in the woods? I combined one of my favorite seasons with one of my favorite holidays (there’s something nostalgic and wonderfully eerie about autumn) by uploading the picture I snapped on my phone of three pumpkins into the aforementioned Paintbrush app.

Then, I let my inner elementary school student run free with the spray can, shapes, and paint tools to create this scene. Note the peering owl eyes from the tree trunk–essential to any Halloween scene.
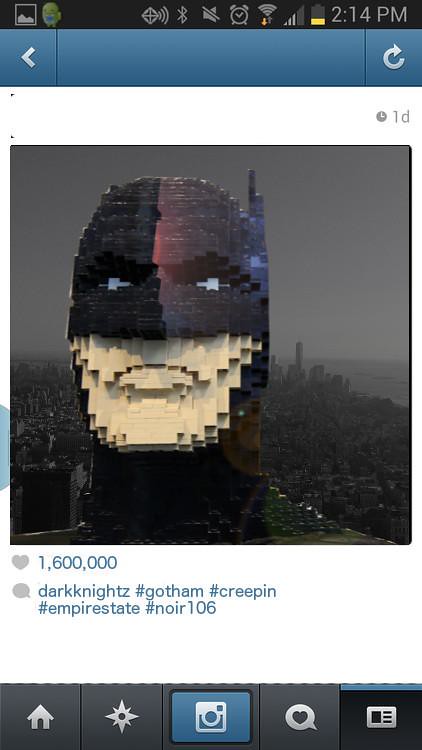

HISTORICAL SELFIES

3.5 stars


This took the longest out of the three visual assignments, but it was a helpful process to learn more about photo editing and produced an exciting result!

My favorite Golden Age Hollywood actress and one of my beauty inspirations is Marilyn Monroe. I love her wit, charm, and how she’s come to stand as a role model for curvaceous women.

I also really love James Dean: sexy bad boy with intelligence and a good heart deep down.

I’m sure many of you have seen this image around the Internet or decorating 1950s-era diners:

This is an incredible drawing of the two classic stars of American cinema, sex appeal, and popular culture, but before I started researching Marilyn and her life, I actually thought she and James Dean were involved thanks to this image, and that got my romantic, cheesy heart soaring.

Unfortunately, they were not.

According to memoirs, they met once or twice but never became serious. Despite this revelation, I still think they would have made an adorable couple, and I love to see art and pieces dedicated to the two of them today.

The above historical selfie is my contribution to the James/Marilyn collection.

Since I don’t have Photoshop on my personal computer, I was able to do some quick Google-ing and found an awesome online editor that does nearly the same things Photoshop does. The final product doesn’t look quite as seamless as it would have if I had used Photoshop, but it works.

It took a lot of tinkering with layers, erasing, and blending–and before all that actually FINDING two pics with similar lighting to edit–but this was the result.

A tutorial for this would be far too dense for this post, so I suggest you hop on over to YouTube and watch some Photoshop tutorials OR check out the Digital Teaching and Technology Center in the ITCC. They can show you the basics, there.

I decided Marilyn is totally BFFs with Audrey Hepburn in this universe, so Audrey snapped a pic of her bestie with her man being all cute and lazy on a rainy Sunday morning, and Marilyn then posted it on Instagram. Not technically a selfie, but that’s a minor detail.

Also, notice the amount of likes, because you know modern Marilyn would absolutely be Instagram famous.


Marie Antoinette Selfie

Here is a selfie of Marie Antoinette.

FDR and JFK Were Around Then?

Visual Assignment 2! This one was great. Just the assignment itself was hilarious because i love both historical figures and disasters. What mostly attracted me this assignment was the whole idea of cropping. I get the hang of cropping when i completed the “Me and Bae” assignment where i cropped out Stringer and Avon into the bodies of Will and Jada Smith. Of course if i didn’t do that assignment, this one would have taken me twice as long. Surprisingly, there were no hiccups when i created this so i pushed my luck and made two separate photos. Good thing i’m a master with GIMP because i’m seriously proud of both of these. I might secretly make the FDR one my screen saver.

Crop 1: FDR & Pompeii 

As you can tell, this is a picture of our famous 32nd President Of The United States of America. FDR is hands down my favorite president so i had to choose him. The only problem was, what do i pick as a background? I thought it would be funny to pick something way out him time zone so i chose the eruption of Mt. Vesuvius. I know i shouldn’t be as proud of this because a lot of innocent people died, but ah, come on… Especially the way i rotated FDR, it almost looks like he’s coming out of the volcano.

FDR & Pompeii

2. JFK & Twister

Like the title says, i chose JFK as my next victim. He is my second favorite president, right behind FDR. The background i chose for this was just a simple tornado. I wanted to pick natural disasters rather than acts of violence so i strayed away from wars and such. I think this picture looks really good, so feel free to save it to your computer. ;)

twister & JFK


GIMP:

I’ve used GIMP before in a prior assignment which uses the exact same steps of cropping, so here they are!

Cut Head:

What I did here was open GIMP and chose the scissor icon thinking it would cut, and yes, it did! I cut around Avon and Stringer’s heads. After not knowing what to do next, I watched this tutorial which helped me a lot.

Layers: As the tutorial says, you go under the “Layer” menu and choose transparency then choose “Add Alpha” which I did.

Select: Now you go under the “Select” menu and choose “Invert”. After invert you now have the background selected. Now go under “Edit” and press clear.

DON’T FORGET PNG LIKE ME!: Now, Please… Please… don’t forget to save the image as a PNG so the background is not white. I was stuck on this for almost 2 hours wondering why my background wasn’t transparent. Then after emailing/tweeting/bothering Groom, he gave me his words of wisdom. Keep in mind, this whole process is just for cutting the heads out…. There’s more.

Open As Layers: Yes, open the pictures as layers. From here, you select the tool that is for moving layers and you shift the floating heads over the bodies of the soon to be headless. That’s really all it takes. I wish i could say that with more sincerity but this process was frustrating for me. Hopefully you will avoid frustration.


ENJOY!

Historical Selfie

When I saw that DS106 had an Historical Selfie option, I was so excited. I knew I had to use one of my favorite historical figures -Marie Antoinette. To make this project happen, I had to download Gimp (basically, a free and less-user-friendly version of Photoshop). After about an hour of cursing and throwing things at my computer, I finally made a halfway decent post. Note – this project isn’t exactly for the photo-editing novice.

Assignment instructions can be found here.#beheading #goodhairday#beheading #goodhairday #atleastilookhot

Historical Selfies

Historical Selfies

For my blog post, I chose to do a Historical Selfie under the visual assignments category. It seems that there’s a lot of recent talk on selfies and there’s even a (terrible) song about it. https://www.youtube.com/watch?v=kdemFfbS5H0

So I decided to make a somewhat funny/morbid selfie photo of Abraham Lincoln picture in the Ford’s theater. This was the most technical of the other blog posts because it required some editing, something which I’m terrible at, but it provided an opportunity to learn how to get better at it.