Got Web?

Tim Burners-Lee

Did you ever wake up in the morning, and say:

“Man, I’m so grateful that the world wide web exists! What would I do without it?”

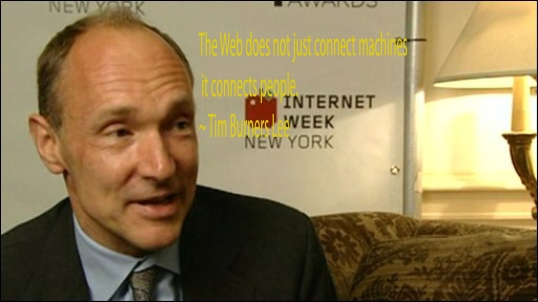
Well, if so, the vibrant guy in the picture above, Tim Berners-Lee, is who you should be thanking!

Hmm, wait a minute. This guy was knighted by the Queen of England, right?

Better make that Sir Tim Berners-Lee instead! (According to Wiki, the rank he was giving was Knight Commander of the Most Excellent Order of the British Empire)

Compared to the old days, it must have gotten a lot easier to become a knight considering all he had to do was invent the web!

Anyways, since I guess he is kind of like royalty now, how about we go ahead and give him the Royal treatment? The Royal Photoshop treatment of course!

With that being said, I’m going to go ahead and give you guys a really really simple tutorial on how to use filters and a few other tricks in Photoshop to get any picture looking like the one I posted above!

Okay, so first lets start off with the base picture. I got this photo. from this wiki in case you want to use the same picture to practice on.

Lets start up by opening the file in Photoshop. Your screen should look something like this:

<Reg Pic Begin>

Next, go to your layers window and right click on the layer named “Background” then click on the option “Duplicate layer”. For this tutorial, let’s duplicate it twice. When you’re done, your screen should look something like this.

<SS after Double Duplicate layer>

After that, select Background copy 2 to work on simply by clicking it in the layers window. Once you’ve done that, click the drop down Filter menu at the top of the screen and select Filter Gallery. (For those of you using older versions than Photoshop CS3, you may have to manually select the type of filter you want to use instead of using the Filter Gallery.)

Your screen should look something like this once you select Filter Gallery:

<SS of filer gallery menu>

Once the filter gallery is open, simply select the type of filter you wish to apply and (for the sake of brevity) experiment with the filter options using the sliders on the right side of the window. Each filter is unique so try out each one to see what you like the best!

As of right now, your window should look something like this depending on what filter you chose:

<Picture of bc2 changed>

For our next step, lets go back and try doing what we just did with the remaining layer. Once both layers have been modified with filters, it should look something like this:

<Both layers filters applied>

Now we’re ready to do a little magic with our handy-dandy quick masking tool! Select it by clicking on the (circle in the rectangle) icon in your tools menu box.

<cropped photo of masking icon>

Once selected, you should see your background colors automatically switch to black and white. This is important, as the color black in quick masking mode selects the areas you want to work with when you exit quick masking mode. The color white, on the other hand, is used for removing the mask, so to speak.

Applying the mask is easy. Just select the layer you want to work with, your paintbrush tool, adjust your brush size, opacity, flow, etc., to your liking and then click on the areas you wish to mask. Again, if you make a mistake, just select the color white and paint over the area you wish to undo. (Or..press ctrl+Z to undo your last action)

Oh, and for those really unfamiliar with layers, remember that the layer on top in the layers window is the first and most visible one. Just think of layers like paper, and in our example there are 2 pieces of paper. Background and Background copy. Background copy is the one on top of the pile, with the layer Background on the bottom.

The masked areas should appear red, and your screen by now should look something like this.

<Show masked area pic>

At this point you should exit quick masking by clicking on its icon again in your tools menu. Next, click on the eraser tool and then use it inside the selected area to uncover parts of the layer underneath. Your screen should look along these lines once you do:

<Layer Mask Erased>

After you familiarize yourself with all the steps up to here enough, from here on you should try and make an even more amazing multi-layered, multi-filtered picture on your own!

Here is my final image after making more layers and applying different filter effects.

<Final Image>

…and that’s all folks!

I hope my (very first) tutorial helped you out at least a little bit and many thanks for giving Sir Tim Berners-Lee the royal photoshop treatment with me! Feel free to leave a comment and if you can, tell me what photo-editing software you use (include the version please)!

Thanks and good luck!

Don’t cry because it’s over, smile because it happened :)

Hey guys!!

Here’s my 3rd ds106 assignment!! It’s my second assignment with an image but please bare with me…I love using images!! :D

The assignment I chose this time is a visual assignment again and it’s called “Image with a Message“. Well, here are the directions!!

Are you looking for an engaging computer-related activity or project for your students? Regardless of the grade or subject area in which you teach, I think I have an idea that you will find both stimulating as well as educationally relevant.

It is said that “a picture is worth a thousand words”. Your challenge is to enhance a famous quotation by superimposing it on an appropriate “Creative Commons” licensed image and to give proper credit.

Detailed lesson steps, together with supporting web sites, samples, and activity handouts are available on by blog at: http://life-long-learners.com/image-with-a-message/

Take care & keep smiling :-)

The Process:

First, I went to google to look for a quote to use for this assignment. I found a nice site with many different kinds of quotes and I chose Dr. Seuss’

Don’t cry because it’s over, smile because it happened.

Then I went to flickr to look for an image that goes well with this quote. Since I wanted something that seemed innocent and cute, I chose this image:

Close Up by LeMast – CC Licensed via Flickr

Then, like I did last time, I went to Picnik to do the editing. I chose Picnik again because I wanted to try it out on my own this time.

I uploaded the picture and put an effect on the picture. This time, I chose Orton-ish.

When I saw this effect on the image, I really liked it but the brightness. Therefore, I chose to bring the brightness up to 75%.

That looks a lot better, doesn’t it?? :)

Moving on to the quotation…

First, I thought of putting the whole quotation at the bottom in one line. However, when I did that, it looked really boring. Therefore, I split the sentence up to “Don’t cry because it’s over,” and “smile because it happened.” When I put the word on to the image, the white didn’t work so well with the text and the image. Since the word “it’s over” is in the sentence, I thought of coloring the text dark purple because that represented the sad image of the text.

Then the second part of the sentence, “smile because it happened.”, since there’s the word “smile” in the sentence, I instantly thought of the color yellow; just because its a bright and fun color. Also, since I thought the last part of the sentence was the most important amongst the two parts, I made it bigger than the first half.

The Story:

By doing this assignment, it allowed me to challenge myself by using a new photo editing site on my own. Also, I had fun going through flickr and looking for the perfect image for this assignment.

Well, here’s the finished product :)

Teacher Feature #15 – The Daily Create

I want to share a remarkable educational vehicle for stimulating creativity and engaging students. Through the “The Daily Create” participants are offered a unique invitation to engage in creative exercises which help individuals look at the world differently. Too often, we become complacent and approach day-to-day events in much the same way with little opportunity, or time, to think or act in a creative manner.

To challenge and engage readers, I decided to describe one aspect of “The Daily Create” (TDC) in a somewhat creative manner. Can you interpret the descriptive words that are displayed in the following nine character word puzzle? If you are correct, you should be able to complete the following sentence:

Many who think outside the box* would consider “The Daily Create” as a rather …

To help readers better understand “The Daily Create”, I thought it might be interesting to compare it from the following two points of view – the teacher and the student.

TDC – The Teacher Point-of-View
The “Digital Storytelling” DS106 TDC web site states:

“The Daily Creative is an exercise in the continual practice of spontaneous creativity through short exercises. Each “assignment” should take no more than 15-20 minutes. There are no registrations, no prizes, just a community of people producing art daily.”  

Individuals share their daily “creations” through their respective blogs with appropriate links to one of three sharing mechanisms: Flickr (photos), YouTube (videos), and SoundCloud (audio clips) where free accounts can be established.

TDC – The Student Point-of-View
“The Daily Create” is an inspirational and engaging activity that is part of the free Digital Storytelling DS106 MOOC (massive, open, online course) in which I have enrolled. The DS106 course is facilitated through Jim Groom’s hard working team at Mary Washington University in Fredericksburg, Virginia. Students in DS106 are not required to buy a textbook but they are required to purchase, if they do not own one, their own domain (e.g. www.ideasandthoughts.org or www.life-long-learners.com) together with hosting services to set up their own blog. This blog will become their online diary where they will document and reflect about their engagement in this important educational process.

The DS106 course just officially started last week and for many students new-to-blogging, their task was to secure their own domain, write their first post, and ensure that all necessary “feeds” were linked back to the DS106 learning community. One might think that because I already owned my “life-long-learners.com” domain and was somewhat familiar with the WordPress blogging process, that I would be idle waiting for the “newbies” to catch up. I assure you nothing was further from the truth!

Enter “The Daily Create” … an amazing adventure to help students express their creativity, to explore some of the DS106 linking mechanisms, and to provide an activity to stimulate the sharing of experiences through student blog posts.

In my opinion,  “The Daily Create” fosters the contagious creativity that Albert Einstein recommended we share, as illustrated in this month’s “Teacher Feature” remix:

Teacher Feature #15 – Albert Einstein – January, 2012

To help the reader gain a better perspective, I will list some on “The Daily Create” tasks. These descriptions are purposely short because they are shared using Twitter’s message limitation of 140 characters. Online readers are encouraged to view these links to gain an understanding of the creativity demonstrated by this amazing DS106 community of learners:

From a student perspective, I am so amazed at the creative ideas that are showcased by my fellow DS106 learners. In addition, one of the important aspects of the entire DS106 environment is that most of the engaging assignments, together with “The Daily Create”, activities are suggested by those who have enrolled in the course. Furthermore, as a K-12 educator, I am wondering if we might modify this “daily create” mechanism to stimulate engaged learning by our own students. I welcome readers’ thoughts on how such an “outside the box” process might be accomplished.

Take care & keep smiling :-)

* Outside the box challenge – I purposely have not provided the answer to the above nine character word puzzle which describes “The Daily Create”. Rather, I encourage risk-taking readers to share their interpretations in the comments below.

DS106 Assignment — Image With A Message

20120125-042605.jpg
Image With A Message

The Assignment
So, for my first ds106 assignment, I decided to do a visual assignment because it seemed quite simple! The assignment, which I found under the visual assignment is called Image With A Message by Brian Metcalfe. The task for this assignment was written as:

It is said that “a picture is worth a thousand words”. Your challenge is to enhance a famous quotation by superimposing it on an appropriate “Creative Commons” licensed image and to give proper credit.

The Process
First, I decided to find a quote that was related to this class — so maybe a quote on computers, internet, or social network services, or something like that since this class is all about Cyberspace and Society!! I went to Brainy Quote and looked for different quotes under the computers section!
After I found a good quote that was related to this class, I went to Flickr and searched for an image that matched with the quote I found.
When I was done finding a quote and a photo, I used an application on my iPad (since I’m writing this post with my iPad) to edit the photo. I lightened up the photo so that the colours would become lighter and the text would be more visible. Then I pasted the quote onto the photo and voila! I was able to finish my assignment for Image With A Message!!!

The Story
I chose this quote because first, it is related to this class. In this class, we learn about the things that Internet has given us to improve our lives or entertain us. By taking this class, I think I am going to improve my understandings towards the different websites and programs that I can use on a computer to do different things. However, this is my second reason, I think that we should not forget the importance of being with someone at the same place and time. We can meet people on the internet too, using Skype or other social network services, but it’s different from meeting an actual person. In this quote by Louis Gerstner, I think he is sending us a message that although it is ok to use the Internet, people should not forget the importance of laughing with someone by their sides.

Image: Free. by JoysephCC Licensed via Flickr

Pioneers: Alan Turing

Photography by Ryan Lobo

DS106 Assignment:

Image With a Message: Enhance a famous quotation by superimposing it on a “Creative Commons” image and give it proper credit.

The Process:

This assignment is quite simple, actually. I started with searching for a quote-which I decided HAD to be Star Wars. After deciding on a Yoda classic, I searched on Flickr for a suitable picture. Once I found one, it took a matter of seconds in Photoshop to add the text (Although, all that is ESSENTIALLY needed for this project is MS Paint, or something equivalent).

The Story:

I chose this quote because of how accurate I feel it is. The mind of a child is not burdened by the trivial hassles an adult mind may possess. Its potential is limitless, as is that of the internet.

I believe this quote is also reflective of a technology pioneer: Alan Turing. The father of computer science and artificial intelligence, Turing was talented in mathematics and sciences from childhood. His talents and intelligence were utilized in World War II to break German ciphers at Bletchley Park. He concentrated on Cryptanalysis of the Enigma with Dilly Knox, and was awarded the OBE in 1945.

Alan Turing worked on designs for the ACE (Automatic Computing Engine), and presented the first detailed blueprints of a stored-program computer. He also worked on software for the Manchester Mark 1, an early stored-program computer.

Though, one thing Turing is most well known for is the Turing Test. This test addresses the issues on artificial intelligence. The test is supposed to assess a machine’s ability to exhibit human-like intelligence. A judge converses with a human and a machine via text-media. If the judge cannot tell which is the machine, then the machine has won.

Alan Turing’s visions set the foundation for the modern computer. He honed the potential he had as a child, and used it to conceptualize and create; characteristics of a pioneer.

~NOMNOMreeses~

Brian Metcalfe’s Image with a Message

Demonstrate that “a picture is worth a thousand words” by superimposing a famous quotation over a “Creative Commons” licensed image.

Make certain to include the author’s name and the licensed image web address in your visual remix to provide proper credit and acknowledgement.

Detailed lesson steps, together with supporting web sites, samples, and activity handouts are available on my blog at: http://life-long-learners.com/image-with-a-message/

Take care & keep smiling :-)