Preparation is key (for video assignments and other such things).

While I enjoy watching Vines, I do not have the app downloaded on my phone. Much like Twitter, unless it’s used to communicate with friends or family, entertain friends or family, or I am a celebrity/comedian/singer/actor sharing my work, I see no real reason why people would want to view 6 seconds of my life.

Despite this attitude, I am choosing my first video assignment to be one created on Vine.

What attracted me to this assignment was the literary aspect; I love books and reading, so anytime I get to nerd-out (yes, I am totally using that as a verb) and reference a favorite novel of mine, I will gladly take the opportunity.

The prep work for this assignment isn’t too difficult, considering the fact that the video only has to be 6 seconds long.

After viewing the provided example, my mind immediately thought of the movie Clueless–or rather, the book that Clueless is based off of: Emma. Thanks to the speaker’s attitude portrayed by her body stance and vocal inflection–very California Valley girl–I was reminded of the 90s film, and anything to do with social class and judgement based on aforementioned class reminds me of Jane Austen or Dickens.

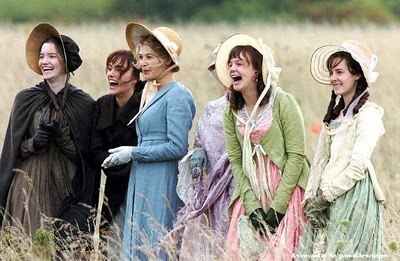
Thankfully, I wasn’t too far off; the book was Pride and Prejudice. I think the original assignment poster could have made the time period more obvious by using a stereotypical English accent and maybe dressing up a bit (fancy springtime hats, anyone?), but otherwise, the example–the only example for this assignment, unfortunately–is cute.

I know which book I will be referencing (don’t worry, it’s not Dracula or anything Palahniuk related), and the two items I need I can easily find in my closet or at a grocery store (a dress and bread, specifically–yup, it is going to be an interesting mix!). The last clue will involve a certain phrase/line, so the guessing shouldn’t be too difficult!

This piece is one of my favorite novels and is a popular one, so my readers should have encountered it sometime during their academic career.

The only thing that I will alter slightly is I will not film the Vine on the actual Vine app. I don’t want to make an account just for one video, so I will record six seconds of footage and edit it together on iMovie before uploading it to Vimeo. Again, I like to keep all of my videos/files together for organizational purposes!


I will be honest: Sherlock caught my eye in this next assignment.

I remember watching this video when it first made its rounds around Tumblr a couple of years back, and it is still just as funny. Oh, dramatic, angry chipmunk John and ever-stoic-chipmunk Sherlock–how I love you.

The example including Samuel L. Jackson is pretty much awesome; his voice is as iconic as Morgan Freeman’s in this day and age (Nick Fury FTW!). Hearing him narrate this parody of a children’s book is funny enough as it is, but to make his voice higher is just extra hysterical. I do think the language in the video could use a disclaimer at the start of the post, and the video itself could be shortened a teensy bit. After about a minute, the audience sort of gets the point.

I didn’t think something could actually be funnier than the aforementioned post, but Mel Gibson in Braveheart with a chipmunk voice is actually in the running.

My parents love to quote this movie; I myself have never watched the whole thing through, because it’s just too violent. My mom, however, loves to go outside when it’s beautiful out or after a long day indoors, stretch her arms, and bellow,  “FREEDOM!” in reference to this scene.

I really like the use of this dramatic scene in a humorous assignment–a nice juxtaposition. I agree with the poster, also–the chipmunk effect does not help his Scottish accent much. Sorry, Mel.

After great deliberation and many texts to my friend, I decided to chipmunk-ify the opening sequence from 1996 Romeo + Juliet. I love Leondardo DiCaprio, and the movie–while apparently staying the truest to the original Shakespeare script, according to my friend’s English professor–is extravagant and ridiculous in all the best ways. This opening sequence is particularly excessive.

To make things even more entertaining, I couldn’t find the original English version on YouTube, but I did find a dubbed Italian version. Now, we will have the joy of watching out-of-sync dialogue and high pitched voices! This will be a fun one.

Together, these will equal 5 stars (2.5 each).

Stay tuned for the finished projects next week!

BUT SCULLY–PINTEREST!

Again, I like to sprinkle my assignment posts with details about my likes and dislikes, and one of my biggest likes EVER is The X-Files.

I first watched the X-Files when I was fourteen and home sick from school, and from then on, I was hooked to the mystery, the spookiness, the science, and the subtle but oh-so-fulfilling romance. Dana Scully is still one of my heroines today with her beauty and brains.

Therefore, when I had to choose a character for whom to create a Pinterest board, I knew I wanted it to be Scully!

One of my favorite things about Scully’s character is her depth. There are so many layers to her personality. On the surface, she’s a brilliant scientist dedicated to rationality and logic, but as the series progresses, you find that she is far more troubled by emotions, rash decisions, and doubts than originally expected. As her character grows and becomes more open-minded and comfortable with those closest to her–Mulder in particular–her layers are peeled back bit-by-bit!

By revealing her flaws and fears to the audience, I connected with Dana Scully and loved her more than ever. As someone who loves science herself and tries to be as Spock/Vulcan-like as possible in moments of extreme tension or trouble, watching one of my heroines become more vulnerable helped encourage me to become less guarded and uptight, as well.

This Pinterest board–for her eyes only and for those times when she just “needs a boost”–represents that softer, more human side of the character.

Now, I will take you through the pics one-by-one and explain each one’s significance to Dr. Scully!


SECRET board. Who knows what Mulder would pin if he got a hold of her password?

scully pinterest 1

Scully Pinterest Part 1


Scully’s Pinterest Part 2

Moving from top left to right and starting with Part 1…(All captions/comments beneath the pins are written by me pretending to be/think like Scully!)


1) In Season 3, Episode 12, “War of the Coprophages,” while Mulder is off investigating killer cockroaches and flirting with entomologists named Bambi (this is not a joke, seriously), Scully is seen relaxing in her living room reading Capote’s Breakfast at Tiffanys. Therefore, she’d totally re-pin a pic of Audrey Hepburn in the classic role, because she’s totally a fan.

Nice to see her RELAXING for once.

2) Scully’s a doctor, so she’s probably into healthy eating. She also likes sweets, as seen again in the above episode when she’s eating ice cream out of a carton (see why I love her?):

My heroine.

Sweets + healthy eating = frozen yogurt covered blueberries!

3 + 6) SPOILER ALERT: Mulder and Scully end up in a monogamous relationship together after years of battling horrifying creatures, government baddies, and aliens.

She would totally think of clever alien cakes and homemade gifts like the alien abduction lamp for his birthday!

4) She has gorgeous red hair and would totally read beauty tips for said color. (Red is not actually the actress, Gillian Anderson’s, natural hair color. Someone told her to dye it red after she got the role of Scully.)

5) Even when not sporting professional pantsuits and skirts as a F.B.I. Special Agent, Scully’s style is still classic and has a lot of blues and neutral colors. Therefore, she’d totally admire the pinned, navy blue, winter jacket.

6) See #3!

7) It’s made clear that Scully is particularly close with her father, who was in the navy. Therefore, I’m sure she’s been instilled with a love of the sea and would re-pin this gorgeous shot of the beach & sea shells.

8) Scully likes wine and totally collects sangria recipes.

9) Again, she has an attachment to the ocean because of her navy father and is drawn to lots of nautical shots!

10 + 11) Attending the University of Maryland, Scully majored in Physics and wrote her undergraduate thesis titled Einstein’s Twin Paradox: A New Interpretation. She would totally dig science nerd/physics humor and Einstein’s genius goofiness.

12) Mulder had this poster in his office. You can clearly see it here:

I’m sure seeing the print online would bring back some memories–both good and bad.

13) Scully enjoys taking bubble baths to relax.

This is also one of my favorite screen caps from The X-Files EVER. The third person in the bottom split-screen is their boss and the assistant director of the F.B.I., if you didn’t know. From one of the funniest episodes ever: “Hollywood A.D.,” written by Duchovny himself.

14 + 15 + 20) Again, as a doctor, Scully values logic and reasoning and would re-pin quotes reflecting this belief. Also, doctor jokes and cool pictures of heart anatomy, yay!

16) “You drive me nuts, but I love you, anyway.” How well does that fit Scully’s relationship with a certain someone?

17) Along with her sharp sense of clothing style, she also has cute hair styles, too!

18) More navy/family love.

19) While she also loves science, Scully’s Catholic faith is a huge part of her character and helps her get through some very rough health problems in mid-to-later seasons. She’s all about faith, and the show overall has a theme of faith: in each other, in trust, in the unseen, in logic, all depending on the situation.

20) See #14

21) To exercise, Scully runs and would absolutely re-pin inspirational running quotes! You find this out thanks to a killer stalker that is introduced in Season 6, so it’s an unfortunate way of discovering a character detail, but this is how she stays fit!


And that’s my version of Dr. Scully’s Pinterest! I just made a Pinterest account with a junk e-mail and deleted it after I was done searching, captioning, and screen capturing appropriate pins. Hope you enjoyed!


All screencaps from this great site!


Social Media during the Russian Revolution?!

I’ve mentioned in a previous post that I particularly love Russian history. My interest started when I was a wee little thing and first saw the movie from Fox Animation called Anastasia.

MAGICAL. (credit linked in .gif)

Of course, I didn’t know the true, tragic story of the Romanov family at this young age, but when I was old enough to handle such details, I was addicted to finding out all I could about this Russian grand duchess.

I’ve spent years studying this family and followed the mystery faithfully. I’ve cried many tears for their lost lives and the suffering of the Russian people as a whole during this turbulent time.

If I had to choose, this final years of Imperialist Russia would probably be my favorite period of history to study. I knew I wanted to create a social media post based on one of the people during this era.

Writing as a member of the imperial family or a Bolshevik just seemed too sad, so I decided to focus on one of the points that lead to the Revolution’s crescendo: the murder of the monk Grigory Rasputin.

Long story short, the monk–despite his drunkenness and habit of sleeping with and beating prostitutes–was considered a mystical, holy man by the Tsarina or Empress of Russia. She believed that he could heal her son, the Tsarevich or Crown Prince Alexei, when he had bouts of pain and near death experiences from his hemophilia.

Rasputin’s visits did help ease the Tsarevich’s pain, but his influence over the Empress (he often gave her advice–which she followed–on handling governmental dealings and decisions) and general nasty appearance and demeanor struck a sour chord with the Imperial Court.

The Prince Felix Yusupov lured Rasputin to his home one evening on the pretense of dinner and then killed him with a friend’s help. The monk survived poisoned food and gunshots to the chest, only finally dying after they dumped his body in the Neva River and he drowned–not even kidding. How creepy/eerie is that?

The death caused an uproar within the Imperial family. Prince Yusupov was exiled and the Tsarina was distraught. The family arguably never recovered from the dramatic consequences of the murder.

Now that you have a bit of history, take a look at my tweet:

yusupovtweet

Not such good company after all, huh?

I tried to use the Twister app provided by Alan, but the picture the generator spewed out for Prince Felix here was blurry and unattractive. I wanted to make a new, clearer tweet, so I used a different site that allowed me to upload my own pictures, screenshot the result, and then did some further editing in GIMP.

I hope you learned a bit about Imperialist Russia, and I hope all of your future dinner experiences are far more pleasant than Rasputin’s and Prince Felix’s!


NOT 4 DOGS (Internet Storytelling)

Okay, so, even though I’m really happy with my finished product for this assignment, getting to this point of satisfaction was NOT fun.

Homecoming weekend was this weekend, so after being awakened far too early on my Saturday morning by alums standing on Ball Circle singing jaunty tunes about beer (this was the actual song they were singing; I’m not even joking),  decided I should get started on my biggest project of the week.

Gathering up all of my electronics and coziest jacket, I went and sat in the sunlight and began. The Mozilla Goggles thankfully weren’t hard to learn how to use (and I had no idea Mozilla offered so many awesome web design tools/apps!), so the hardest part for me was to decide what sort of site I wanted to re-design.

I’m a huge fan of IMDB and LOVE to browse message boards of movies I’ve just finished watching (especially if the films have deep, whacky, open-to-interpretation endings and I’m confused and emotionally distraught and have to have someone explain the details or plot elements before I drive myself insane), but I wanted to work on a site that wasn’t provided in the examples for this week, so I decided on Buzzfeed–particularly, their Life section.

Buzzfeed is a super popular website with 20-somethings, and I myself spend far too much time taking their quizzes instead of sleeping. Therefore, I knew the website would be familiar to my audience, and the layout is rich with fun colors, text, and pictures that I could easily edit.

The twist was: instead of being aimed at humans, this Buzzfeed Life page would be aimed at pets! Featuring articles such as “Best DIY Exercises for Those Days When Your Human Won’t Take You for a Walk” and “Top Fashion Trends from the Latest Westminster Kennel Show,” the page was going to be über popular with humankind’s favorite friends.

I had half the page coded when…boom.

Or, rather–no boom. Nothing at all, actually. My entire screen went dark, Mozilla WebMaker Goggles stopped functioning, and I lost all of my work. I mentally debated screaming and throwing my laptop across the field, but decided against that, because there was a lovely family playing Frisbee nearby that didn’t need to see such a tantrum.

Rather than moan and groan and try and figure out what happened (I still don’t know what happened; I was at 74% charge, other apps would work, and the Mozilla Goggles just went kaput), I went inside to have a snack and take a breather.

I was too frustrated to try and re-do my Buzzfeed page (R.I.P. Buzzfeed Life For Pets 2014-2014), so I tried to think of something a bit simpler but still fun. I was inspired by the amusing Amazon.com Wolf T-Shirt reviews and decided to keep with my dog/pet theme and write a critique of some online item. Instead of choosing an actual analog product, though, I searched pet apps.

One of the top results was DoggyDatez. I thought it was a cute, unique way for dogs to meet other dogs in the neighborhood/town/city while their humans got to socialize, too, but then I tried thinking from a dog’s point-of-view. Sure, meeting new animals is a blast–especially for canines–but I would be mad if my mom or dad’s attention was suddenly on another person or their smartphone instead of me during our walks!

Therefore, my altered DoggyDatez: REVIEWED BY ACTUAL DOGS page was born.

DoggyDatez 1

DoggyDatez 2

If you can’t read the text super well, I apologize. My screen was being troublesome, so I had to zoom out, but hopefully you can zoom in on the screencaps or check out the live version.

I began by re-writing the description. Each detail/perk that the app company described I re-described as an angry pooch! Therefore, traveling to all sorts of different territories overseas or in different states (NO PLANES PLEASE says every dog ever) or marking/labeling territory with the touch of a finger instead of pee became cause for concern and sometimes outrage. The dogs have spoken, and they clearly prefer dog parks where THEIR socialization is the main focus–not their human’s–or one-on-one play time and fetch with their favorite person in the world AKA their owner.

Then, I edited user reviews by giving each Internet savvy dog a personality and username to match.

The first was a handsome, smooth–or trying to be smooth–perhaps over-eager Rottweiler that liked to lay on the charm.

Username “rott weiler.” What a ham.

The next was a precious, overactive golden retriever who was just really upset that her momma wasn’t paying as much attention to her because of this app. We are the center of our pets’ worlds, after all, so we should give them as much love and care as possible, right? Fetch > smartphone apps.

This shot really speaks to username “GOLDY RETRIEVE”‘s personality.

The last user to review happened to be the very same poodle with whom username rott weiler was so smitten. Clearly, the feelings weren’t reciprocated, and she officially prefers meeting dogs in person to “online dating.”

So much sass from “LittleMissPerfectPoodle.”

I then fiddled with details like the title/subtitles of the app (that also act as the title and subtitle for this post) and Compatibility.

The actual editing took forever, because X-Ray Goggles kept crashing/messing up on me, again! I’m not sure if there’s something wrong with my computer or it was just the app, but some text segments appeared completely deleted/empty after I’d just added them while others were in the wrong place or duplicated for no apparent reason. Maybe I should write Mozilla and let them know the Goggles have bugs. Do those crash/error reports ever actually help IT services and coders, anyway? I’ve always wondered.
Frustrations and app crashing aside, I had a lot of fun with this project. I’m such a dog lover that looking for material for this edit and my short-lived Buzzfeed page was a blast. The voices I have in my head for each dog are pretty funny, too, but I’ll let your imaginations run wild with those details rather than provide them, this time. (;

Enjoy & thanks!

Foley artists do NOT have an easy job.

When I first saw the assignment to dub sounds for a Charlie Chaplin film, I was nervous. I could think of enough sounds that should go in each sequence, but I didn’t think I could create said sounds. I didn’t think I had enough materials in my house and/or dorm room to even pretend to create half-decent noises! Plus, I was a mix of totally intimidated and totally amazed by watching actual, professional Foley artists work. I didn’t really know where to start.

So, I started at the most basic point I could think of: voices. Sound effects could come later, but Professor Polack instructed us to include voices. I could write a script and act it out.

Surprisingly, it only took me a couple of viewings to figure out what I wanted each character (granted, there are only two that actually talk) to say. The words came to me easily, and I could gather enough context from reading a little bit of their lips as well as their body language.

I recorded the female, first. True to the era, I gave her a breathy, Marilyn-Monroe-esque voice and raised the pitch of my own voice to enhance that stylized femininity.

Next, I broke down what I considered to be the most important sounds: her footsteps racing up the steps, the straw moving around as she awakens, the lion’s roar, and Charlie’s character running away.

I grabbed a pair of my mom’s shoes and recorded a longer (15 second) segment of me just frantically walking the heels along my desk with my hands. Then, carefully watching and re-watching the video, I cut the segment down and placed it near the previously recorded female voice so that the timing was realistic.

My perfectionism again rears its head.

My perfectionism again rears its head.

For the sound of straw rustling, I grabbed a piece of paper and crumpled it near my computer’s microphone.

The lion’s roar is my own work, and I’m quite proud of it–frightened myself, actually! (; I bet you can guess where the roar is in the above audio track (hint: it’s the biggest, darkest, longest squiggle. I had fun).

Lastly, I recorded Chaplin’s character’s vocals. I gave him a 1940s (yes, I know, a bit ahead of his time), Cary Grant/Katherine Hepburn accent and added a few grumbles and throat clearings when I felt it was appropriate (he is a bit disgruntled, after all!). His terrified scream was also fun for me to record, as I exaggerated it for comic effect!

For his footsteps, I just looped/copied the footsteps from earlier and faded them out to imply him becoming more distant as he runs.

Once I was done recording everything, I tweaked placement and length appropriately to make sure everything synced up to my portion of the video (2:31-2:55). I also was very careful to edit out any extraneous sounds of my movement, keyboard typing, etc.

More Drive-Thru!

I’ve already written up a tutorial for this assignment, so that post will speak more to my technical process of creation. I want to write about my creative process in this segment!

So, I saw this sort-of accent challenge in the Bank after looking for a decent one-to-one-and-a-half star challenge, and I was immediately inspired. Memories of more intense accent challenges on YouTube that completely blew my mind prompted me to pull out my love of languages and give this assignment a shot.

I debated for a couple of minutes about which accent to use: my English accents that I’ve been working on thanks to One Direction (don’t laugh) or Italian or French that I’ve heard all my life thanks to my grandparents?

Then, it hit me. I speak Spanish–at least semi-fluently. I love the language and have been studying it for nine years, and my accent is fairly good. I figured why not step up the challenge a notch and order in Spanish as well as a Spanish accent?

I wanted the encounter to be as organic as possible, so I just decided what I wanted to order before hand and then recorded the audio on Garageband. I inserted pauses and vocal fillers–ones I picked up from my Spanish professors through the years–to increase the authenticity and was as careful as possible with my pronunciation. Aside from one or two stumbles and I think one grammatical mistake, my drive-thru order turned out decent!

If you’re wondering, I’m ordering a Big Mac (there’s not a Spanish word for this, I don’t think!), a large fry, and two milkshakes: strawberry and chocolate. Yum.

“She must have really had to go to the bathroom.”

Upon reading the title of this post, you might be going “what the heck?” I don’t blame you.

Basically, the first, four-star assignment I chose from the Assignment Bank was to create a Spooky Soundscape that’s a little over a minute long.

I began by browsing some that were already posted for inspiration. Jess–the creator’s–example was fun, and then, I stumbled upon an audio by Quinntero that initially caught my eye because it’s titled after a Shakespeare quote (trigger warning: blood!) and then ended up scaring the heck out of me–as you can see from my comment in the post.

After making an account on freesound.org (thank goodness for royalty free creators), I brainstormed on what scene I wanted to set with my creation. Immediately, my brain went to my favorite book/black-and-white movie Dracula. The opening scene always sticks in my head as one of the creepiest ever, because can you imagine how the protagonist, Jonathan Harker, must have felt standing all alone in front of that looming castle in the wilds of Transylvania in the haunting night?

I began to act out the basic scene: appropriately frightening background ambiance, footsteps along a dirt path, a knock, a door opening, the noises from inside the bastion, and then…well, I wasn’t sure, but I decided inspiration would strike me as I went along.

Finding just the right sounds that were at an acceptable 16 bit rate was tricky, and I tried a lot of files. My folder looked like this:

folder


AKA a bit messier than I like my folders to look.

My workspace wasn’t much better:

workspace Screen shot 2014-10-13 at 10.50.17 PM

As I’ve said, I’m a perfectionist, so I messed with the volume levels of each track and sliced and diced them up to make sure fade-outs and timing were exactly as I wanted them and certain details more than others were emphasized (think: backtrack to a movie scene). I even added a stutter to the woman’s voice by copying and pasting the teeniest sound snippet to a larger one!

The story morphed into something Dracula-esque: a woman wandering through the woods stumbles upon an old manor, dares to knock and venture inside only to be greeted by haunting organ music and maniacal laughter. She then–as everyone should–proceeds to run away.

A note: the female voice isn’t me, despite the fact that it actually sort of sounds like me. The original vocalist has an Australian accent, though, so I’ll take the compliment. (;

When I posted it to SoundCloud and then tweeted it out, a SoundCloud promoter favorited it, which made me feel cool.

And now, for the burning question…what’s with this post’s title?! Well, I had my mom listen to the piece once it was finished, and before the end when the character runs away, when she’s just standing in the mansion, my mom simply said, “Wow, this chick must have really had to go to the bathroom.”

Then, when she heard the footsteps finally racing away, she added, “There we go!”

Yeah, I wouldn’t mess with manor ghosts or ghouls no matter how badly nature was calling, either. My character made a smart choice.

Anyway, hope you enjoyed, and here are the amazing people who created the audio samples I used!

mistersherlock’s “Graveyard At Night”

xDimebagx’s “Foosteps”

bones’s “Haunting Knock”

gregswinford’s “Large Creaking Door”

fishwithfeathers’s “Ghost Sounds”

Aeonemi’s “Creepy Organ”

digifishmusic’s “Female Hello”

JarAxe’s “Scary Laugh”

Robinhood76’s “running on dirt path”


(Not) Stuck in the Drive-Thru: A Tutorial

Before you read any further, please make sure you have appropriate background music playing. You’re welcome. Everyone needs a dose of Weird Al every now and again.

Now, this audio assignment is one of the easiest in the Bank–worth only one star. Despite this, it has a lot of room for creativity and good ol’ goofiness. Plus, I’m showing you all how to do this assignment on Garageband, an application for Mac OS, so fellow Apple users, read on. PC users, read on, as well, because chances are, at some point in your higher education or career experience, you will encounter Mac computers and have to use Mac software. This is a nice way to ease into the OS.

1) First things first: open the application! The icon looks like this and can be found in Finder > Places > Applications:

ROCK 'N' ROLL

ROCK ‘N’ ROLL

2) Double-click the icon, and be patient. There’s a lot to load in the app, so it might take a while. When it does pop up, you’ll be greeted with this window:

Yeah, this is as awesome as it looks.

3) Since you’ll be recording your voice, double click the mic stand. Name your file whatever you’d like. The .band extension is default for Garageband; you can change that later, so no worries.

  • 3A) For future reference, if you’re penning a song and know what key and time signature the piece will be in, you can alter the file’s details before it loads. This assignment, however, doesn’t require any musical theory.


My personal files are blacked out; that black rectangle won't typically be there!

My personal files are blacked out; that black rectangle won’t typically be there!

4) Your newly loaded workspace should look like this!

Such opportunities await.

5) Now, “Female Basic” and “Male Basic” are just fancy terms for vocal tracks laid down for you to record over with slight attention to pitch variation that occurs between genders. Don’t worry about it, but if you prefer one or the other, go ahead and choose. The differences are quite subtle.

  • 5A) To delete a track, click it, and then hit COMMAND + DELETE. It should disappear from the left hand column.

6) Again, we’re not doing anything fancy with this assignment, so, the first thing I recommend is to turn off the metronome that counts you in during recording. When it’s turned off, there will be no check mark next to the word, and you won’t hear any clicks rhythmically echoing through your headphones.

Metronome

7) Now it’s time to record! When you’ve prepared your script and accent, press R. You are now recording. Say what you will!

8) Once you’re done with what you’ve decided to order, hit the space bar. This will pause/stop your work. Your space should look a little something like this, with variations in audio marks–little ticks along that line–and overall section length.

Feelin' like a rockstar, yet?

Feelin’ like a rockstar, yet?

9) Click back at the start of your recording, near the 1. Press the space bar for PLAY and take a listen. If you’re satisfied, move onto Step 10!

  • 9A) If you’re not happy with the recording, that’s totally okay. This is a learning process, and Garageband is tricky at first! You can get rid of/select all or portions of your recording by literally highlighting sections of the colored area and COMMAND + DELETING. Feel free to take as much time as you need to record over and over and mess around with effects if you’d like! This is a simple assignment that’s fairly wide open, so you have room to fiddle with different details.

10) Once you’re happy with your recording, hit COMMAND + S. This will save it as a Garageband file on your Mac so that you can go back and edit or access it whenever you want. To upload it to SoundCloud, however, you have to make it a .mp3 or .wav file.

11) To do this, move your cursor to the top tool bar and click SHARE. Then, click EXPORT SONG TO DISC.

Export

I’m suggesting you save your file as an .mp3, so when it comes up with this window, just hit EXPORT. Don’t change any details.

MP3

Title your piece something memorable and/or awesome and save it in your chosen folder.

name mp3

So, don’t title it this!

Viola! Your recording is now saved as an .mp3 and can be uploaded to SoundCloud like the rest of your audio work!


I hope this tutorial helped! Let me know what you think or if you have any questions in the comments below!


Lyrics typography tutorial!

Hello all! I recently downloaded GIMP, so from now on, I’ll be using mainly that program to create my edits. Before I switch mediums, however, I want to offer you a tutorial on Pixlr for this assignment from the Design vault for ds106! I was very happy with how my own experience with this app and assignment turned out.

Pixlr is a fun web app–meaning you don’t have to download anything to your hard drive–that does all of the same things as Photoshop or GIMP minus one or two program-exclusive-features such as Content Archive. The developer for Pixlr also wrote two more web apps to create edits similar to Instagram with filters or text, but for this tutorial, we’ll be working with their arguably most advanced photo editor, which is linked earlier in this paragraph.

Let’s begin!


1) Open the Pixlr photo editing app. It should load automatically on your browser without you having to download anything and look like this:


Step 1

2) Click “Create a new image.” For my typography poster, I chose the size 382×461. You can either type in the exact numerical width and height you want or move the slider on the size scale. Also, name the image something memorable–not just “pic1,” for example.

Step 2


3) From here, you can start to create your background. I chose to add a blue-green, linear gradient for my backdrop.

  • 3a) IF YOU WANT A GRADIENT BACKDROP LIKE MINE: click gradient tool/blue square in toolbar > choose color and gradient type > start clicking and dragging around your image to experiment with how you want your gradient placed. I made my gradient go from the top of the page to the bottom by clicking at the top and dragging my cursor downward.


Step 3a

Gradient tool

Step 3a2

How to alter/personalize gradient

Step 3a3

How to position & move gradient


  • 3b) You can also have fun with shapes, tons of colors, brushes, stamps, etc! Explore the toolbar and find out what each icon does. You can always create a new image or undo a step (CTRL or COMMAND on Mac + Z) if you don’t like the result.

MY RESULT:

Step 3

4) Now, add a new layer. In the layer box on the right, click the tiny post-it/notepad in the lower right-hand-corner. Name your new layer something memorable instead of just Layer 1, 2, etc.

Step 4

How to add a new layer in the Layers Box

5) Next, I added some brushes. Select the paintbrush icon in the toolbar. From there, you can choose what kind of brushes you’d like by clicking Brushes > MORE. I chose Splatter and Fire and smoke. You can also choose the size of the brush; I don’t think I went over size 200-300.

Brushes menu

Brushes menu

Splatter brush example

Splatter brush example

Smoke and Fire brush example

Smoke and Fire brush example

  • 5a) Once you choose your brush type, choose a color (I went with a violet) and have fun with the brushes; place them where you’d like for your desired effect.


6) After you’re happy with you background, save the image. It will automatically save as a .jpeg, which is great for the web. You can upgrade the image quality from 80 to 100 if you prefer.

Finished Pixlr background

Finished Pixlr background

Save menu

Save menu


7) Since, for some reason, Pixlr wouldn’t let me add text in the web app (this is apparently an issue with some browsers), I inserted my image into PowerPoint to quickly add text. If Pixlr text DOES work for you, go ahead and keep using the app, but if not, read on!

Just open up a simple PowerPoint template and delete all pre-loaded boxes/designs

Just open up a simple PowerPoint template and delete all pre-loaded boxes/designs

8) First, I dragged the file from the folder and dropped it into a white, basic PowerPoint template. Then, I added a text box. Adjust according to the size of the text/lyric.

Screen shot 2014-10-02 at 9.46.12 PM

Add text box

Add text box

  • 8a) I chose a font I liked and played around with different sizes. I decided to go with a dark purple color to echo the color of the brushes.

9) Now, after I wrote out the lyrics, I began to mess with the typography–more specifically, leading, or the space between lines of text. I first played with line spacing and decided on 2.0-2.5 line spacing for the first part of the lyric.

Edit line space or leading

Edit line space or leading

10) I justified the text to the center.

Justify text

Justify text

11) Finally, I altered the spacing between characters or altered the tracking of the text.

Text tracking

Text tracking

12) Once I was satisfied with the look of the piece, I screen capped the image (COMMAND + SHIFT + 4 on a Mac and PrintScrnSave on a PC), which saved it as a .png—a nice web format. I titled it then uploaded it to my blog.


That’s it! Hope this helped, and let your creativity run wild!


minmalize your philosophy + (kind of) movie poster?

though my soul may set in darkness,

it will rise in perfect light.

i have loved the stars too fondly

to be fearful of the night.

“the old astronomer to his pupil” by sarah williams

I originally found this poem attached to a Star Trek blog that I was browsing back when J.J. Abrams’s Into Darkness was released. The passage was associated with Captain Kirk, another one of my favorite TV heroes, and I was struck by the piece’s simplicity and powerful, inspiring message. To embrace one’s fear–to investigate it, dwell in it–is to conquer it and discover a new world.

Since this creation is a part of a poem and inspired by a movie, I wasn’t sure under which assignment this should fall. I finally decided on Minimalize My Philosophy, because this quote moves and encourages me with its easy rhyme and precise imagery.

As with my minimalist poster, I worked on this graphic in Pixlr editor.The background is a black, blue, and radial gradient drawn diagonally through the center. I downloaded a galaxy brush set from Pixlr and then mixed and matched various galaxies and star clusters to create my desired, vast, outer space effect.

Then, I input the image into PowerPoint and added some white text–matching the stars’ color–that echoed the elegance of the poem (the font is Engravers MT Regular). For the final touch, I added a soft, nearly transparent glow around the words to enhance the dreamy effect.

I have this poem saved on my phone when I need a pick-me-up; I hope it provides some happiness for you, too, on those days when you could use some rising galaxies and an endless expanse of gleaming stars.