Wanted! Assignment and tutorial

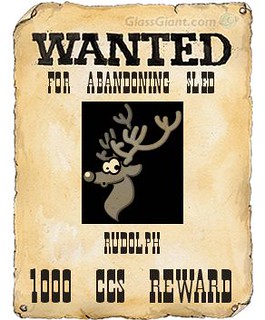
For my final assignment idea and tutorial, I decided to go with something that is a little simpler than my other. A visual assignment creating a Wanted Poster for someone or something. I came up with this as an idea building off of my final project story for Rudolph. Tutorial and Assignment below.

Tutorial:

Final Product:

Rudolph wanted


Black and White re-imagined in Color Tutorial

Tutorial for Black and White re-imagined in Color or the Colorize It assignment

So I decided to turn this classy lady:

in to a classy lady in color:

First off you need to choose a black and white photo. Originally I was going to do one of my Grandmother’s wedding photos but I realized I was too close to the subject of the photo and no matter what I did it looked wrong, soo I went on Tumblr and found this lady. I loved her hat and her positioning and right away knew how I would recolor the photo.

I used Gimp to recolor the photo.

So, step one:

Open Gimp.

Step Two:

Open whatever photo you chose in to Gimp.

Step Three:

Prepare your work space. You are going to need to open up the Layers dialogue box. That can be achieved by going to the Dialogue Tab and selecting layers:

Step Four:

Once you have your Layers window up, you are ready to start colorizing your photo. On the main Gimp window you have your foreground and background colors, the black and white boxes. Decide which  part of the photo you want to start coloring first. Once you have decided on the section, click on the black box and change the color to whatever you want that section to be.

After selecting your color you will see a box like this:

Select foreground color as indicated by the red oval.

Once you have your color selected, go to the layers tab and select new layer. Name the layer whatever area of the photo you are recoloring. Example, I did the hat first so I named my dark purple layer Hat. DON’T FREAK OUT! Your image will be totally filled with whatever color you chose.

Don’t worry, its going to be OK. Right click on your new layer in the layer window and select add layer mask.

After selecting layer mask another smaller window will pop up.

In this window you want to select Black (Full Transparency).

Now in the layers tab towards the top there is a drop down menu called layers mode. Click on the menu and select Overlay.

The Overlay feature allows the shades and the texture of the photo to really come through the color and make the coloring look more authentic. Now you are ALMOST ready to color. In the main Gimp window you are going to want to select the erase tool and use the scale option to increase or decrease the amount of area you are coloring.

It may seem counter intuitive to use the eraser tool to color a photo, I mean wouldn’t it make more sense to use the paint tool? Well, no, because what you are doing is erasing the black and white of the original photo so the color layer you created can show through.

NOW you are ready to color. I’d suggest zooming in so you can get around edges well and so your lines are crisp.

TIP: If you are coloring skin, its really hard to find a good color. If you are looking for a color similar to mine I used ebdeb9 as the HTML color notation in the color selection window. If you enter that in you can use the different hue, tint, saturation, etc controls to adjust it from there.

Once you are finished with your first color you are ready to move on to the next one. All you need to do is repeat the process all over again. Select a new color, open a new layer, create a layer mask, select overlay, and erase away!


Black and White re imagined in Color

Black and white photos are beautiful in their own way, but sometimes I wonder how color would change the the feel of a photo. So my assignment is to recolor a black and white imagine how you would imagine it looked during the time it was taken or how you think it should look in color.

From a Windows User to another–How the heck does Video Editing Work on Macs?

After a long title like that, I guess it’s hard to tell what the heck I’m going to even talk about, right?

Master informs me that it apparently works that way in the computer science world, but I have no idea.

Well, this is a tutorial on how to make an AMV on a Mac, using iMovie HD, written by a Windows user (that’s me).

1. The first thing you need to do is get all the episodes you want to use from the anime in question.  There are lots of ways to do this, but it’s often considered a legal gray area, so I’m not gonna go into a lot of details.  Alternatively, one can purchase the DVDs (if available) and rip the files off of them.  To do that, one can use many media players, including iTunes, I believe.  I’m not positive on that regard, but there’s a nice and easy button at the top of Windows Media Player’s full screen view (which I don’t have access to right now either!).

2. Once these are gathered, you need to convert any and all files into .AVI format, so that iMovie can read them.  This also applies if you’re using Windows Media Player, for the record, since both of them primarily work with .AVIs.  This can be accomplished by several programs, such as YouTube Downloader, SeaSky Video Converter, etc.  Again, Google is your friend for finding these programs for free.

3.  After the files are converted, drag them into iMovie in full.  Be ready to do this multiple times, as you may need to edit the episodes multiple times.  On the side of the screen, you’re going to see all the clips you’re working with.  Use the Cut tool (command + T) to pick apart the clips to what you want to use–it’ll cut STARTING at the frame you’re working on.  You’ll want to intersperse this with step #4.

4. You’ll want to acquire the song that you’re using and drag it into the bottom section of the screen.  If you want to cut it, you can do it the same way as the video clips.  You’ll be using the little purple bar to time everything.

5. Wash, rinse, repeat.

This is a pretty simple tutorial, but there are many functions in iMovie, which I don’t fully understand (not being a Mac person).  Happy trails!

Draw it Tutorial

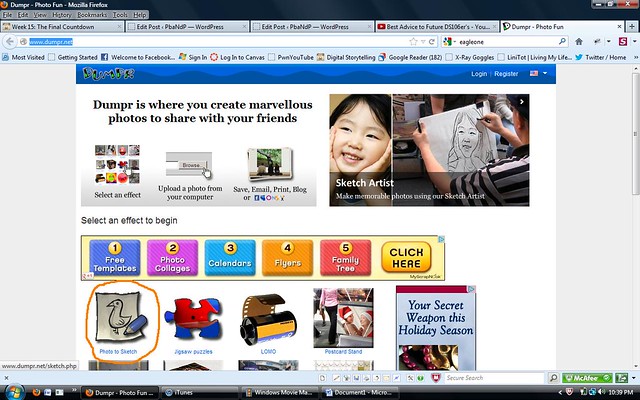
So for this tutorial all you have to do is pick a picture that you would like to change so it looks like some one drew it. First select a regular picture. Then in your search engine type in the following:   http://www.dumpr.net/. Here is the link to that website dumpr. Click on photo to sketch like in example 1. Then the site will take you to their next page where you upload your picture.Upload the picture and the program will change it to make the picture like you drew it. Then right click on the picture and save as the new draw it picture on to your computer. It’s a simple and easy program.

Example 1

sketch1

Here is the original picture

Here is the Draw it Picture


Make a Daytime Picture look like Night time

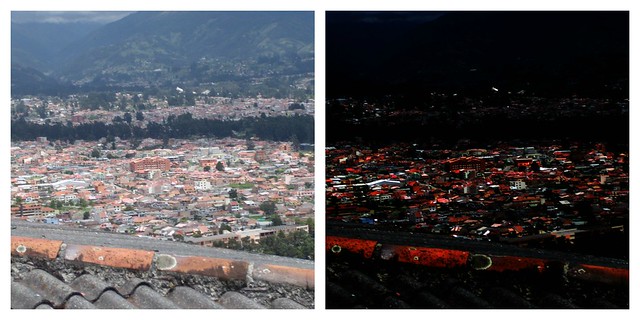
I chose to make up a design assignment that I think is worth 2 stars. All you have to do is take a picture in the day time and use a program to change into a picture that looks like it was taken at night. Then put the two pictures side by side so everyone can see the difference.

Here is my Daytime Picture turned into Night time

contrast


Tutorial on Actor Transformation

To complete this assignment I used Windows Movie Maker. First you have to go to youtube and select your videos you want to use for your project. (1) Once this is done, you want to save the video as an MP4. This can be done using the tab PwnYouTube. Once it is saved, open the videos onto WMM. Then drag the video into the video section at the bottom. Here you can clip and trim what you want. (2) To trim from the ends of the clip you just move the cursor of the video to where u want from either the beggining of the video or the end of it. But to edit a video you want to use the split screen button. This button helps to cut out parts you don’t want. (3) Let’s say you dont want a clip from 15 seconds to 20 seconds. You want to cut this out. To do this click the Split screen button on the right. So in the pictures below that would be section 2 that you split out and you can then hit delete. After which your video will be put together. Hope this helps!

(1)

video1

(2)

video2

(3)

video3

Here is how my video turned out


I Spy Minions

I created a Visual Assignment that is worth three stars. The reason why I made it three stars is because making the background can take some time and become tedious. Also being able to use the correct tools to make the picture just right can take some thought and trial and error steps.  I was inspired by I Spy Game. All you have to do is make a background and disguise the person, place, or thing into the background. Once you decide what to do use any program to put it together. I used Paint to help me put my I spy picture together. You can be very creative with this assignment and it is fun!!

Here is the I Spy Minions Assignment.

My example of I Spy Minions

i spy minion


Save as Desktop Background

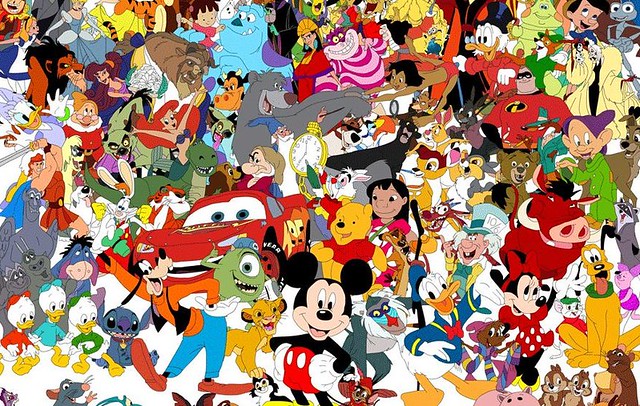
I really like to make my own computer desktop wallpapers and so I use the program Paint to create mine. I created an assignment that allows you to create you own. I made this assignment 2 stars because it can be simple and just a good one of putting different images together and being able to keep it for your own use.  You can use any program and collect images that fit a particular theme. For my example I chose my favorite shows.

Here is the assignment for Save as Desktop Background.

My example of my favorite shows wallpaper

fav shows


Did our Mother’s Plan this

I created my very own visual assignment. One day I was looking through my friends pictures and came across a baby picture that was similar to one I had taken when I was little too. This made us laugh so much, so for the assignment I thought it would be cool to take these two pictures and put them side to side. This is where my idea came from to create an assignment. It’s fairly simple but can be fun so I gave it 2 stars.

You can find this assignment under Visual Assignments called Did Our Mother’s Plan This.

Here is my example:

Horse comparison