For this assignment I had to take a close-up picture of something and have people guess what it is. Can you guess what this is?
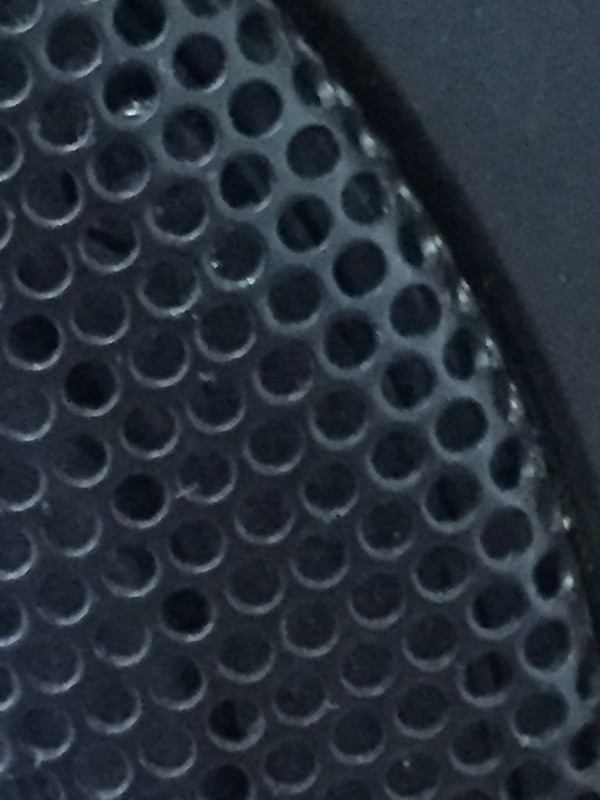


For this assignment I had to take a close-up picture of something and have people guess what it is. Can you guess what this is?
I love dogs. Like, a LOT. So when I came across this assignment, I was thrilled. It just so happens that my mom just bought me Photoshop Elements, and, using my computer graphics experience, I photoshoped my dog onto campus!
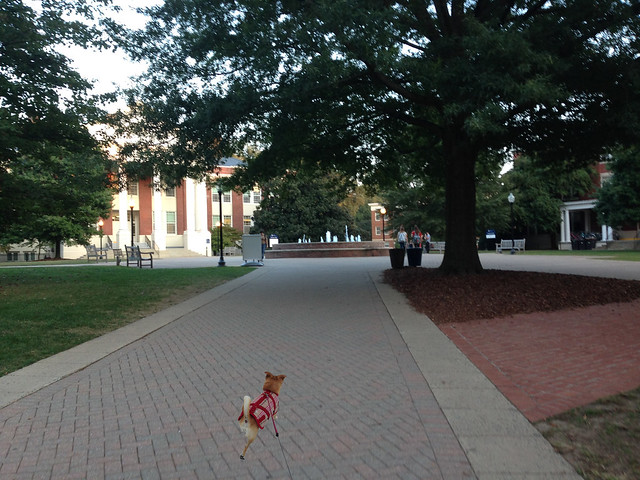
I took the background picture when I first came to UMW, and it just so happens that I had a picture of my dog Rixs while I was walking her that fit perfectly. I just used the polygonal lasso tool in Photoshop to crop around my dog, and voilà!
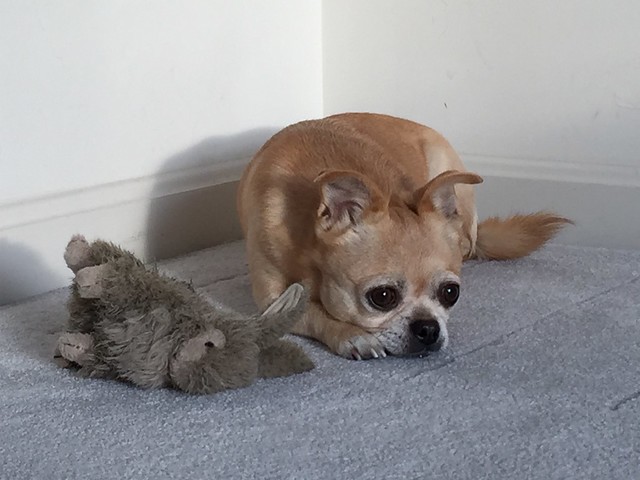
Because I love her so much, here’s another picture of Rixs (not photoshopped):
Using Vincent Van Gogh’s famous painting The Starry Night, I did the visual assignment Adapt an Artist’s Work for my final project story. The assignment asks us to:
Adapt a famous artist’s work to change or reinforce its possible message.
Here’s what I did:

I incorporated it partly because I couldn’t photograph the moon in the right phase on such short notice, and partly because the painting style goes nicely with the surreal aesthetic of my story.
This is the original painting.

I found it on the Wikipedia page for the painting.
If you click on the image, it tells you the copyright info. In this case, its available for any use.


With that, you should be able to take any image of a piece of art and adapt it with a Drawing in Google Drive.
The full assignment is linked and listed in its entirety below:
Take ten steps in any direction and with each step take one photo. Think about angles and lighting to create interesting photographs. Don’t forget the Rule of Thirds! Create a collage in a photo editor.
This assignment is worth 3 stars.
The first step in this assignment was to complete the photo challenge. To go along with my theme of my final project and my character of a college student, I did the photo challenge as 10 steps out of the HCC. All of the photos were taken using my iPhone and then uploaded to my computer. Next, I went to Picmonkey.com and clicked collage on the top right of the menu bar.


I chose from the many options of collages offered on the site and picked on that had 10 image slots for my photo challenge. Collages can be found on the left sidebar.


I uploaded the images from my computer and then dragged them into my collage. Editing the pictures in the collage was done by clicking on the image and then clicking the edit button in the top left corner of the image.

After all of the images were in place, I wanted to make the outline framing thinner to fully show the images I had taken. This was done by changing the level of the spacing in the background tab on the left menu bar.

I saved my final draft to my computer from the website.
For this Visual Assignment, the objective is to create a collage of your favorite vacation pictures or destinations. The assignment is worth 3 stars.
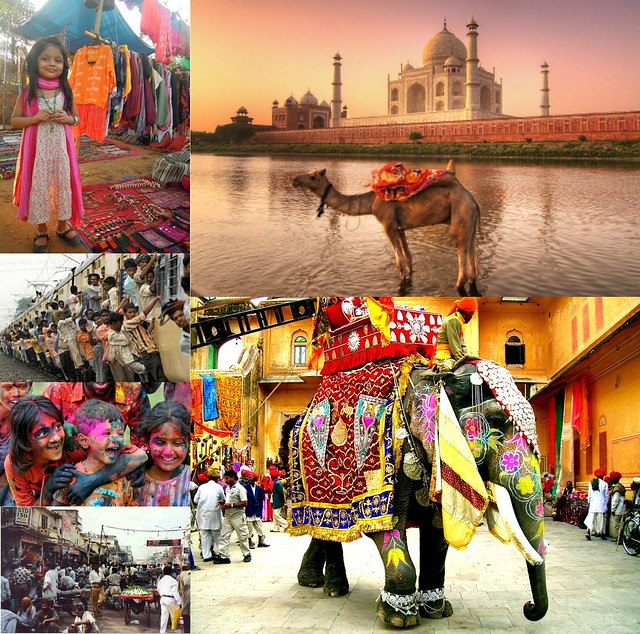
To create this collage, I used the website Be Funky.
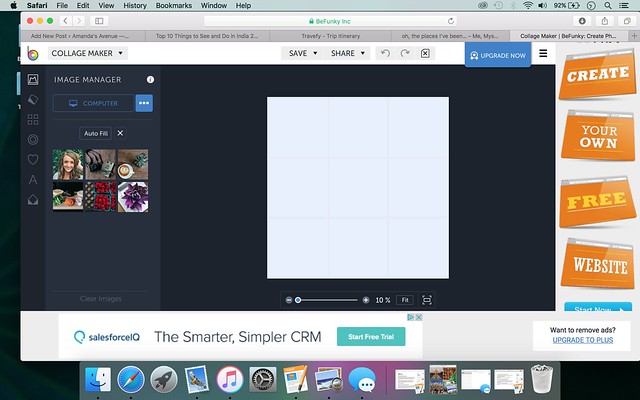
Once you get to the website, click “create collage” at the top of the page.
Upload you photos by clicking the “computer” button on the left side. Choose which photos you want to be apart of your collage.
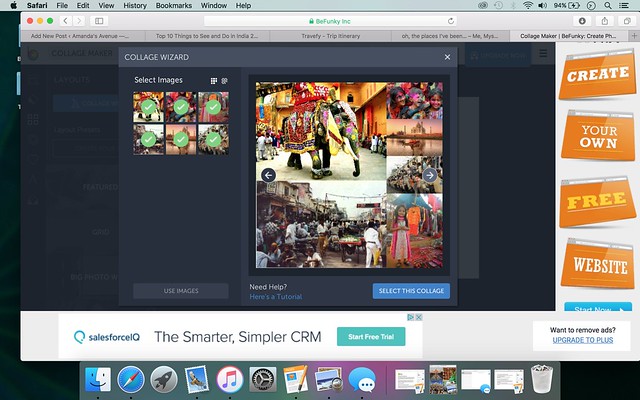
You can pick which layout you want to use or choose the “Collage Wizard” button and it will give you a few options on how to organize your collage. I chose this option and chose which layout I liked the most:
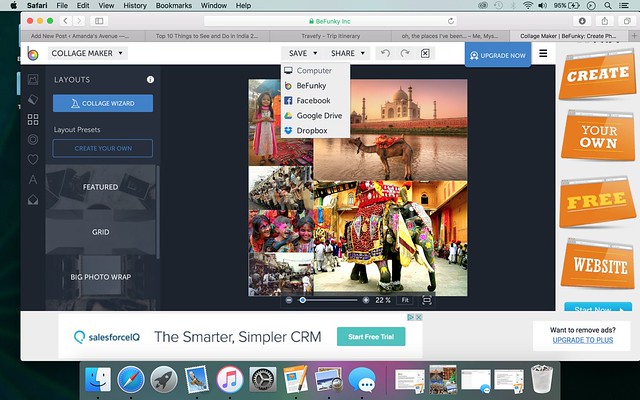
Finally, click the “Save” button at the top of the screen and save your work. I saved the file to my computer then uploaded my collage to Flickr.
Hope this helps, good luck!
Links:
Please click here for assignment page (The assignment I completed is similar to it, not exactly the same)
I must say that it is really an easy task to make a GIF animation because there are many. I used GIF Maker website to make my animation. In my story I had three characters. I wanted them to be known at the start of the story so I made a GIF with three photos of the characters as can be seen in the following GIF.

Please follow the following instructions to make a GIF of your own.
Step 1: Go to GIFMaker website.
Step 2: Upload the images that you want to use in your GIF from the upload button.

Step 3: Select one of the options. From the options bellow depending on the kin of GIF you want to make. I selected “Create GIF Animation”.

Step 4: You will be provided a download button. Simply click it and your GIF will be downloaded to your computer.
The post How to make a GIF animation from different images appeared first on TaractarOnline.
For this visual assignment,the goal is to create a bucket list of the places or things you want to do. This assignment is worth 3.5 stars. The best site to use for this assignment is Be Funky, a site designed for creating collages with pictures. Here is a step-by-step tutorial of how I created this collage

Once you get to the website, you will see a tab at the top called “Collage Maker.” Click this tab.

Next, you can upload the pictures you want to use from your computer. Then click the “Layouts” tab on the left and select which layout you want to use for your pictures.

You can select which photos you want to use from the ones you upload.

Next, select the “text” tab on the left and “add text.” You can format the font and size and place these words wherever you want on your collage. I chose to put them on the bottom of the photos to show exactly what is on the bucket list.

Now you are done! Click the “Save” tab at the top and save it to your computer. You are ready to share your bucket list with everyone! Good Luck!
I have loved all the Bring It On movies since I was young. I was a cheerleader once, believe it or not, so these movies really spoke to my peppy soul at the time. I remember them fondly, so even when the new ones came out, I would still watch them for solidarity towards the franchise. When I created this DS106 Reacts assignment, I was thinking of how I wanted a reaction gif in my final story but there was no assignment for it. So I made one! This gif was easy to make and I’ll show you how. Gimme a G! Gimme an I! Gimme a F! What does that spell? Gif! Yikes…sorry that’s the cheerleader in me coming back out.
First, I downloaded a scene from the newest Bring It On: Fight To The Finish movie, starring Christina Millian, from YouTube. I downloaded it using KeepVid and I dragged it on to my desktop.

I opened up iMovie and imported the clip. I extract the couple seconds I want and put it in the editing bay. Then I saved the file on to my desktop.

I go to Giphy and click the create tab. I insert my movie clip and added the subtitle feature. I used the “Meme” font and wrote #judgingyou because that was clearly the reaction I was going for.

After that, I got my gif. I’m happy with how it came out and I think it fits well with my storyline. It was a good way to introduce a gif into my story without having it detract too much or feel mismatched among the other media. I hope you felt the same!

This is not a trick or a treat its just font Last Visual Assignment for the semester. It one of my favorite Assignments its “What A Crappy Font Will Do” (4 stars).
I really like this idea what fonts can do to the meaning of a sign or even a label. For this exercise I used “Petco” as an example of what a crappy font can do.
1. I googled “Petco” and I made sure I was on the “Image” tab
2. I then took clicked on the image and then took a snap shot of it
3. After that I then opened the image on my desktop and uploaded to iphoto so I could crop it.
4. After cropping it I clicked on my microsoft word document app at the bottom of my screen top open it. I then dragged the picture that was in iphoto into the word document. I then used different fonts .
I am continually impressed with font because fonts are every where in our society. The are one of the icons we look at to show us direction, if these fonts are not correctly placed and at the right font the message is lost.
