Snow on the rainbow bridge

The second and final video project I chose to do this week is the 4-and-a-half (?!) star Narrative Ambiance assignment. I chose it because I thought it would be easy. I was dead. wrong.

I like to film the weather – if it’s raining, windy, snowing, you know I’ve got a few minutes of video of it. I make videos of the trees in my neighborhood in fall, too. There’s always that one specific day when all the trees are at their most brilliant colors: yellows, oranges, and those amazing, beautiful REDS! All cast against a cloudy, gray autumn sky. But for this project, I wanted to use some of my videos of snowfall, because I’d come across a poem that hit me in the heart.

Carl Phillips’ White Dog, to me, is about knowing when it’s time to let something go. This past October, we had to make the decision to let our beloved cat go. He was only 14, but he knew it was his time. We couldn’t make him stay for us. To let him go that autumn was to really, finally, totally let him go. He was an indoor/outdoor cat, but this was the one time he wouldn’t be slinking back through our door. We wanted to let him go because we loved him, and that was that.

Here he is being used as a pillow by our bug-eyed beagle mix. They were best friends and hardcore snugglebugs!!!

The snowfall as a visual was more than a “poem about snow -> snow video” thing, too. Snow and winter is usually used to represent death, or at least a long slumber. I think that’s partly why the poem itself reminded me of the critters we’ve had to say goodbye to – imagining them bouncing off through the snow, disappearing into it!!

This project was HARD, not just like “I had computer trouble” but I had to take a few breaks now and then to love on our living pets. There was a lot of stuff with Windows Movie Maker that I got frustrated with – I feel like I must have a crappy version, like the one they give you to try and convince you to buy the full version. I had the worst time trying to tack on the opening and closing credits without them being “white text on black screen” blech. Anyway, the music I used for the background is Snowfall (final) by ShadyDave on Freesound.org.


Origami SPEED-RUN! No zen allowed!

The first video assignment I chose to do for the week is the 4-star Six Second Art project. I’ll say right now that I’m no artist – I can’t draw for beans, I can’t paint, I can’t dance, and I can’t sing. I have shaky hands so anything that requires a gentle touch is out the window. Woosh. Bye bye, art that isn’t of the abstract performance variety!

What I am kinda good at is origami. For this video I decided I wanted to make a paper crane. When I was younger I used to make them all the time – I really wanted to make 1,000 cranes. As the legend goes, if you have the patience to make 1,000 paper cranes, you’ll get to ask the gods for a wish. I always went by the “you have to make them all in one year” rule, so I never made it to 1,000.

Instead, I’d try to challenge myself in other ways – what was the smallest crane I could possibly make? The biggest? I tried using all different kinds of paper too. Newspaper, construction paper, tissue paper… I think once I actually tried to make one using just plain old tissues. Pretty sure it didn’t go well.

Learning how to fold the crane was a really tough process for me, especially since it was a few years before everyone started posting How-To videos on Youtube. I had to go by crazy diagrams that were hard to figure out. But in the end I was able to do it, and even though I needed a “refresher course” to make the ones for this video, being able to fold them is something that I’m proud of. I realize that posting a video where my process is sped up 160% is exactly the opposite of what I would have wanted to find 10 years ago, but… that’s the way the cookie crumbles.

The worst part about doing this assignment had nothing to do with the editing process – it was positioning my freaking camera. I didn’t have anyone on hand to help me out with this in the way of filming… I was hoping someone would hold my phone over my shoulder, but nope. Instead, I had a setup that ended up looking like this. Behold, my terrible art skills!

I had a BOX in my face the whole time. ARGH. It was a bit of a struggle getting the video from my phone to the computer (I use Google photos and have my camera roll sync to that when I open the app, but the video was nearly 3 minutes so it took a while to upload). But after getting it into Windows Movie Maker, it was pretty much smooth sailing for me. I chose a shamisen for the music track because it reminded me of Kubo and the Two Strings – a beautiful stop-motion film by Laika that was ROBBED OF AN OSCAR and features origami and the shamisen. Here’s a gallery of my process –


Walk a Mile in My Shoes

Where do your shoes take you in a day? Tell a story using a video of only your shoes!

For my last assignment (4 stars) I decided to make a movie of everywhere I travelled in a day. This assignment caught my eye because I like to watch vlogs, which is basically a day on video. Mine was a more simplistic version of that including just my feet. The original assignment specifies shoes, but I was barefoot a lot of the time on the day I filmed and I decided that was just as good.

When I woke up we relaxed basically all morning and there wasn’t much footage of that. I started a puzzle, but quickly gave up on it. Then around one I headed out to the beach. I laid on the beach and read for about two and half hours, and was rudely interrupted by some guy who wanted to take our picture. I was actually shocked that he started talking to me because I was literally facedown in the sand reading a book. Rude.

Anyways, after the beach we went to the store for some pre-dinner appetizers. We came back and played a bunch of outdoor games like corn hole and Kan-Jam and had a nice happy hour. It was such a nice happy hour that we ate so much we didn’t have dinner until 9 pm.

Everyone had burgers and fruit, and then we hunkered down for the rest of the night and played games. We played truth or dare, Jenga, and lots of different card games. It was a very fun beach day, and luckily the only work I had to do was a daily create!


I created this video using iMovie. When iMovie is first opened, select create new > movie.

Select the my movie menu option and then import media.

Choose the files that will be included in the movie, the click import selected.

Drag and drop the imported files in the order you want them to appear to the lower section of the screen. To cut clips, move the playhead to where the cut should happen and select modify > split clip. That will split one clip into two, and then one can be deleted.

Once all the clips are in order, transitions can be added. A simple cross dissolve transition can be added by selecting the clip you want and clicking edit > add cross dissolve.

More complex transitions can be accessed by clicking transitions in the menu.

Once the video is done, it is time to add opening and closing credits. To do this select titles from the menu. Then choose an opening title you like. For the closing credits, choose scrolling credits.

I needed to cut the sound out of some of my clips, so I selected the clips individually and clicked modify > mute audio.

I then added background music. Go to audio > effects > theme music. Then click and drag whichever song you want onto the clips it should apply to.

To save the project go to file > share > file…

The last step is to upload the movie to Youtube. To do this, log into your Youtube account and click the upload button. Then select the movie and click upload. This may take a while! After it is done uploading select a thumbnail and click publish.

Then you are done!

I Spell Love L-U-C-K-Y.

Video Assignment Week 4 – # 1 What Do You Love? 


http://assignments.ds106.us/assignments/what-do-you-love/

Number of Stars: 1 Star - Easy Peasy2 Stars3 Stars4 Stars5 Stars - Really Frickin Hard

This is called pure self-indulgence. I love my puppy, wow, it’s just that I love him enough to take hundred of photos of him. I know I’ll probably regret it later on, but I just love him so much. Even when my day is bad, I still have him staring at me from across the room (like he just did right now before running off to go look out a window). He had a lot of problems when he came to us, most of which he has not had to deal with in a while. Each of these photos I always keep a dozen saves on my computer and the videos have been seen over ten times at least every year. Yeah, it might look choppy, mainly because I was having problems with MovieMaker deciding to warp sound and at one point erasing the sound altogether.

I started with the title screen and added all the video that I could. I wanted to make when the vocals were softer a bunch of photos so you could see him actually standing still, which he does not do that often. He always has a tendency to look away from the camera, unless he’s on the stairs or just got a new haircut (He has to get one next week, but shh, don’t tell him!).

By the end of the song, I realized that the lyrics suddenly faded and the music got hyper and happy, so I decided to have the videos go at 8x. It was like watching him run around chasing someone. Cute, cute, and ultra cute. As the song came to a close I decided to do one last video of him just staring (because he knows he’s the best in the entire universe) and then sits down in his cute Snoopy bed (which we do not own anymore due to things).

The credits roll the same way they did with my lyric video, and I added the last two cards to make sure the question at the beginning of the video answers in words.

This is by far my favorite thing. It might not be my best, but I love my Lucky and anything he does. Even when the world looks bad or I’m depressed, I’m just…I really love him. I just can’t help it.

I mean, what would you expect of me? My love for my dog transcendences the stars in most cases.

  • De

Let It Sing While You Read.

Video Assignment Week 4 – # 2 Lyric Video Snippet


http://assignments.ds106.us/assignments/lyric-video-snippet/

You can find the lyric cards that I used here: https://www.canva.com/de_norm.

I decided to take Hasley’s Castle (Huntsman Version) and turn it into a music video. Firstly, I needed to acquire the song and converted the lyrical video available online into a mp3 using this website. After that, I reluctantly started up Windows MovieMaker and created my opening slides. It consisted of the assignment name and the name of the singer. After pressing “add music” and adding the music, I went to Canva.

Canva is where I make most of my graphics for most of my work. It is very fun to use, has a large range of graphics to choose from, and comes in many forms. I took to the presentation set up and decided to go with a black background while using clipart for certain words.

I’ve been planning for this for some time, actually, and already envisioned how I wanted the lyrics to go. I didn’t want much going on in the background, so I kept to a black background and white words. I clapped my hands a lot in beat to make sure that the images flowed. My process seems very explanatory in the video, with my reuse of slides in order to have the lyrics go along. It’s cute, I think.

Firstly, I opened up Windows MovieMaker and created the title card, naming both the assignment and song I chose. I made sure that they lasted about eleven seconds while the song began.

Afterwards, I worked on the slides in Canva. I made sure to position them in a way to show off the lyrics. I can’t really explain how I went about it, but it just felt right. Sometimes you just have to go along with that feeling and create around it. That’s kind of how I decided to go.

For most of the pictures, I decided to tell a certain story. A young woman who wants to be a revolution. The kingdom is locked up and the old king is cruel. A woman shouldn’t say this and a woman shouldn’t do that. It’s a tale as old as time. She’s got her pride, she’s got her life, and she’s ready to bloody her pretty mouth, even if the world tries to sew it shut.

A good story, I guess.

She gets the castle and the world receives a new queen.

I then added the credit music, which was Hey, Juliet by LMNT and a video in the background that I sped up to 1.5x. I’ll be using the video with my credits for my second video as well. I cut everything off at 5 minutes.

I then downloaded it as a video by clicking “Save Project As” which allows you to convert the file into a multitude of video viewing options.

After watching the video back several times to make sure the timing was right, I uploaded it to Youtube and embed it here.

I decided against doing a snippet, mainly because I couldn’t decide where to cut it, and since the song repeats, I just reused the same slides. It was a fun video to make, including the credits. The credits I have used before and decided to make it my signature this week. In the last video, I will be making this week, I plan to use that as my credits as well.

I hope you enjoy it.

  • De

How I Ended Up Here

Compile your favorite photos from your experiences, trips, hobbies etc and make them into a video. Try to organize them chronologically to tell your story as you work your way through college. Make the video at least two minutes.

This 4.5 star assignment was on the first page of video assignments for this week. I decided to do it because I love taking photos and I know I have a lot from my first year at college. I also thought it would be nice to have this video in the future to be able to look back on all the best memories I made during my first year of college.

Going to college was a very weird experience. There was so much freedom I had never experienced before and so much responsibility. I handled my workload pretty well, but making new friends was pretty hard at first. I knew a couple of people going into college (literally two people) but I wasn’t really friends with them. I usually ate breakfast alone, which to be honest I was perfectly fine with, because I am NOT a morning person. Lunch and dinner were trickier, because it seemed like everyone already had friends and I still didn’t really know anybody.

I eventually ate lunch with people I had classes with right before lunchtime and became better friends with them. I wasn’t good friends with my roommate, and while I ate with her at the beginning of school and did some stuff with her, we didn’t interact much. About a month had gone by and I didn’t have good friends. I had some really nice acquaintances, and I tried to hang out with them as much as possible, even if it was a little awkward at first.

I became really good friends with three people in my FSEM that lived in my dorm (FSEM served its exact purpose in our cases) and we hung out and ate together almost every day. I met my best friend in my FSEM class, and she introduced me to more people, and now we’re all rooming together next year. I honestly didn’t know anyone at the beginning of the year, and even a month or two into the year, that I would be comfortable rooming with. Now, I have so many new friends that I never would have had if it weren’t for UMW. If I could give one piece of advice to incoming freshmen it would be this: do not give up trying to make friends. It will take a while and you will feel lonely at the beginning. Don’t worry, you aren’t alone! I have pictures to prove it ?


These directions work for Apple products. First, open the photos application. Then click projects > + > slideshow.

Create a title for the slideshow, click OK, and then select the photos you want. Once all the photos are selected you can choose a theme for the slideshow.

To change the order that pictures appear, just click and drag the photo you want to move to the place you want it to be moved to. To edit a picture in the slideshow, double click on the picture. This window will appear. When you are done editing click done.

To add captions to slides, select + > add text. Then just type directly onto the slideshow where the text box appears.

In order to get a closing slide in my slideshow, I made a Powerpoint slide with all the closing credits. I then took a screen shot of the slide by clicking command – shift – 4. Then insert it into the slideshow by navigating to the very last picture and clicking + > add photo.

To adjust the speed of the slideshow click the stopwatch icon and slide the custom bar until it is the total speed you want.

When you are happy with your slideshow, click export > save. Be patient while it exports the project. I saved mine in movies to later be uploaded to Youtube.

To upload to Youtube, log into your channel and click upload.

Then choose the movie you want to upload. Again, be patient. This will take a few minutes. Then you can choose a thumbnail and click publish.

The Wanderlust Traveler

Video #2: Where Do You Want To Go?

Rating: ????

Have you ever wanted to travel, but don’t have the money? Well what if you miraculously did? Where would you go? Who would you see? The Where Do You Want To Go assignment involves making a video of the top place(s) you would love to travel to. Personally, I have always wanted to go to the Czech Republic and Romania. When I was in the fifth grade my class was divded into groups. Each group was assigned different countries and with those countries we were required to research their traditions and customs. My group had the Czech Republic and Romania, and ever since then I have always wanted to go!

I chose this assignment because I love looking at pictures of the Czech Republic and Romania. It’s mesmerizing to me! I also wanted to refresh my memory of the material I learned when I was younger. The Romanian section of my video included, Bucharest (capital of Romania, the Tunnel of Love, and Bran Castle (aka Dracula’s Castle). The video I included displays the Romanian landscape (for the full/original video click here). During the images and video the Romanian National Anthem was being played. The Czech Republic section of my video includes, Prague Castle, the little town of Karlovy Vary, and Moravian Kart. I also included a video that displays an aerial view of Prague (for the full/original video click here). While all these images are playing the music you were listening to was the Czech Republic’s National Anthem.

All these different places peaked my interest, whether it was because of it’s beauty or it’s history.  I also felt that I needed to see some touristy things. If you want to go on the same virtual journey and plan your own trip follow the procedure below (I apologize in advance for the quality of my procedure photos).

Procedure

Step 1: Go to the Home tab and select the Title icon.

Step 2: Change the background to white and the font color to blue.

Step 3: Remain on the Home tab and select the Credits icon.

Step 4: Once you’ve customized your credits slide, begin to add your images and videos. You can do this by selecting the Add videos and Photos icon.

Step 5: Insert your desired video. Go to the Edit tab and select the Split tool. This will break your video apart into two segments. Next, I deleted the portion of the video I did not want by simply hitting the delete button on my keyboard.

Step 6: Once you have edited your video, go back to the Home tab and select the Add Music icon. Add your music.

Step 8: Once you’ve added your music feel free to add your remaining photos by repeating Step 4.

Step 9: Once you import your first picture go to the Home page and select the Caption icon. A text box will apear on your slide, edit it.

Step 10: Repeat steps 4-9 for your second country.

Step 11: Once you’ve finished with all your countries go to the File tab, select Save Movie, and click the For Computer option.

Congratulations! You’ve completed the assignment!

Link to assignment is tagged above in ‘Video #2: Where Do You Want To Go?

Art Attack!

Video: #SixSecondArt

Rating: ????

When I was younger, my family and I would go to El Salvador every summer. While there, my parents would put my siblings and I in art classes. These art classes had kids of all different ages and each week we would have a new project. These projects ranged from painting to ceramics. I remember for one of the classes the teacher made us throw paint onto our canvas, followed by folding the canvas in half. For this video assignment I recreated the lesson they taught us by simply laying paint down and folding my canvas. It doesn’t really sound like art, but I like the plethora of combinations you can create!

I chose this assignment for three reasons. The first reason is because I thought it would be an interesting assignment to complete especially since it had to be speeded up. The second reason is because I’ve never used my phone’s camera recorder, so I wanted to give it a try. And the third reason is because I was in the mood to paint and get my hands dirty, so I thought what better way to do that than this project! Little did I know that this assignment was going to be a lot tougher.

I have used Windows Live Movie Maker previously, but my new computer did not have the program so I had to redownload it. Well it turned out, after I had finished creating my assignment that I couldn’t convert it to a .WMV file because I only had the tutorial version. After many failed solutions I had to recreate my assignment with my sister’s computer, which wasn’t too bad but I was not much of a happy camper. The second time I did the assignment I had trouble limiting to six seconds because if i hyperlapsed it too much, it would skip sections, and I didn’t want that. There were two tutorials that assisted me through my struggles. The first one helped me with fast fowarding the video and the second one helped me save the video to a .WMV file.

If you would like to try this assignment follow the procedure below.

Procedure

Step 1: Open Windows Movie Maker, select the File tab, and click on Open Project. Import your recorded video first!

Step 2: Once you import your video, highlight it. A video editing tool should appear, select the speed option. Since this assignment requires you to speed up your video I recommend doing the 8x option.

Step 3: Go to the Home tab and select the Title option.

Step 4: Once you have a title name you can adjust the font and background color.

Step 5: To add music to your video, go to the Home tab and select the Add Music icon.

Step 6: Highlight your video to receive the Music Tools tab. Under this tab you will find the Music Volume, lower it a tad.

Step 7: When you are satisfied with your video, go to the File tab and select Save Project.

Link to assignment is tagged above in ‘Video #1: #SixSecondArt?

I’ve Got A Dream

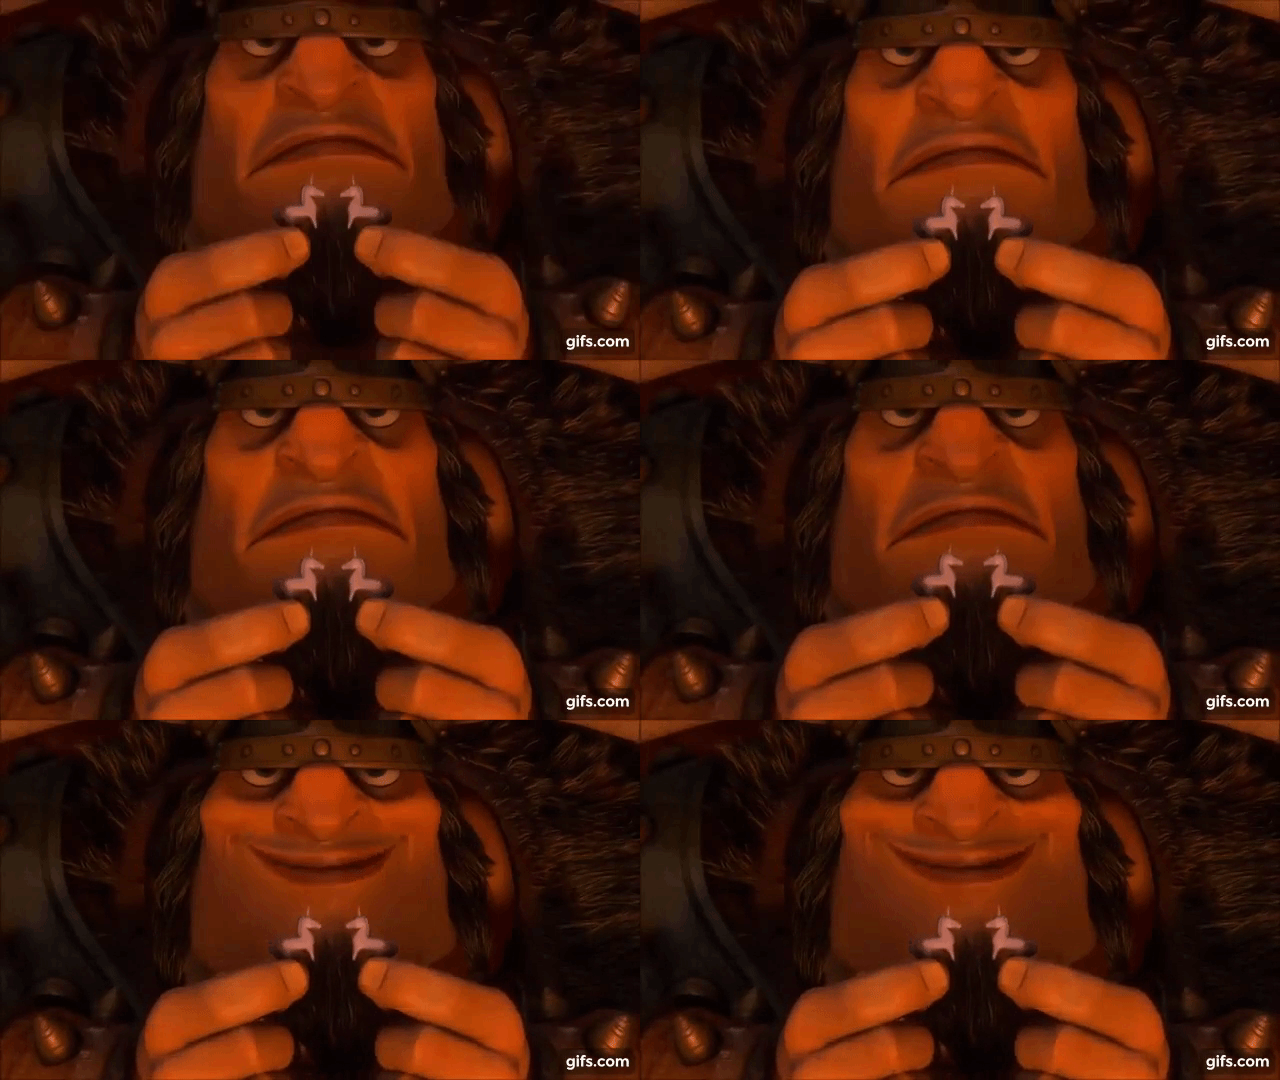
The purpose of this assignment was to pick a movie scene to turn into a GIF.

I chose the scene in Tangled, where Flynn and Rapunzel are at the Snuggly Duckling. While they are at the Snuggly Duckling, Rapunzel gets all of the big thugs to share their dreams with her through a song. I picked this scene because I always enjoyed watching the characters in the Snuggly Duckling sing about their dreams because you wouldn’t expect that from all these big, scary guys. I specifically chose the segment where Vladimir shows his ceramic unicorns because I enjoyed that part the most.

I found the clip of this scene on youtube and proceeded to make a GIF, following the process I laid out in my previous blog post, Soccer GIF.

This assignment is worth 3 stars and the link can be found here.

Soccer GIF

The goal of this assignment was to create a sporting gif that depicted a certain element in a sporting activity.

The sport I chose was soccer because it is a sport I love. I found a video on youtube that had Tosun’s goal against Benefica. Once I had the video url, I changed it from a youtube.com url to a gifyoutube.com url. Making this change brings you to a website that uploads the youtube video for you. You then choose which segment of the video you would like to use in the GIF. Once that is done, you can add captions or stickers, and you can add effects. I chose to add the caption “GOOOOAAAAAL,” because that is what the announcer says during many soccer games when one of the teams scores.

In order to learn how to create a GIF from a youtube video I used this website.

This assignment is worth 1 star and the link can be found here.