Cannon Ball [splash]!

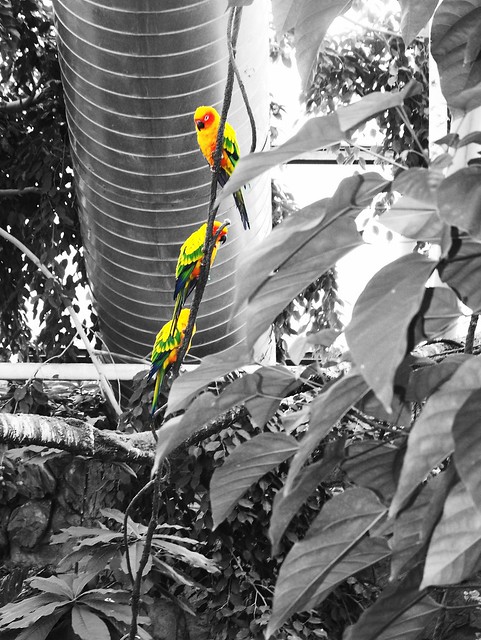
To continue my Visual Assignments quest, I chose a 2 star assignment called Splash the Color, from the ds106 Assignment Bank.  I used to dabble in color splashing on my iPhone (just for fun), so I already had the App to do this assignment.

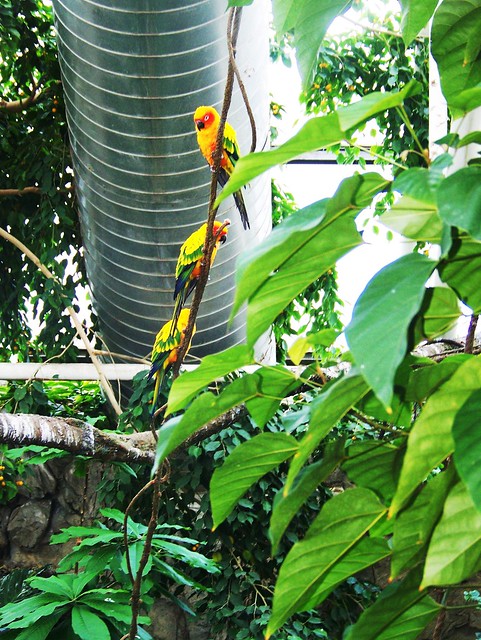
I chose the photo I wanted to color splash by finding a subject that was very vibrant and would stand out against a black and white background.  This is the original photo:

Color Birds

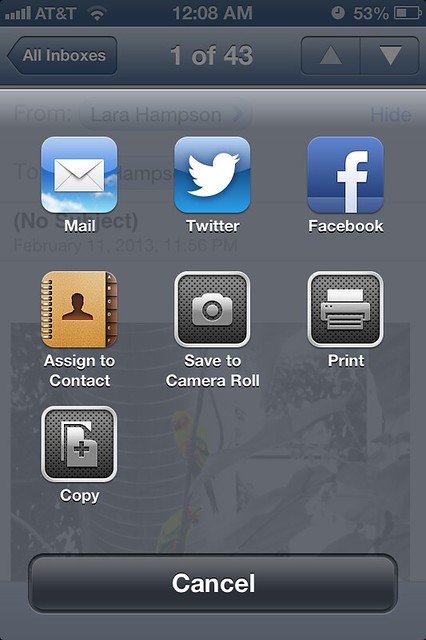
I emailed the photo to myself so that I could have it on my iPhone and saved it to my camera roll.

iPhone

I opened the photo in the app Color Splash and painted the birds to be color and the background to be black and white.  I then saved the final product to my camera roll, emailed it to myself, opened it on my computer, and uploaded it to Flickr.  Et voilà!

Color Splash Birds

Finally, I had to share my blog via Twitter!

Significant Otter

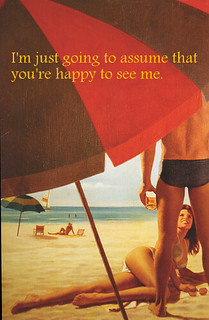
This week, we’re really getting down and dirty with Visual Assignments.  We have to complete 10 stars worth of assignments before the end of the week from the ds106 Assignment Bank.  We get to choose which assignments to do, however the first one, Valentine’s Day Caption Challenge (worth 2 stars), is mandatory by everyone in order to compare ideas.  The assignment was created by Sara last year.  My cheezy caption on this card is more for mature audiences, but I couldn’t turn down the obvious opportunity.

Head's Up

To make the photo, I first downloaded a blank card from Sara’s Flickr set.  I used Picasa to add the text I wanted, then I saved the photo, and uploaded it to Flickr.  Finally, I publicized my blog post via Twitter.

Getting Cheesy up in here + a tutorial

It’s another new week of DS106! This week is about visuals and photography.

This week we start choosing our own assignments from the assignment bank. However, before delving into that, the whole class is starting off doing captions for Postcards a former ds106 student (Sara K) found in Urban Outfitters. They are a pack of pictures called “Unbridled Passion” by Franco Accornero.

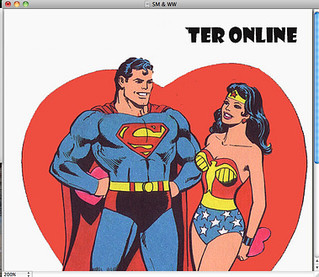
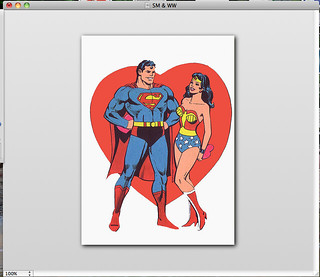
I thought these pictures were too funny and ridiculous! But I ultimately decided upon the Superman and Wonder Woman Photo. I do not have photoshop of my computer, so I’ll share how I edited my photos– I guess you could call this a tutorial.

For my tutorial all you need is:

Paint program – MAC users– I downloaded this program and it works great

Picmonkey.com (It’s free)

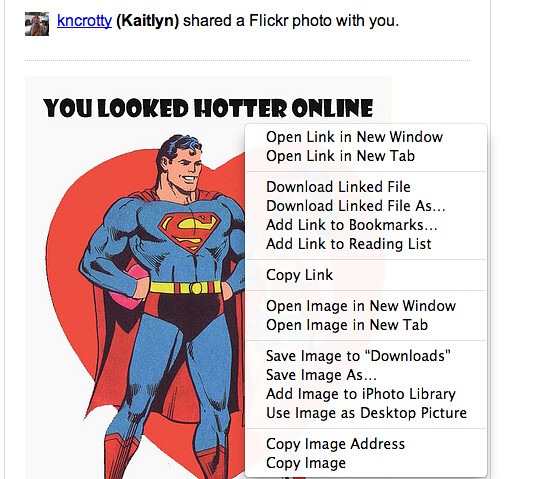
Step 1: Get the photo off flickr. For me, I found it easiest to email myself the picture and then save the photo onto my desktop.
Screen shot 2013-02-11 at 9.43.38 PM

Click on “Save Image As.” Select the best place for you, I just find the desktop to be the most convenient.

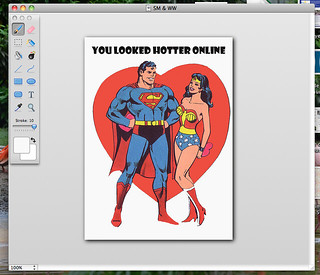
Step 2: Open up the “paint” program and open up your picture in the program
Screen shot 2013-02-11 at 9.44.53 PM

Note your little “toolbox” to the left of the screen.

Step 3. Select the “eye dropper” tool to select the background color of the photo

Screen shot 2013-02-11 at 9.45.09 PM

Step 4: Select the “paint brush” tool to color over the words.

Screen shot 2013-02-11 at 9.45.26 PM

Screen shot 2013-02-11 at 9.45.53 PM

Screen shot 2013-02-11 at 9.46.12 PM

The words have disappeared!

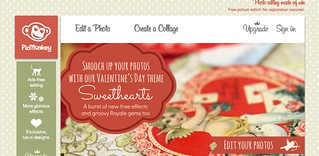
Step 5: Save the file onto your desktop and open Picmonkey.com
Screen shot 2013-02-11 at 9.46.31 PM

Click on “Edit a Photo” and select your file.
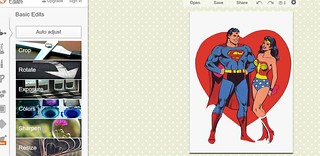
Screen shot 2013-02-11 at 9.46.55 PM

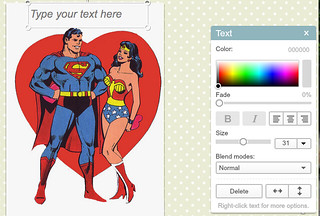
Step 6: Click that little “P” on the left hand sidebar and that opens texts and fonts. Click the “Add Text” button.
Screen shot 2013-02-11 at 9.47.20 PM

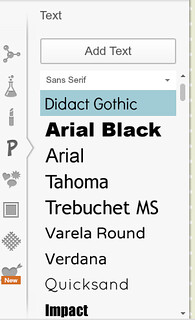
Decide what you want to say, the font, color, position, size, etc. There are tons of fonts to choose from. The ones with the “crown” symbol are a part of the upgrade package, which costs money.
Screen shot 2013-02-11 at 9.48.24 PM

For this photo I used the “Bangers” font.
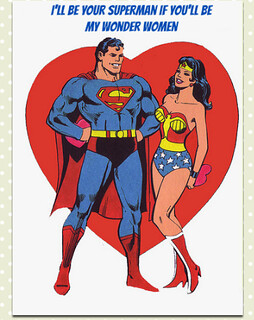
Screen shot 2013-02-11 at 9.48.38 PM

Step 7: Add more text if you chose. Click Save and upload to flickr!
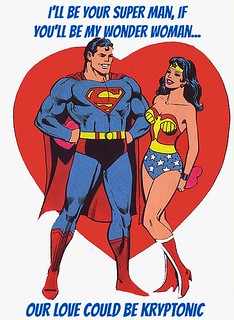
Valentine's Day Caption Challenge

Enjoy your newly created masterpiece!

Now I am sure there might be another quicker method that doesn’t use as many programs to get the desired effects complete. But without photoshop and knowledge of other programs, this is what I use. I hope it was easy to understand!

Additionally, I’m not sure kryptonic is a real word. But for this we will make it work ;)

This is a 2 stars assignment!


“NO U (turns)”

DSCN0335 smaller
This image was for the assignment called Cropped Signs. The task was to take a picture of a street sign and crop out a portion of it to make it have a different meaning. I took this “NO U TURNS” sign. This may seem like a simple sign that says “NO U” but when I saw it as I was walking I immediately snapped the picture and laughed like crazy.

Being an internet geek, I’m familiar with the infinite amount of memes floating around online; the phrase “NO U” being one of them. This is just the phrase you say when somone is in the process of telling you off and you regress back to your childhood days by saying “No you!!” as if that’s going to effectively shut them up. Learn more about the “NO U” meme here!

in which I realize that sound clips of human sounds creep me out

For this assignment I went through several pages of free sound clips to find the sound effects I wanted to use for my five-sound story.  The story I wanted to tell was of an event that lasts just as long as the file I ended up creating.  I had to look up several different sounds that humans make for it though, and while I was listening to them I realized I found the noises pretty disturbing.  The weirdest things have always gotten under my skin (claymation, for example) though so I guess I just have to add this to the list.

I powered through it though and came up with this ‘story:’

In it, a person is walking across the floor and runs into a table.  They grunt in pain as everything crashes to the floor, and then they sigh deeply in frustration.

I got to practice more with Audacity, which I liked.  I’ll be glad to never listen to this again though, if I can help it.

cars aren’t the only ones who get to have them…

The radio bumper assignment was my favorite for this week. I actually used iLivid during the process, taking a clip from the video for a song off of YouTube to use in the background of my bumper.  The sites with free sound files were super helpful for this and I used them in other projects as well.

It took me a little bit of time to figure out Audacity.  I’ve only ever used garageband, and that was about four years ago.  Fortunately it seems pretty straightforward and I was able to figure it out enough to do this assignment.

Here’s what I ended up with!

Ahhh, Game Over

For this sound effect story assignment, we were instructed to create a short story using strictly sound effects. For this project, I thought I would delve into my past, and tell a story that an 8 year old Dylan knew all too well. This audio story documents the journey of a video game player, from the excitement of a new beginning, to the frustration and anger associated with those last two dreaded words, “game over”.


Bump It Up

The mission of today’s work was to make a DS106 radio bumper. I spent the first hour or so fumbling through my itunes looking for a the perfect 10 or so seconds from a song to use as part of the bumper. After skimming through several songs I chose the beginning portion of “She Moves In Her Own Way” by The Kooks. Fortunately, I have had some previous experience using Audacity, so I wasn’t too intimidated by this assignment. I started by recording a quick little clip of myself talking, and then imported the song. I then lessened the volume for the song so that it did not overpower my speaking. I ended up with a two-layered file looking like this:

Audacity

Alas, the project was complete, and I exported it as an MP3 using the LAME plugin(the plugin is not lame, but actually quite helpful). Here is the final product.


Love Makes You very Cheesy…

BeachLove

I’ve never been a fan of pickup lines…but some of them can be just plain hilarious. For this assignment I had to caption a picture from Franco Accornero’s postcard pack called “Unbridled Passion.” I got this horrible pickup line from one of my friend’s Facebook statuses last Summer when she explained how this guy came up to her and her friends and the beach and said this. Apparently it didn’t work on her…oh well.

True Glamour


gorgeouscaesar
Such glamor can only be attained by a canine of exquisite tastes.

This is my lovely hound, Caesar. His hobbies include strutting his stuff on the runway, signing autographs, and going to photo shoots like the true model he is. He enjoys eyeshadow that brings out his gorgeous amber eyes and lashes that accentuate their almond shape. As you can see, he doesn’t mind posing nude for the camera. ;)

I created this image using GIMP and borrowed a wig image from here. I added make-up by using the paint tool and adding a Gaussian Blur to spread out the color. I then toned down the opacity to make it a bit more realistic. I added the eyelashes using a brush that I acquired years ago (search eyelash brushes on google to find something similar. I don’t remember where I got mine.) Lastly I brightened up his eye by making a separate layer for his eyes and using the paintbrush to color them bright orange. If dogs could be drag queens, Caesar would make a PERFECT one!